4. | Using the source | |
| be recorded from. | |
| NOTE: | Channel 1 must always be used when recording. For a single channel |
| record/playback system, use channel 1 only. | |
5. | Enter a filename for the stream and an optional description. | |
6. | To record an associated audio stream, check the audio box. The ability to record | |
| associated whiteboard or data streams can also be checked if these elements are | |
| available on the source. | |
NOTES: |
• The timing relationship of the elements contained within the stream is maintained |
by the recorder. |
• The information from each recorded element is placed into its own folder within |
the chosen directory. If necessary, those folders can be opened and the individual |
files of each recorded element can be viewed. |
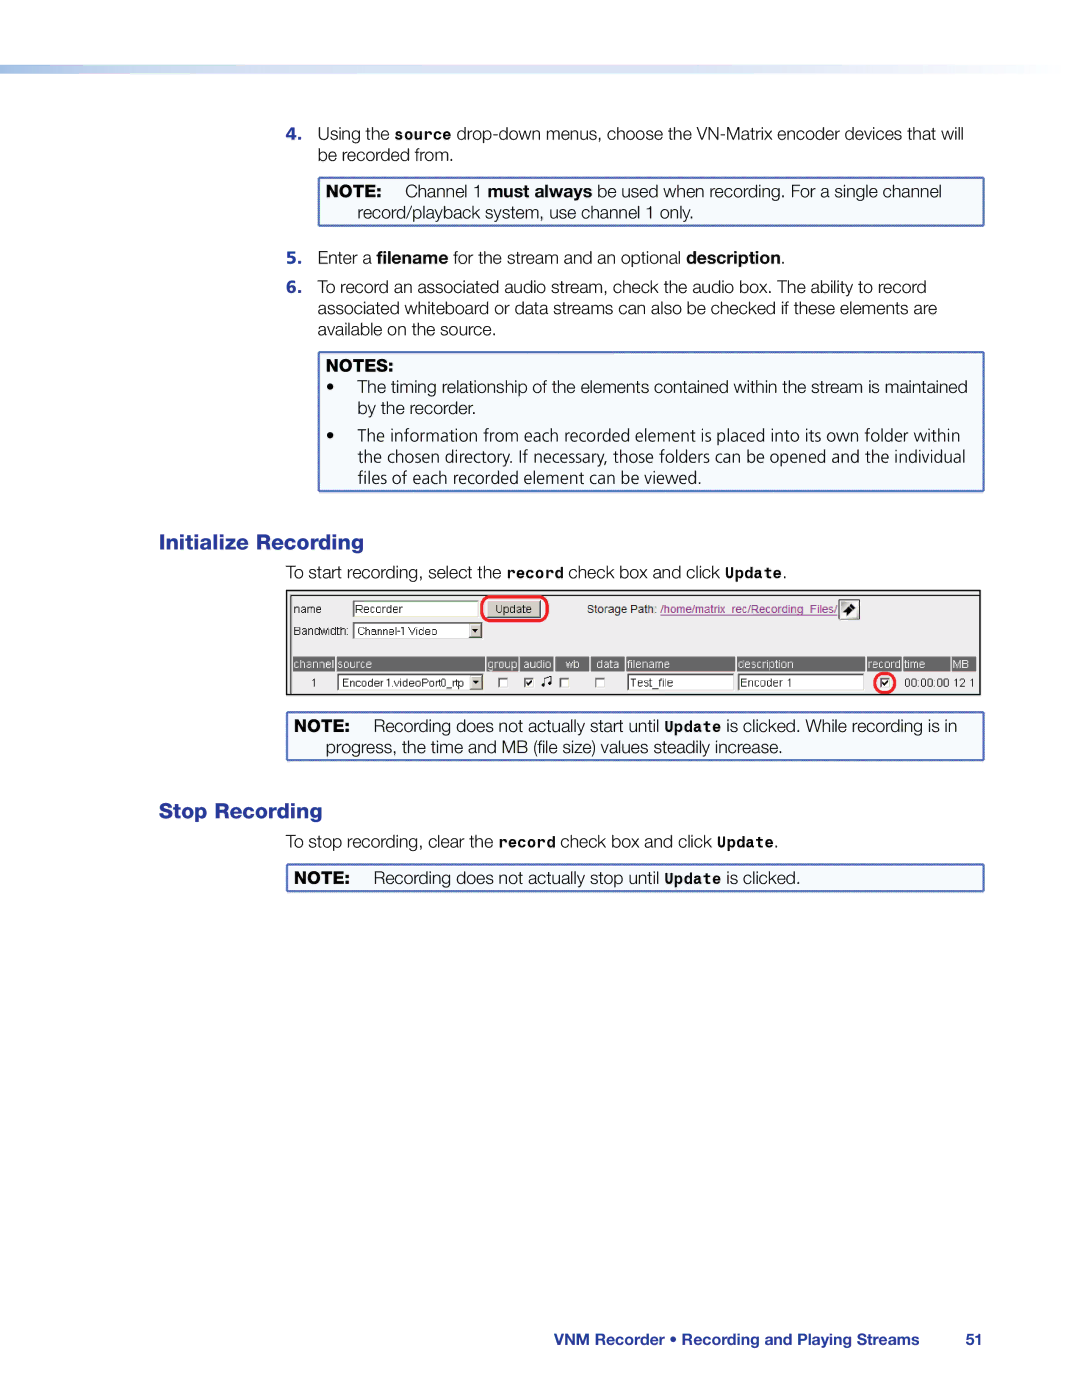
Initialize Recording
To start recording, select the record check box and click Update.
NOTE: | Recording does not actually start until Update is clicked. While recording is in |
progress, the time and MB (file size) values steadily increase. | |
Stop Recording
To stop recording, clear the record check box and click Update.
![]() NOTE: Recording does not actually stop until Update is clicked.
NOTE: Recording does not actually stop until Update is clicked.
VNM Recorder • Recording and Playing Streams | 51 |