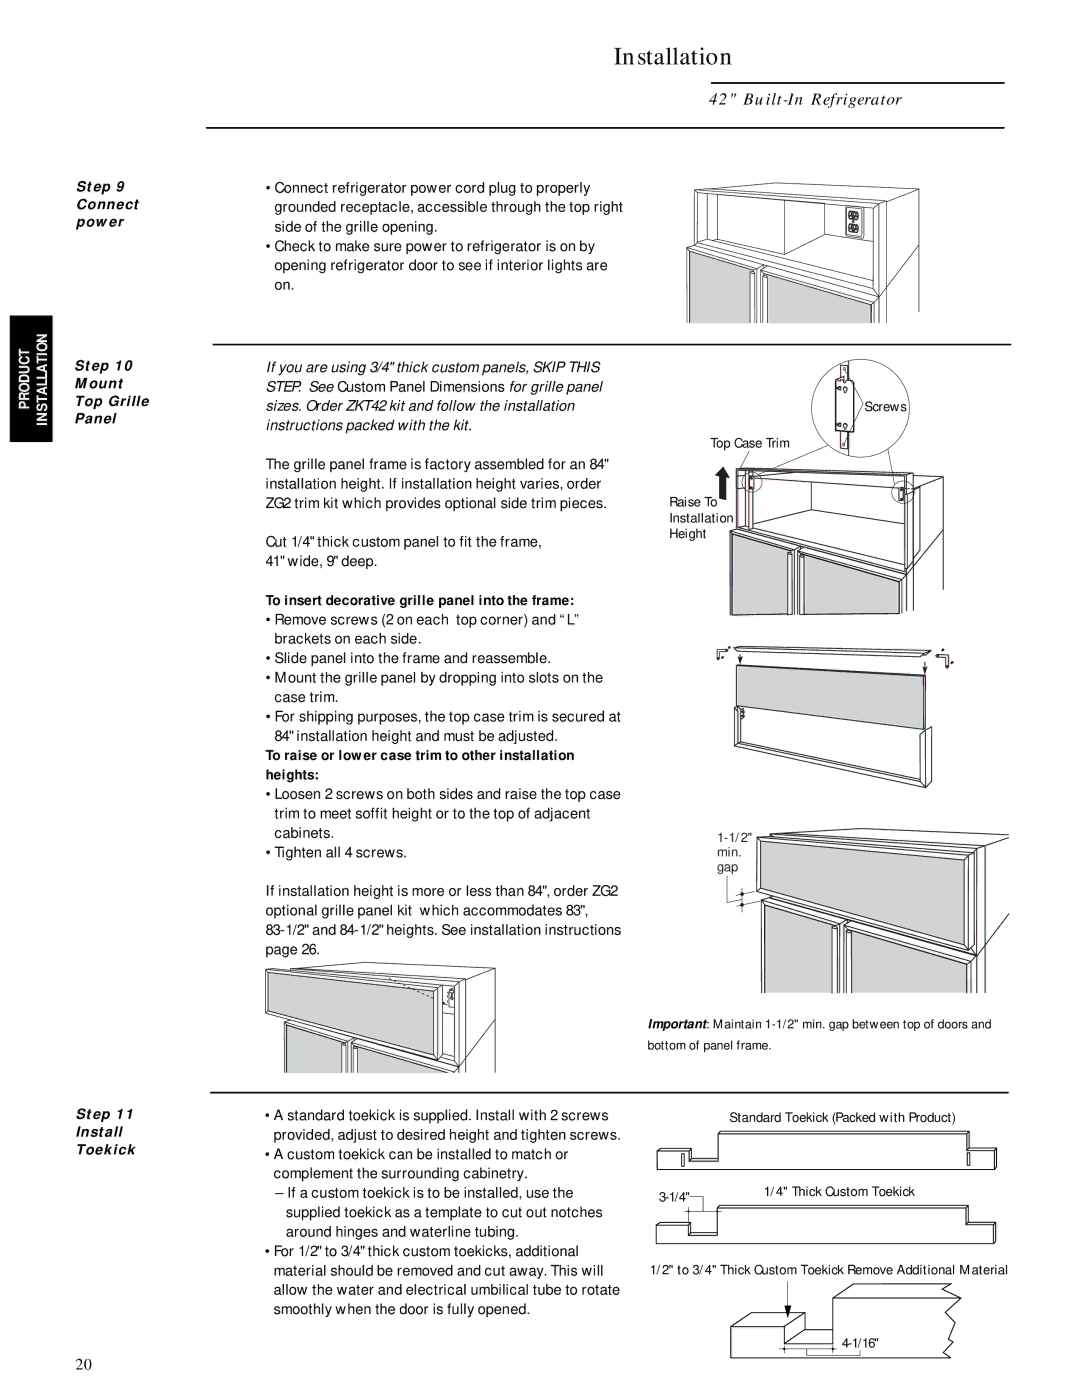
Step 9
Connect
power
Installation
42" Built-In Refrigerator
•Connect refrigerator power cord plug to properly grounded receptacle, accessible through the top right side of the grille opening.
•Check to make sure power to refrigerator is on by opening refrigerator door to see if interior lights are on.
PRODUCT | INSTALLATION |
Step 10
Mount
Top Grille
Panel
If you are using 3/4" thick custom panels, SKIP THIS STEP. See Custom Panel Dimensions for grille panel sizes. Order ZKT42 kit and follow the installation instructions packed with the kit.
The grille panel frame is factory assembled for an 84" installation height. If installation height varies, order ZG2 trim kit which provides optional side trim pieces.
Cut 1/4" thick custom panel to fit the frame, 41" wide, 9" deep.
To insert decorative grille panel into the frame:
•Remove screws (2 on each top corner) and “L” brackets on each side.
•Slide panel into the frame and reassemble.
•Mount the grille panel by dropping into slots on the case trim.
•For shipping purposes, the top case trim is secured at
84" installation height and must be adjusted.
To raise or lower case trim to other installation heights:
•Loosen 2 screws on both sides and raise the top case trim to meet soffit height or to the top of adjacent cabinets.
•Tighten all 4 screws.
If installation height is more or less than 84", order ZG2 optional grille panel kit which accommodates 83",
Screws
Top Case Trim
Raise To
Installation
Height
Important: Maintain
Step 11
Install
Toekick
•A standard toekick is supplied. Install with 2 screws provided, adjust to desired height and tighten screws.
•A custom toekick can be installed to match or complement the surrounding cabinetry.
–If a custom toekick is to be installed, use the supplied toekick as a template to cut out notches around hinges and waterline tubing.
•For 1/2" to 3/4" thick custom toekicks, additional material should be removed and cut away. This will allow the water and electrical umbilical tube to rotate smoothly when the door is fully opened.
Standard Toekick (Packed with Product)
|
| 1/4" Thick Custom Toekick | |
|
|
| |
|
|
|
|
|
|
|
|
1/2" to 3/4" Thick Custom Toekick Remove Additional Material
20