OPTION 2 For dispenser model using
Step 1
Remove handles & trim
Step 2
Install 3/4" trim
ZKT42 Trim Kit
3/4" Custom Panels
• Open freezer door to 90°.
• Remove the Phillips head screws from the
• Open door fully to stop.
• Remove screws from the aluminum trim, top, bottom and hinge side.
• Remove the trim above and below the dispenser.
• Retain screws and
• Attach the new 3/4" trim pieces at the top and hinge side using original screws.
ZKT42
INSTALLATION
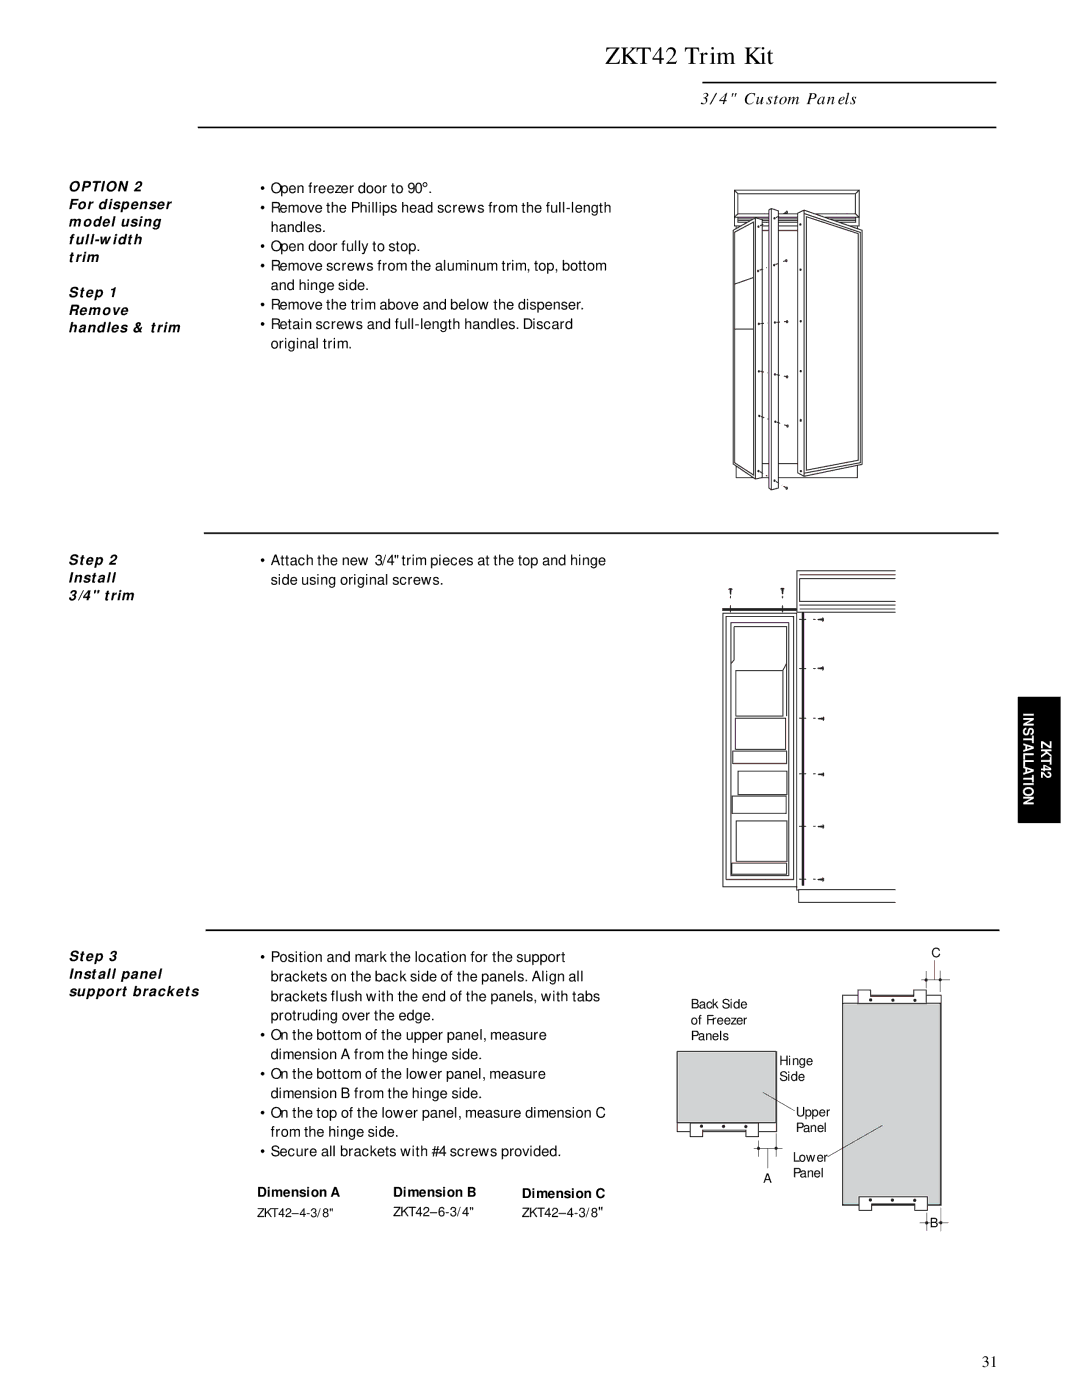
Step 3 Install panel support brackets
•Position and mark the location for the support brackets on the back side of the panels. Align all brackets flush with the end of the panels, with tabs protruding over the edge.
•On the bottom of the upper panel, measure dimension A from the hinge side.
•On the bottom of the lower panel, measure dimension B from the hinge side.
•On the top of the lower panel, measure dimension C from the hinge side.
•Secure all brackets with #4 screws provided.
Dimension A | Dimension B | Dimension C |
|
C
Back Side
of Freezer
Panels
Hinge
Side
Upper
Panel
Lower
A Panel
![]() B
B![]()
31