Step 1
Remove
Packaging
PRODUCT | INSTALLATION |
Installation
42" Built-In Refrigerator
![]() CAUTION
CAUTION
Refrigerator is much heavier at the top than at the bottom – be careful when moving. When using a hand truck, handle from side only.
 PRUDENCE
Le réfrigérateur est beaucoup plus lourd en haut qu'en bas. Il faut être prudent lors des déplacements. Si un diable est utilisé, il faut soulever le réfrigérateur sur le côté seulement.
• Remove outer carton. |
|
– Carefully cut banding at the top and bottom. |
|
• Slide out back corner posts (2). | 7/16" Bolt |
• Slide carton off top of cabinet. | |
NOTE: IT IS NOT NECESSARY TO LAY CABINET DOWN |
|
IN ORDER TO REMOVE SKID! |
|
• To remove skid, remove the four 7/16" bolts and their |
|
brackets. |
|
![]() CAUTION
CAUTION
DO NOT ATTEMPT TO ROLL UNIT OFF SKID.
 PRUDENCE
IL NE FAUT PAS ESSAYER DE FAIRE ROULER LE RÉFRIGÉRATEUR POUR L'ENLEVER DE LAY PALETTE.
•There are support blocks on the bottom of the cabinet and door. They must be removed before sliding unit off the skid or damage will occur.
•Carefully, tilt cabinet and slide blocks out from beneath cabinet, slide unit off skid.
•Remove toekick from fresh food compartment and set aside for later installation.
Step 2
Install
Water Line
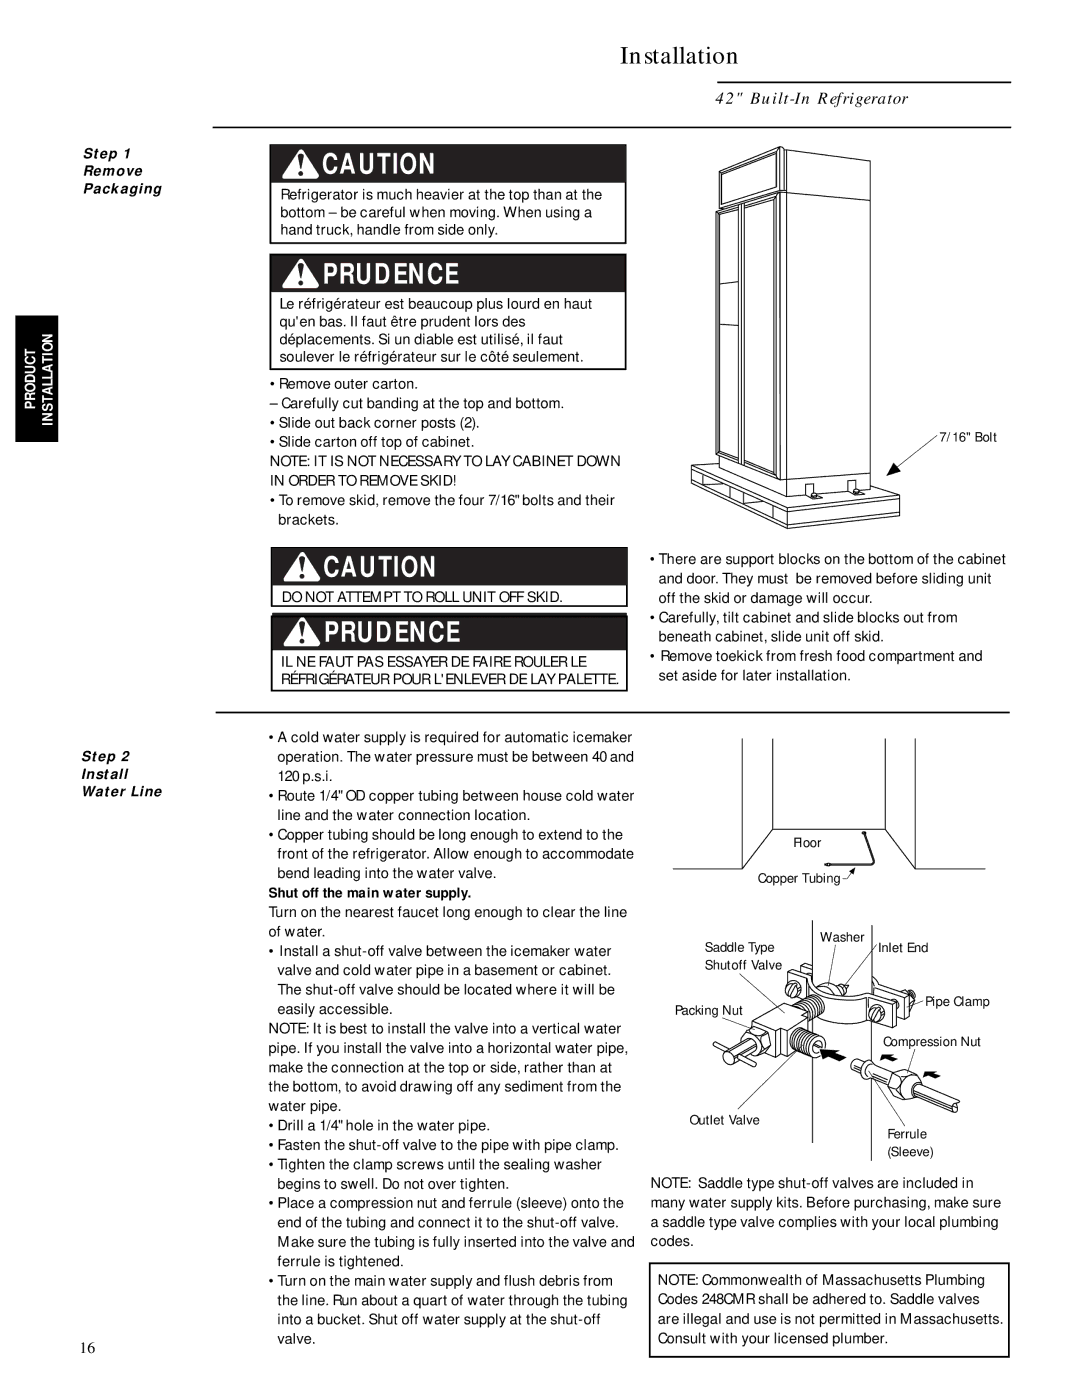
•A cold water supply is required for automatic icemaker operation. The water pressure must be between 40 and 120 p.s.i.
•Route 1/4" OD copper tubing between house cold water line and the water connection location.
•Copper tubing should be long enough to extend to the front of the refrigerator. Allow enough to accommodate bend leading into the water valve.
Shut off the main water supply.
Turn on the nearest faucet long enough to clear the line of water.
•Install a
| Floor |
|
Copper Tubing |
| |
Saddle Type | Washer | Inlet End |
| ||
Shutoff Valve
easily accessible.
Packing Nut
Pipe Clamp
16
NOTE: It is best to install the valve into a vertical water pipe. If you install the valve into a horizontal water pipe, make the connection at the top or side, rather than at the bottom, to avoid drawing off any sediment from the water pipe.
•Drill a 1/4" hole in the water pipe.
•Fasten the
•Tighten the clamp screws until the sealing washer begins to swell. Do not over tighten.
•Place a compression nut and ferrule (sleeve) onto the end of the tubing and connect it to the
•Turn on the main water supply and flush debris from the line. Run about a quart of water through the tubing into a bucket. Shut off water supply at the
Compression Nut
Outlet Valve
Ferrule (Sleeve)
NOTE: Saddle type
NOTE: Commonwealth of Massachusetts Plumbing Codes 248CMR shall be adhered to. Saddle valves are illegal and use is not permitted in Massachusetts. Consult with your licensed plumber.