Installation
42" Built-In Refrigerator
Step 2A
For Installations
With A Reverse
Osmosis System
Only
Skip This
Step When
Not Using
RO System
![]() WARNING
WARNING
When connecting a GE Reverse Osmosis Water System to your refrigerator, the only approved installation is with a GE RVKIT.
If the water supply to the refrigerator is from a Reverse Osmosis Water System AND the refrigerator also has a water filter, use the refrigerator’s filter bypass plug. Using the refrigerator’s water filtration cartridge in conjunction with the RO filter can result in hollow ice cubes and slower water flow from the water dispenser.
Rotate 
Clockwise
To Remove 
Filter
Bypass
Plug
![]() ATTENTION
ATTENTION
Lors du raccordement au réfrigérateur du système GE de purification de l’eau par osmose inversé seule l’installation avec un ensemble GE RVKIT est approuvée.
Si le réfrigérateur es alimenté en eau à partir d’un système de filtration d’eau par osmose inversée, et si le réfrigérateur comporte également un filtre à eau, utiliser le bouchon du circuit de dérivation du filtre du réfrigérateur. Si la cartouche de filtration d”eau du réfrigérateur est utilisée en conjonction avec le système de filtration par osmose inversée, on peut observer une réduction du débit d’eau au point de
INSTALLATION | PRODUCT |
If you use the bypass Plug and want a light shield without the filter opening, order a replacement solid light shield WR02X8967.
puisage, et la production de cubes de glace creux.
Step 3
Install
Side Panels
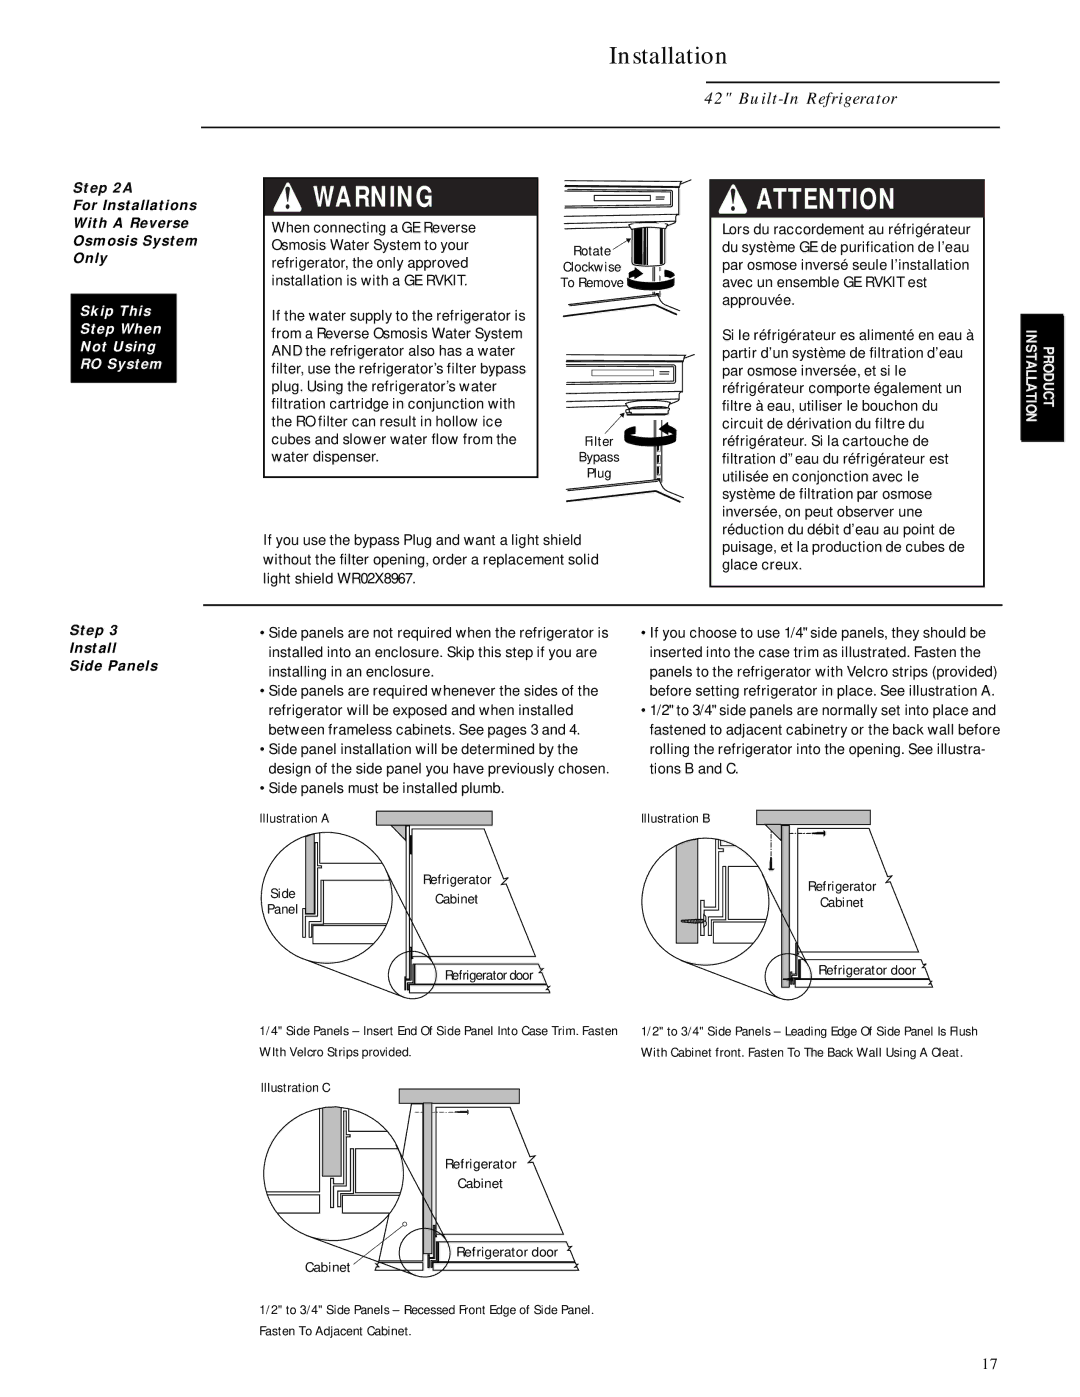
•Side panels are not required when the refrigerator is installed into an enclosure. Skip this step if you are installing in an enclosure.
•Side panels are required whenever the sides of the refrigerator will be exposed and when installed between frameless cabinets. See pages 3 and 4.
•Side panel installation will be determined by the design of the side panel you have previously chosen.
•Side panels must be installed plumb.
Illustration A |
| |
Side | Refrigerator | |
Cabinet | ||
Panel | ||
| ||
| Refrigerator door |
•If you choose to use 1/4" side panels, they should be inserted into the case trim as illustrated. Fasten the panels to the refrigerator with Velcro strips (provided) before setting refrigerator in place. See illustration A.
•1/2" to 3/4" side panels are normally set into place and fastened to adjacent cabinetry or the back wall before rolling the refrigerator into the opening. See illustra- tions B and C.
Illustration B
Refrigerator |
Cabinet |
Refrigerator door |
1/4" Side Panels – Insert End Of Side Panel Into Case Trim. Fasten WIth Velcro Strips provided.
Illustration C
Refrigerator |
Cabinet |
Refrigerator door |
Cabinet
1/2" to 3/4" Side Panels – Leading Edge Of Side Panel Is Flush With Cabinet front. Fasten To The Back Wall Using A Cleat.
1/2" to 3/4" Side Panels – Recessed Front Edge of Side Panel. Fasten To Adjacent Cabinet.
17