ZKHT1 Trim Kit (For 3/4" Panels)
Support for Custom Handles
Option 2 Installation
Step 2
Install
custom handle
Step 3
Mount assembled dispenser trim
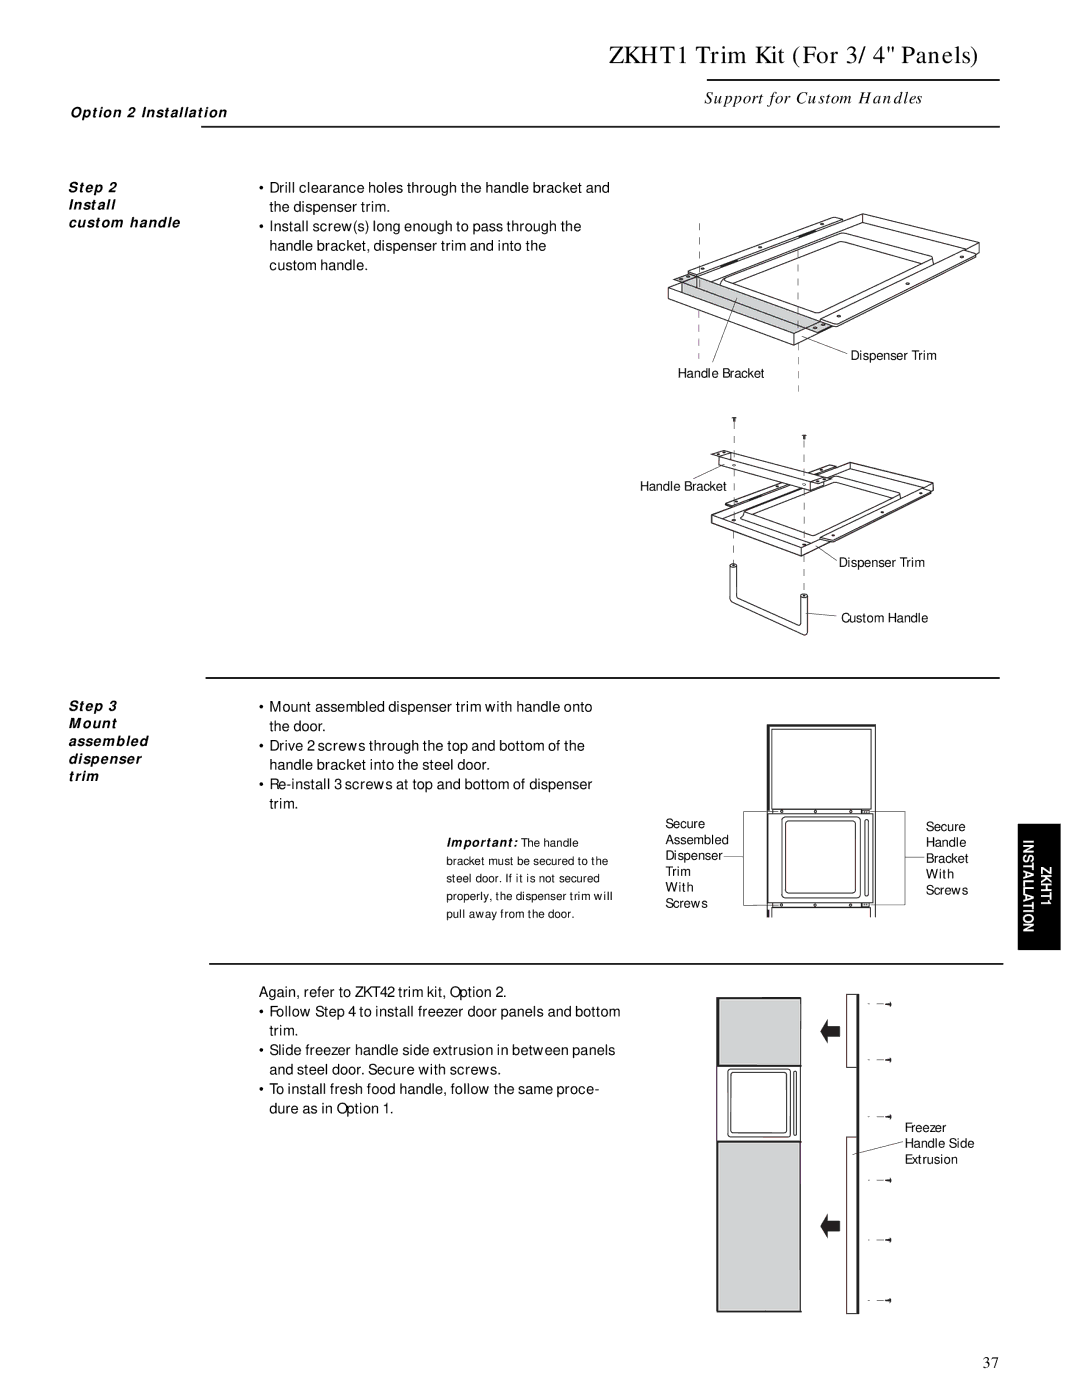
•Drill clearance holes through the handle bracket and the dispenser trim.
•Install screw(s) long enough to pass through the
handle bracket, dispenser trim and into the custom handle.
Dispenser Trim
Handle Bracket
Handle Bracket
Dispenser Trim
Custom Handle
•Mount assembled dispenser trim with handle onto the door.
•Drive 2 screws through the top and bottom of the handle bracket into the steel door.
•
| Secure | Secure |
Important: The handle | Assembled | Handle |
bracket must be secured to the | Dispenser | Bracket |
steel door. If it is not secured | Trim | With |
properly, the dispenser trim will | With | Screws |
Screws |
| |
pull away from the door. |
| |
|
|
Again, refer to ZKT42 trim kit, Option 2.
• Follow Step 4 to install freezer door panels and bottom trim.
• Slide freezer handle side extrusion in between panels and steel door. Secure with screws.
•To install fresh food handle, follow the same proce- dure as in Option 1.
Freezer
Handle Side
Extrusion
ZKHT1 INSTALLATION
37