DVR Basics
Changing Video Format
1.Exit to Windows by clicking Exit on the Live View screen then and select Restart in Windows Mode. (See the Live View screen section later in this chapter)
2.Open the DVR Utility window by clicking the Start button ![]() , clicking All Programs, clicking Fusion, and then clicking vFormat.
, clicking All Programs, clicking Fusion, and then clicking vFormat.
3.Select the appropriate video setting from the list in the Video Setting section – NTSC or PAL..
4.Click Set.
Live View screen
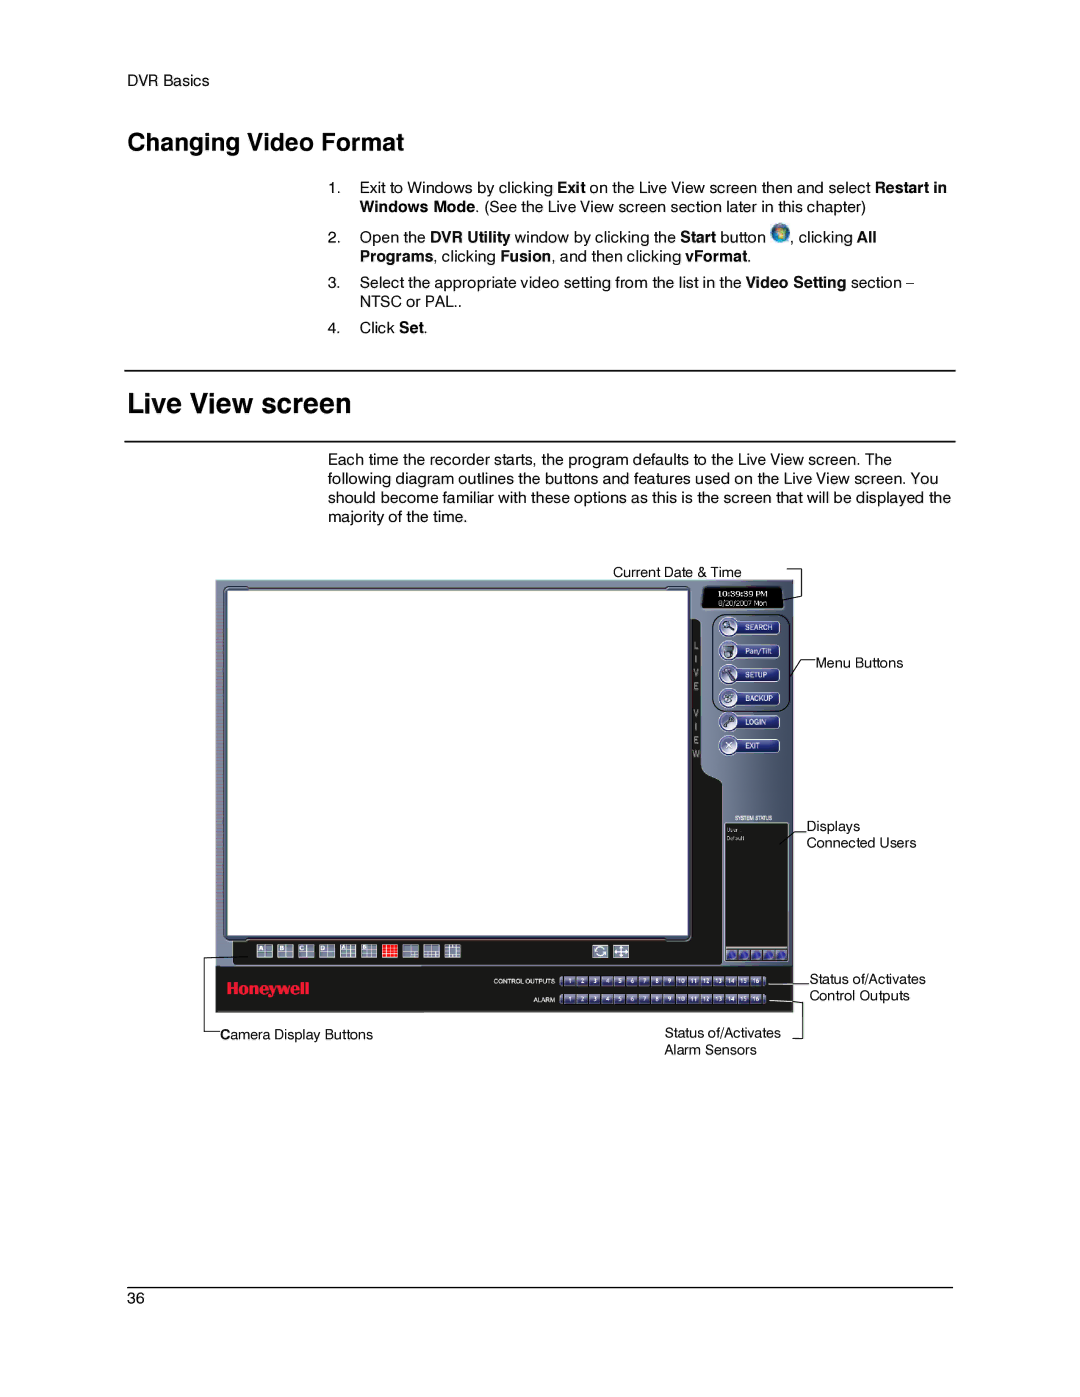
Each time the recorder starts, the program defaults to the Live View screen. The following diagram outlines the buttons and features used on the Live View screen. You should become familiar with these options as this is the screen that will be displayed the majority of the time.
Current Date & Time
![]() Menu Buttons
Menu Buttons
Displays
![]() Connected Users
Connected Users
Status of/Activates
Control Outputs
Camera Display Buttons | Status of/Activates |
| Alarm Sensors |
________________________________________________________________________________________________________
36
