Fusion IV DVR User Guide
Connecting with Camera Finder
1.From the Live View screen, click Setup.
2.Click the Network Video tab.
3.Click the Add/Remove Device tab.
4.Click Find Cameras to automatically find all connected Network cameras.
5.Select the check box next to the desired camera.
6.Click Get Device.
7.Type the User ID and Password of the device.
8.Click Update.
Assigning a Network Device to a Channel
Note Fusion IV recorders support single stream IP camera operation. Dual stream operation is not supported.
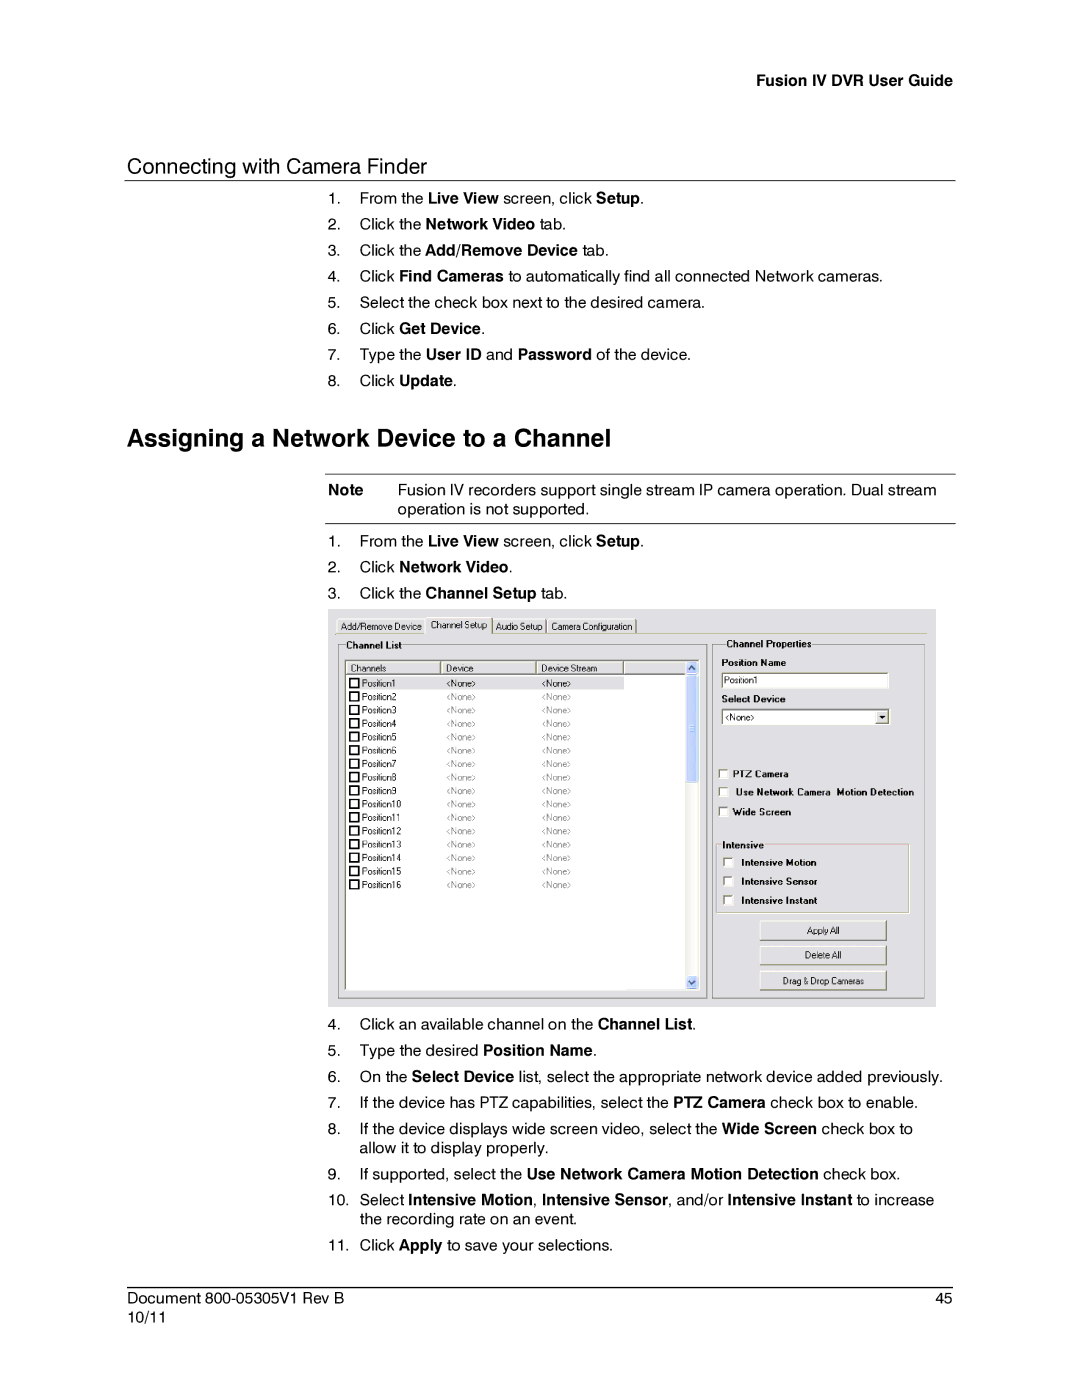
1.From the Live View screen, click Setup.
2.Click Network Video.
3.Click the Channel Setup tab.
4.Click an available channel on the Channel List.
5.Type the desired Position Name.
6.On the Select Device list, select the appropriate network device added previously.
7.If the device has PTZ capabilities, select the PTZ Camera check box to enable.
8.If the device displays wide screen video, select the Wide Screen check box to allow it to display properly.
9.If supported, select the Use Network Camera Motion Detection check box.
10.Select Intensive Motion, Intensive Sensor, and/or Intensive Instant to increase the recording rate on an event.
11.Click Apply to save your selections.
________________________________________________________________________________________________________
Document | 45 |
10/11 |
|