Installation Instructions
Configurable Zone Type Charts
| ENTRY 1 |
|
|
|
| ENTRY 2 |
|
|
|
| ||
|
|
|
|
|
|
|
|
|
| |||
| Response when system disarmed and zone is: |
| Auto |
|
| |||||||
|
| Intact EOL |
|
| Open |
|
| Shorted |
| Restore |
| Vent Zone |
| RF zone normal |
|
| RF zone N/A |
| RF zn |
|
|
|
| ||
| 0 | = normal |
| 0 | = normal |
| 0 | = normal |
| 0 = no |
| 0 = no |
| 1 | = alarm |
| 4 | = alarm |
| 1 | = alarm |
| 4 = yes |
| 8 = yes |
| 2 | = trouble |
| 8 | = trouble |
| 2 | = trouble |
|
|
|
|
| 3 | = fault |
| 12 = fault |
| 3 | = fault |
|
|
|
| |
|
|
|
| see note 4 |
|
|
|
|
|
|
| |
| Entry 1 = EOL + |
| Open |
| Entry 2 = Short + auto restore + vent zone | |||||||
| ENTRY 3 |
|
|
|
| ENTRY 4 |
|
|
|
|
| ||
|
|
|
|
|
|
|
|
|
|
| |||
| Response when armed STAY and zone is: |
| Byp. when |
| Byp. when |
| |||||||
|
| Intact EOL |
|
| Open |
|
| Shorted |
| disarmed |
| armed |
|
| RF zone normal |
|
| RF zone N/A |
| RF zn |
|
|
|
|
| ||
| 0 | = normal |
| 0 | = normal |
| 0 | = normal |
| 0 = no |
| 0 = no | |
| 1 | = alarm |
| 4 | = alarm |
| 1 | = alarm |
| 4 = yes |
| 8 = yes | |
| 2 | = trouble |
| 8 | = trouble |
| 2 | = trouble |
|
|
|
|
|
| 3 | = fault |
| 12 = fault |
| 3 | = fault |
|
|
|
|
| |
|
|
|
| see note 4 |
|
|
|
|
|
|
|
| |
| Entry 3 = EOL + |
| Open |
| Entry 4 = Short + byp. disarmed + byp. armed | ||||||||
| ENTRY 5 |
|
|
|
| ENTRY 6 |
|
|
|
|
| ||
|
|
|
|
|
|
|
|
|
|
| |||
| Response when armed AWAY and zone is: |
| Dial Delay |
| Fault Delay |
| |||||||
|
| Intact EOL |
|
| Open |
|
| Shorted |
| (see field *50) |
| (see field *87) |
|
| RF zone normal |
|
| RF zone N/A |
| RF zn |
|
|
|
|
| ||
| 0 | = normal |
| 0 | = normal |
| 0 | = normal |
| 0 = no |
| 0 = no | |
| 1 | = alarm |
| 4 | = alarm |
| 1 | = alarm |
| 4 = use delay |
| 8 = use delay | |
| 2 | = trouble |
| 8 | = trouble |
| 2 | = trouble |
|
|
|
|
|
| 3 | = fault |
| 12 = fault |
| 3 | = fault |
|
|
| see note 1 | ||
|
|
|
| see note 4 |
|
|
|
|
|
|
|
| |
| Entry 5 = EOL + |
| Open |
| Entry 6 = Short + dial delay + fault delay | ||||||||
| ENTRY 7 |
|
|
| ENTRY 8 |
|
|
|
|
|
|
|
|
|
|
|
|
|
|
|
|
| Display Faults |
| Power Reset/ |
| Use Entry |
| Use Exit |
| Respond as |
|
|
|
| Verification |
| Delay 1/2 |
| Delay |
| Interior Type |
|
| 0 = show alarms |
| 0 = no |
| 0 = no |
| 0 = no |
| 0 = no |
|
| when armed |
| 4 = power reset |
| 1 = delay 1 |
| 4 = use exit |
| 8 = yes |
|
| & disarmed |
| after fault |
| 2 = delay 2 |
| delay |
| see note 2 |
|
| 1 = don’t show |
| (with code + OFF) |
|
|
|
|
|
| |
| alarms when |
| 12 = verification |
|
|
|
|
|
|
|
| armed (show |
| (see zone |
|
|
|
|
|
|
|
| alarms, trbles, |
| type 16) |
|
|
|
|
|
|
|
| faults when |
|
|
|
|
|
|
|
|
|
| disarmed) |
|
|
|
|
|
|
|
|
|
| 3 = never show |
|
|
|
|
|
|
|
|
|
| any alarms, |
|
|
|
|
|
|
|
|
|
| trbles, faults |
|
|
|
|
|
|
|
|
|
| Entry 7 = fault display + power |
| Entry 8 = entry delay 1/entry delay 2 + exit delay + |
| ||||||
| reset/verification |
|
|
| interior zone type |
|
|
|
|
|
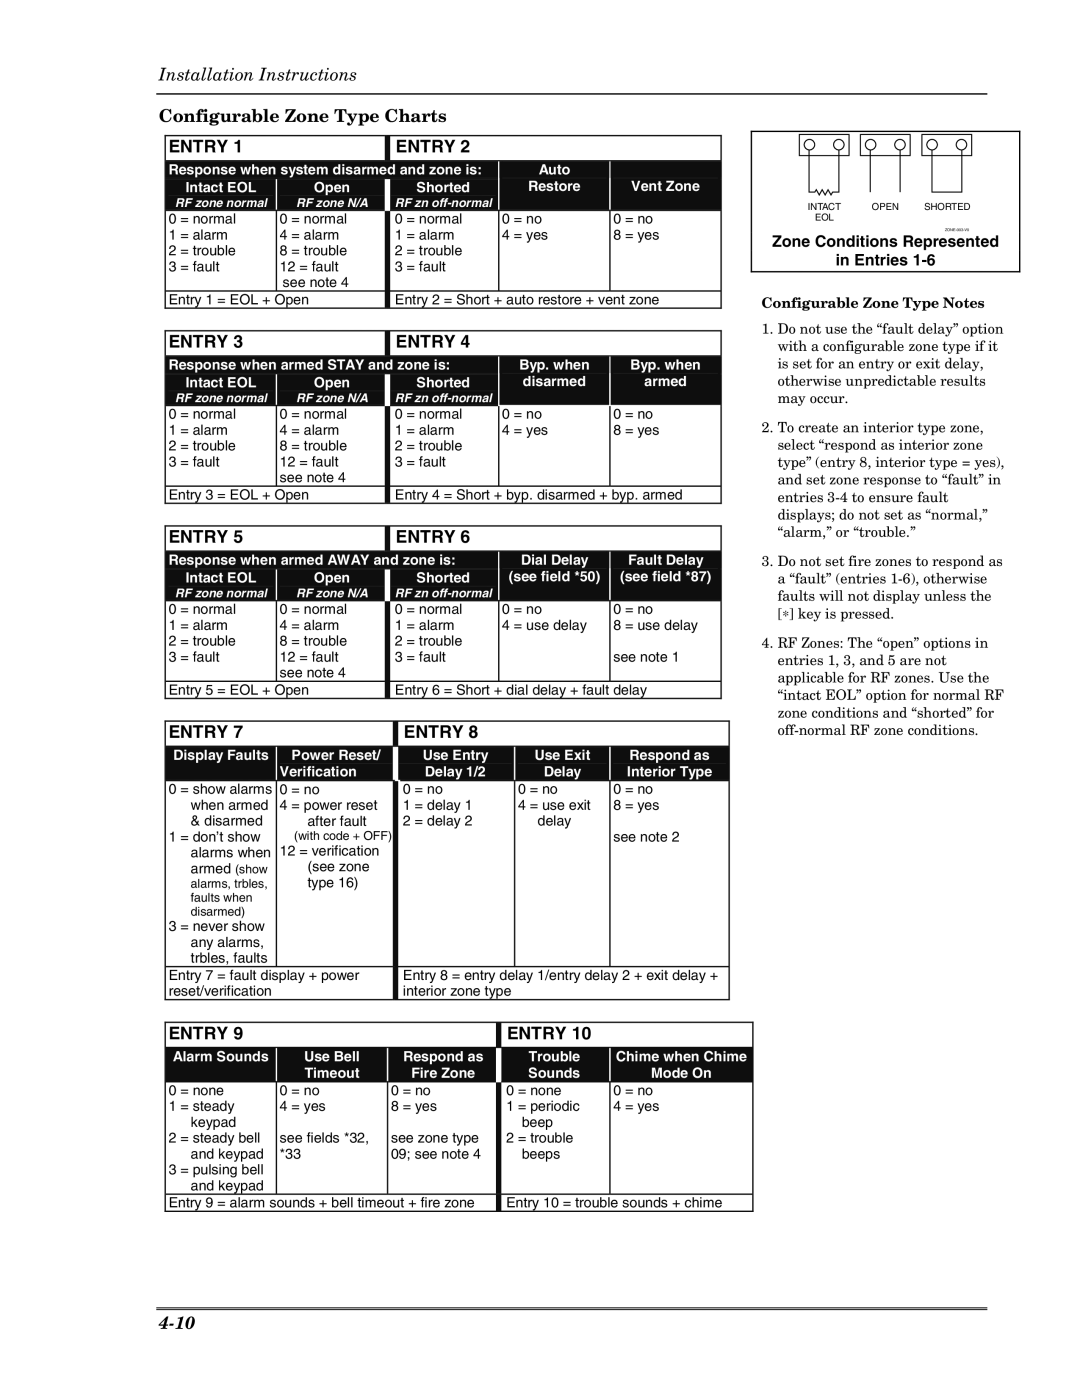
INTACT | OPEN | SHORTED |
EOL |
|
|
|
|
Zone Conditions Represented
in Entries 1-6
Configurable Zone Type Notes
1.Do not use the “fault delay” option with a configurable zone type if it is set for an entry or exit delay, otherwise unpredictable results may occur.
2.To create an interior type zone, select “respond as interior zone type” (entry 8, interior type = yes), and set zone response to “fault” in entries
3.Do not set fire zones to respond as a “fault” (entries
faults will not display unless the [∗] key is pressed.
4.RF Zones: The “open” options in entries 1, 3, and 5 are not applicable for RF zones. Use the “intact EOL” option for normal RF zone conditions and “shorted” for
| ENTRY 9 |
|
|
|
|
| ENTRY 10 |
|
|
| ||
|
|
|
|
|
|
|
|
|
|
|
| |
| Alarm Sounds |
| Use Bell |
| Respond as |
|
| Trouble |
| Chime when Chime |
| |
|
|
|
| Timeout |
| Fire Zone |
|
| Sounds |
| Mode On |
|
| 0 | = none |
| 0 = no |
| 0 = no |
| 0 | = none |
| 0 = no |
|
| 1 | = steady |
| 4 = yes |
| 8 = yes |
| 1 | = periodic |
| 4 = yes |
|
|
| keypad |
|
|
|
|
|
| beep |
|
|
|
| 2 | = steady bell |
| see fields *32, |
| see zone type |
| 2 | = trouble |
|
|
|
|
| and keypad |
| *33 |
| 09; see note 4 |
|
| beeps |
|
|
|
| 3 | = pulsing bell |
|
|
|
|
|
|
|
|
|
|
|
| and keypad |
|
|
|
|
|
|
|
|
|
|
| Entry 9 = alarm |
| sounds + bell timeout + fire zone |
| Entry 10 = trouble sounds + chime |
| ||||||