7210v, 7210 specifications
The HP 7210, 7210v, and 7210xi are multifunction printers designed to cater to the diverse needs of both home office environments and small to medium-sized businesses. Each model brings a unique set of features and technologies, along with robust performance characteristics that ensure high-quality printing, copying, scanning, and faxing.The HP 7210 series printers are equipped with HP’s advanced thermal inkjet technology, which provides precise and vibrant print quality. This technology allows users to produce borderless color photos and sharp text documents, making it ideal for creative projects as well as everyday business tasks. The resolution can reach up to 4800 x 1200 optimized dpi, ensuring that images come out with stunning clarity and detail.
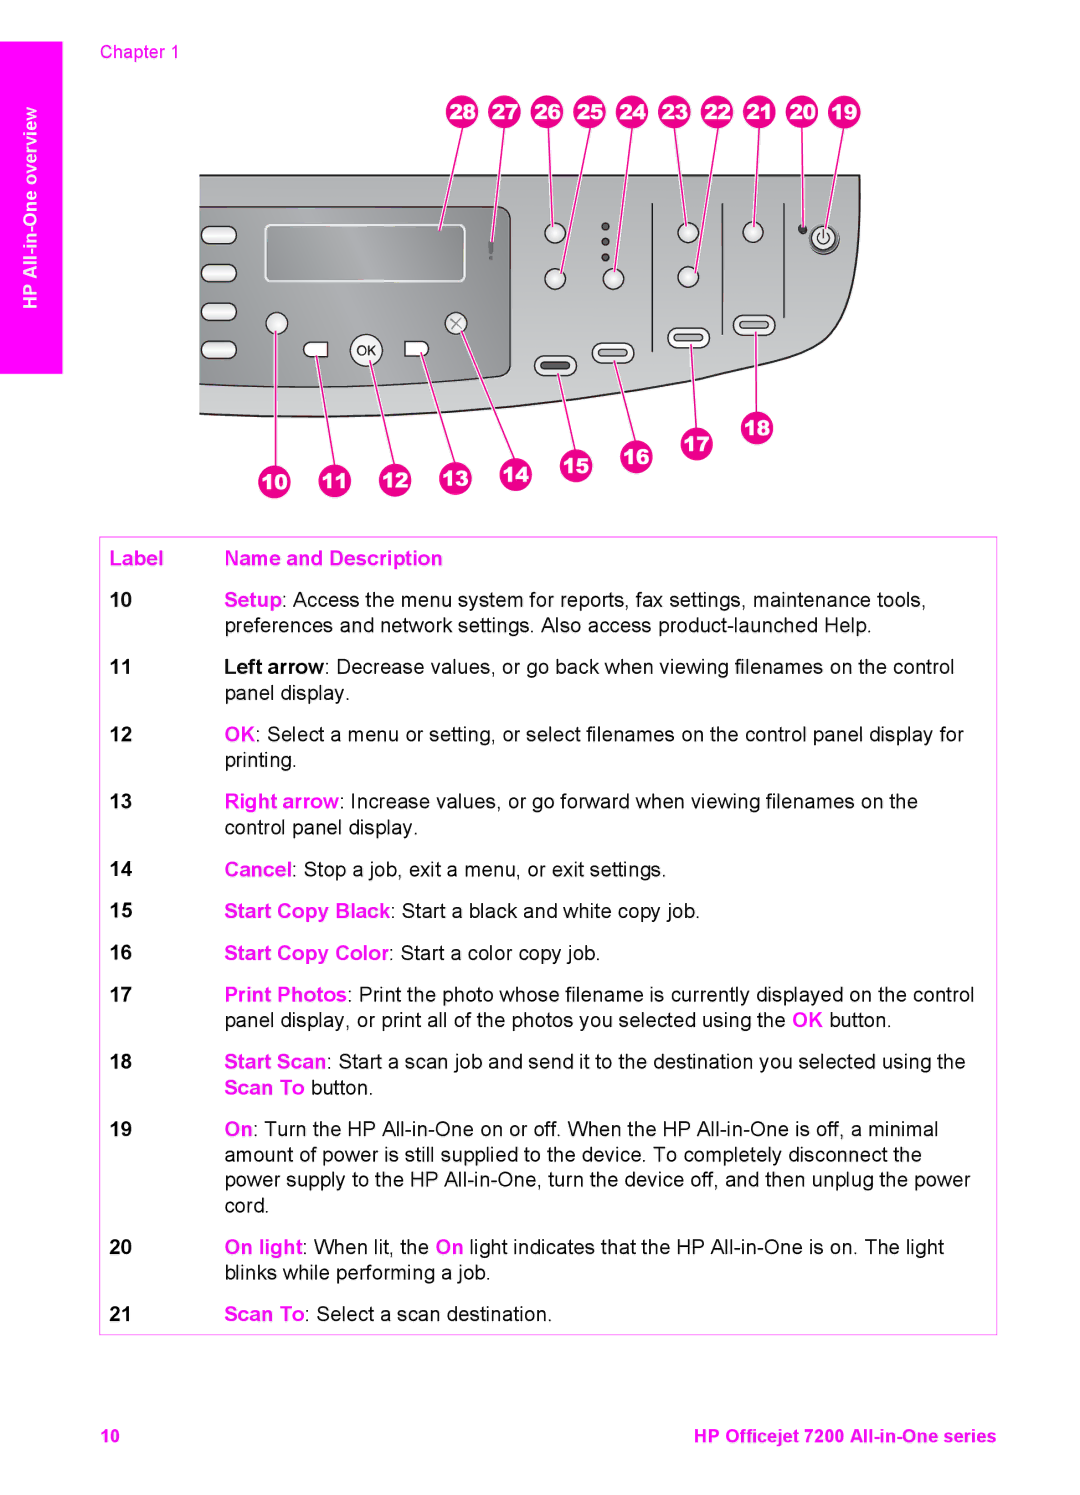
One of the standout features of these models is their large touchscreen interfaces, which allow for straightforward navigation through various functions. The intuitive menus simplify printing tasks, enabling users to quickly select options such as duplex printing or creating a multi-page document. The HP 7210xi, in particular, includes enhanced connectivity options, allowing users to print wirelessly from a range of devices, including laptops, tablets, and smartphones. This flexibility is crucial in today’s mobile working environment.
Additionally, these printers support various media types and sizes, ranging from standard A4 sheets to envelopes and glossy photo paper. This versatility accommodates a wide range of printing needs, whether for business reports, marketing materials, or personal photos.
Energy efficiency is another important characteristic of the HP 7210 series. These printers are designed to minimize power consumption during operation as well as in standby mode, contributing to lower energy costs and a smaller environmental footprint.
Furthermore, the HP 7210 models come with built-in automatic document feeders, which streamline the scanning and copying of multi-page documents, enhancing productivity and efficiency. With high-capacity ink cartridges available, users can also benefit from a lower cost per page, making them an economical option for high-volume printing.
Overall, the HP 7210, 7210v, and 7210xi multifunction printers combine quality, functionality, and efficiency, making them reliable choices for users looking to enhance their productivity in various tasks. Their advanced features, user-friendly design, and eco-friendly technologies contribute to an outstanding printing experience.

