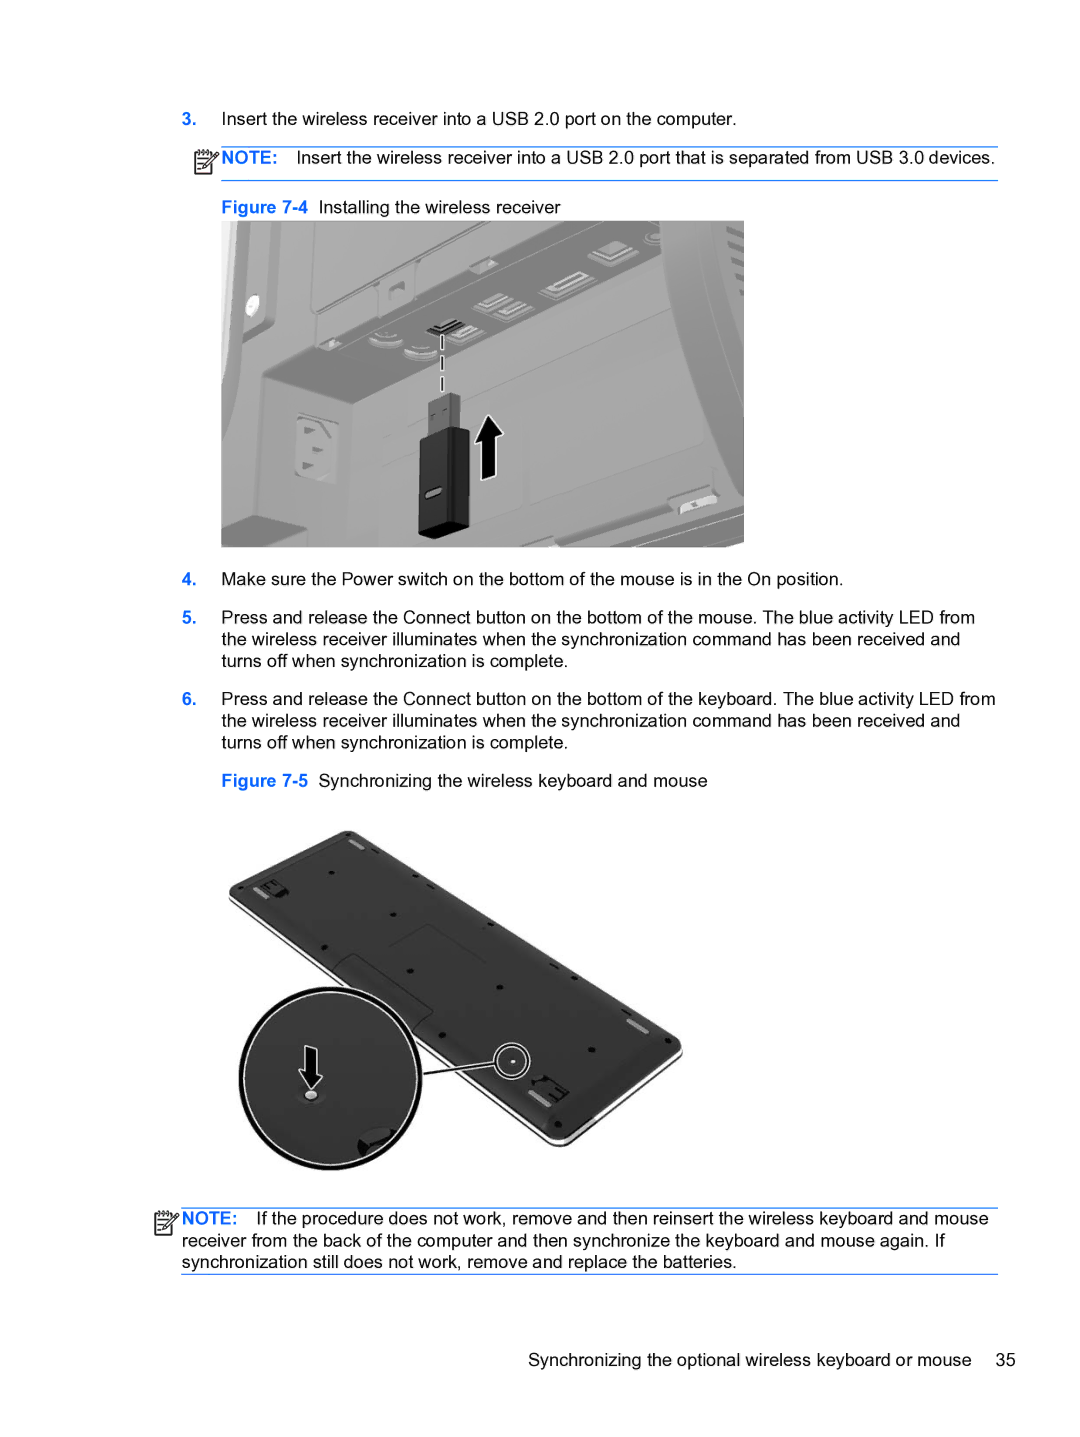
3.Insert the wireless receiver into a USB 2.0 port on the computer.
![]() NOTE: Insert the wireless receiver into a USB 2.0 port that is separated from USB 3.0 devices.
NOTE: Insert the wireless receiver into a USB 2.0 port that is separated from USB 3.0 devices.
Figure 7-4 Installing the wireless receiver
4.Make sure the Power switch on the bottom of the mouse is in the On position.
5.Press and release the Connect button on the bottom of the mouse. The blue activity LED from the wireless receiver illuminates when the synchronization command has been received and turns off when synchronization is complete.
6.Press and release the Connect button on the bottom of the keyboard. The blue activity LED from the wireless receiver illuminates when the synchronization command has been received and turns off when synchronization is complete.
Figure 7-5 Synchronizing the wireless keyboard and mouse
![]()
![]()
![]()
![]() NOTE: If the procedure does not work, remove and then reinsert the wireless keyboard and mouse receiver from the back of the computer and then synchronize the keyboard and mouse again. If synchronization still does not work, remove and replace the batteries.
NOTE: If the procedure does not work, remove and then reinsert the wireless keyboard and mouse receiver from the back of the computer and then synchronize the keyboard and mouse again. If synchronization still does not work, remove and replace the batteries.
