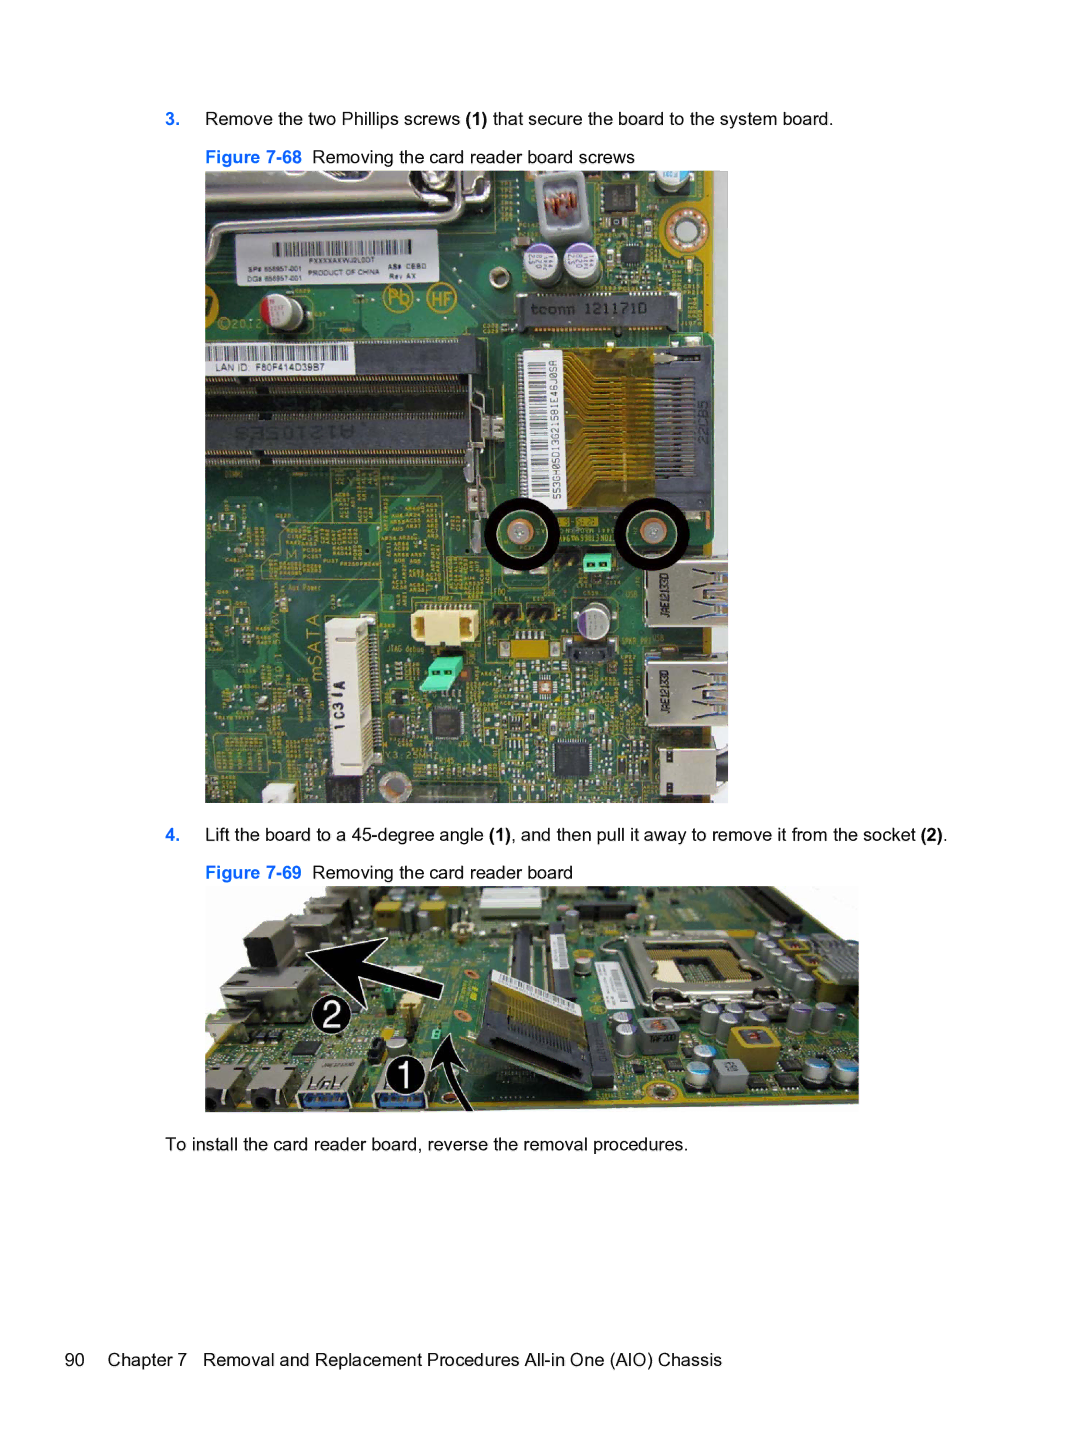
3.Remove the two Phillips screws (1) that secure the board to the system board. Figure
4.Lift the board to a
To install the card reader board, reverse the removal procedures.
90 Chapter 7 Removal and Replacement Procedures
3.Remove the two Phillips screws (1) that secure the board to the system board. Figure
4.Lift the board to a
To install the card reader board, reverse the removal procedures.
90 Chapter 7 Removal and Replacement Procedures