Removing the Keyboard
(HP Authorized Service Providers Only)
Required Equipment
∙Small Phillips screwdriver.
Removal Procedure
1.Unplug the ac adapter, if present, and remove the battery. Remove the secondary battery if one is installed.
2.Remove the power button panel (page
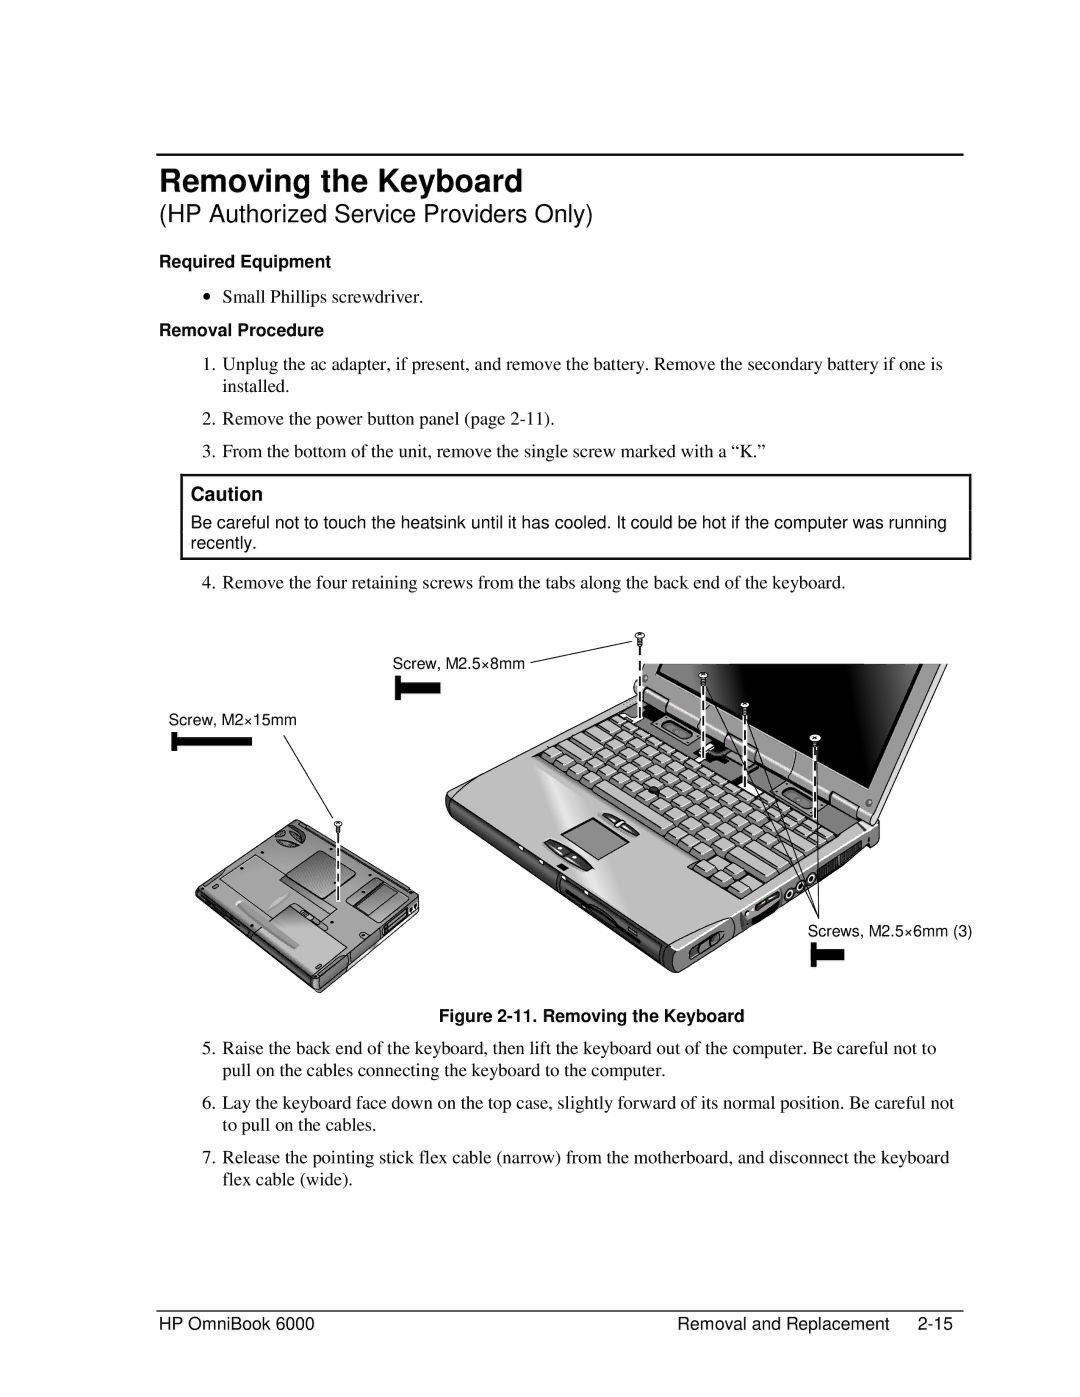
3.From the bottom of the unit, remove the single screw marked with a “K.”
Caution
Be careful not to touch the heatsink until it has cooled. It could be hot if the computer was running recently.
4. Remove the four retaining screws from the tabs along the back end of the keyboard.
Screw, M2.5×8mm
Screw, M2×15mm
Screws, M2.5×6mm (3)
Figure 2-11. Removing the Keyboard
5.Raise the back end of the keyboard, then lift the keyboard out of the computer. Be careful not to pull on the cables connecting the keyboard to the computer.
6.Lay the keyboard face down on the top case, slightly forward of its normal position. Be careful not to pull on the cables.
7.Release the pointing stick flex cable (narrow) from the motherboard, and disconnect the keyboard flex cable (wide).
HP OmniBook 6000 | Removal and Replacement |
