|
| Chapter 9 Transferring calls 67 |
|
|
|
|
|
|
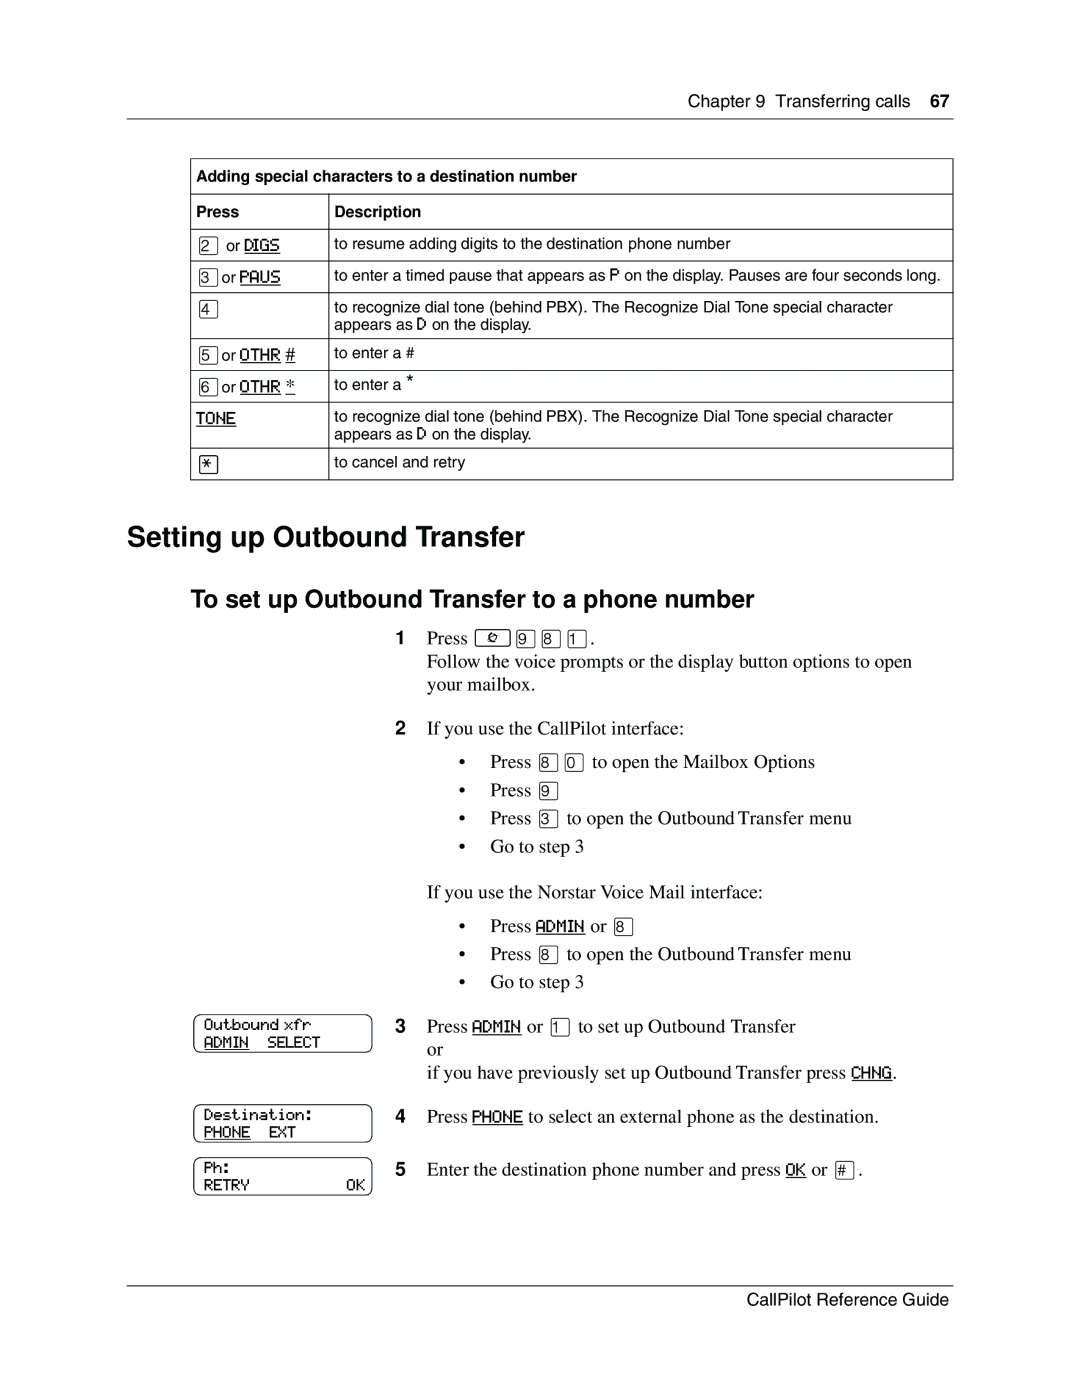
| Adding special characters to a destination number | |
|
|
|
| Press | Description |
|
|
|
| ¤or DIGS | to resume adding digits to the destination phone number |
|
|
|
| ‹or PAUS | to enter a timed pause that appears as P on the display. Pauses are four seconds long. |
|
|
|
| › | to recognize dial tone (behind PBX). The Recognize Dial Tone special character |
|
| appears as D on the display. |
|
|
|
| fior OTHR # | to enter a # |
|
|
|
| flor OTHR * | to enter a * |
|
|
|
| TONE | to recognize dial tone (behind PBX). The Recognize Dial Tone special character |
|
| appears as D on the display. |
|
|
|
| • | to cancel and retry |
|
|
|
Setting up Outbound Transfer
To set up Outbound Transfer to a phone number
1Press ≤·°⁄.
Follow the voice prompts or the display button options to open your mailbox.
Outbound xfr
ADMIN SELECT
2If you use the CallPilot interface:
•Press °‚to open the Mailbox Options
•Press ·
•Press ‹to open the Outbound Transfer menu
•Go to step 3
If you use the Norstar Voice Mail interface:
•Press ADMIN or °
•Press °to open the Outbound Transfer menu
•Go to step 3
3Press ADMIN or ⁄to set up Outbound Transfer or
if you have previously set up Outbound Transfer press CHNG.
Destination: | 4 | Press PHONE to select an external phone as the destination. |
PHONE EXT |
|
|
Ph: | 5 | Enter the destination phone number and press OK or £. |
RETRY | OK |
|
CallPilot Reference Guide