Getting Started
1.6Ribbon Installation
Note: It is recommended to use only original ribbon cassettes supplied by the printer manufacturer. Using other ribbons will void your warranty.
The following procedure describes how the ribbon cassette is installed into the printer for the very first time. Lateron chapter 1.7 Replacing the Ribbon Cassette is applicable.
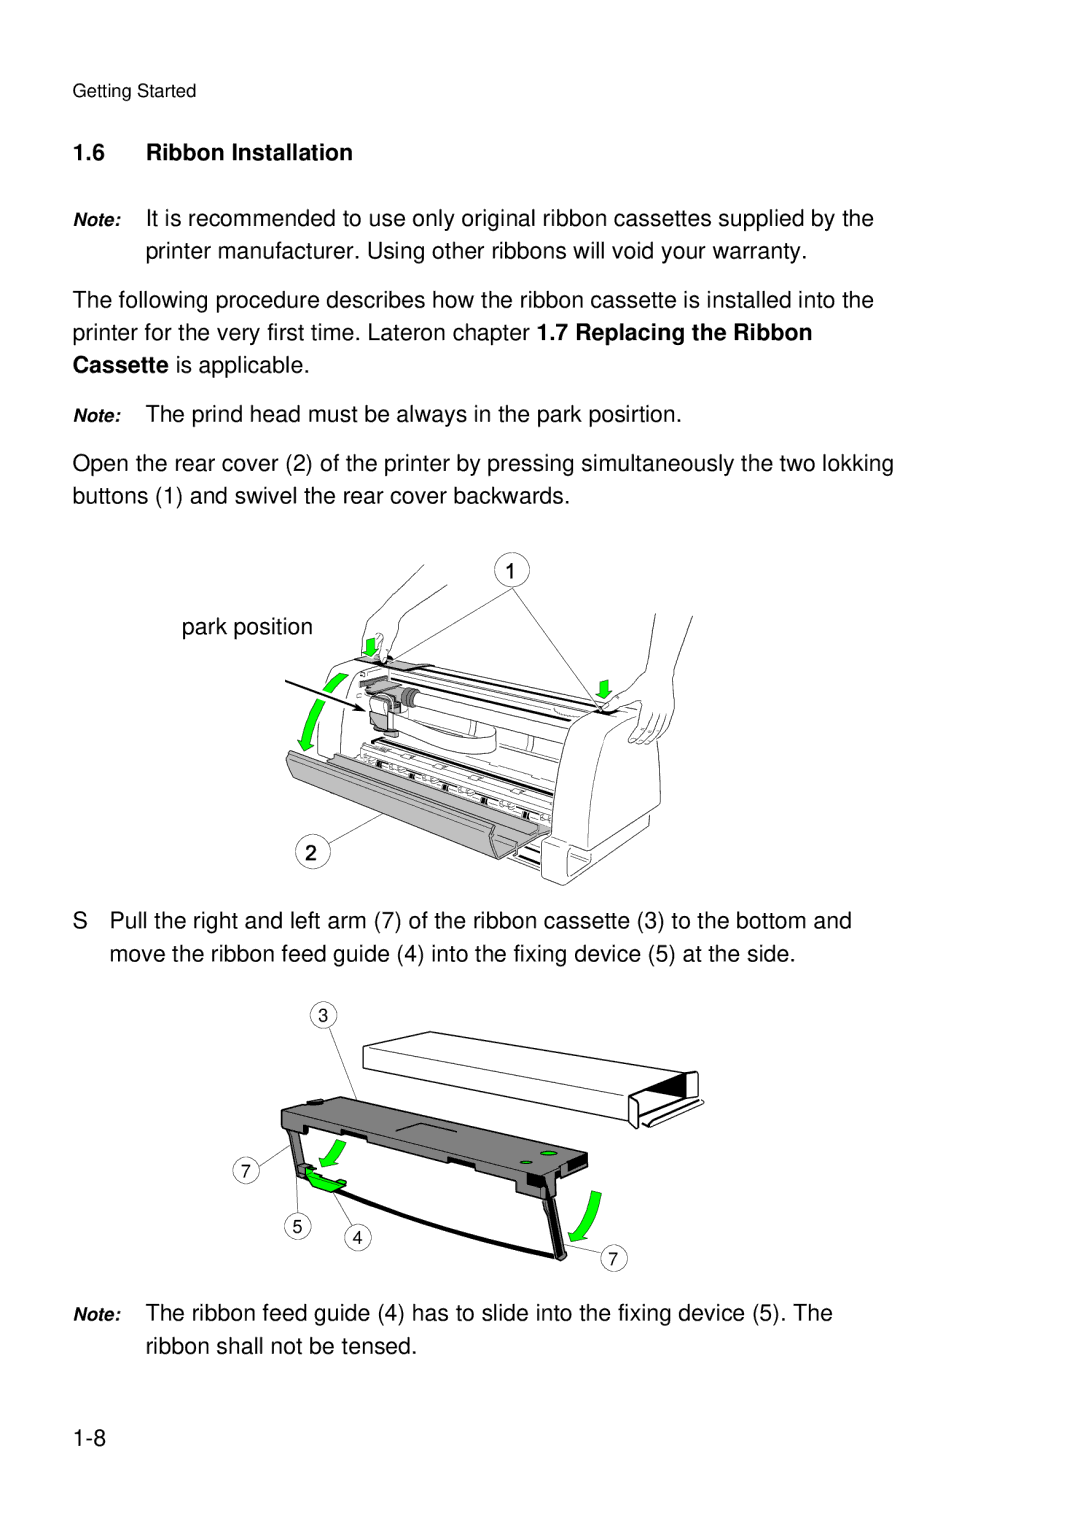
Note: The prind head must be always in the park posirtion.
Open the rear cover (2) of the printer by pressing simultaneously the two lokking buttons (1) and swivel the rear cover backwards.
park position
SPull the right and left arm (7) of the ribbon cassette (3) to the bottom and move the ribbon feed guide (4) into the fixing device (5) at the side.
3
7
5
4
7
Note: The ribbon feed guide (4) has to slide into the fixing device (5). The ribbon shall not be tensed.