uB/W button (*2)
Click the desired button to switch color (colour) of the displayed images between color (colour) and B/W.
![]() : Images will be displayed in B/W (black and white).
: Images will be displayed in B/W (black and white).
![]() : Images will be displayed in color (colour).
: Images will be displayed in color (colour).
![]() : Activates Auto 1 mode. (The camera selects black and white mode if the picture
: Activates Auto 1 mode. (The camera selects black and white mode if the picture
is dark, or color mode if the picture is bright enough.) If the camera has only one AUTO mode, click this button.
![]() : Activates Auto 2 mode. (The camera detects the light source type to prevent
: Activates Auto 2 mode. (The camera detects the light source type to prevent
malfunction. This setting is applicable when using a
iZOOM buttons (*2)
![]() : Click this button to adjust the zoom ratio to the WIDE side.
: Click this button to adjust the zoom ratio to the WIDE side.
![]() : Click this button to set the zoom ratio to x1.0.
: Click this button to set the zoom ratio to x1.0.
![]() : Click this button to adjust the zoom ratio to the TELE side.
: Click this button to adjust the zoom ratio to the TELE side.
oFOCUS buttons (*2)
![]() : Click this button to adjust the focus auto- matically.
: Click this button to adjust the focus auto- matically.
![]() : Click this button to adjust the focus to the NEAR side.
: Click this button to adjust the focus to the NEAR side.
![]() : Click this button to adjust the focus to the FAR side.
: Click this button to adjust the focus to the FAR side.
!0AUTO MODE (*2)
Select an operation from the
Click the [STOP] button to stop the operation. The selected operation will stop when the camera (panning/tilting/zooming/focusing) is operated. Auto pan: Automatically pans between the start
position and the end position set in advance. Even when the camera is operated for zooming or focusing, the camera continues panning.
Sort: Sequentially switches between preset posi- tions counterclockwise, starting from the camera home position.
Sequence: Automatically moves to the preset posi- tions orderly (start from the lowest preset posi- tion number).
Patrol: Operates the camera in accordance with patrol function settings.
Auto track: Performs auto track when the camera supports auto track (AUTO TRACK).
Notes:
•To activate "Auto pan", "Sort", "Sequence", or "Patrol", it is required to perform the settings on the SETUP MENU of camera in advance. (☞ page 28)
•To check if the camera supports auto track, refer to the operating instructions of the camera.
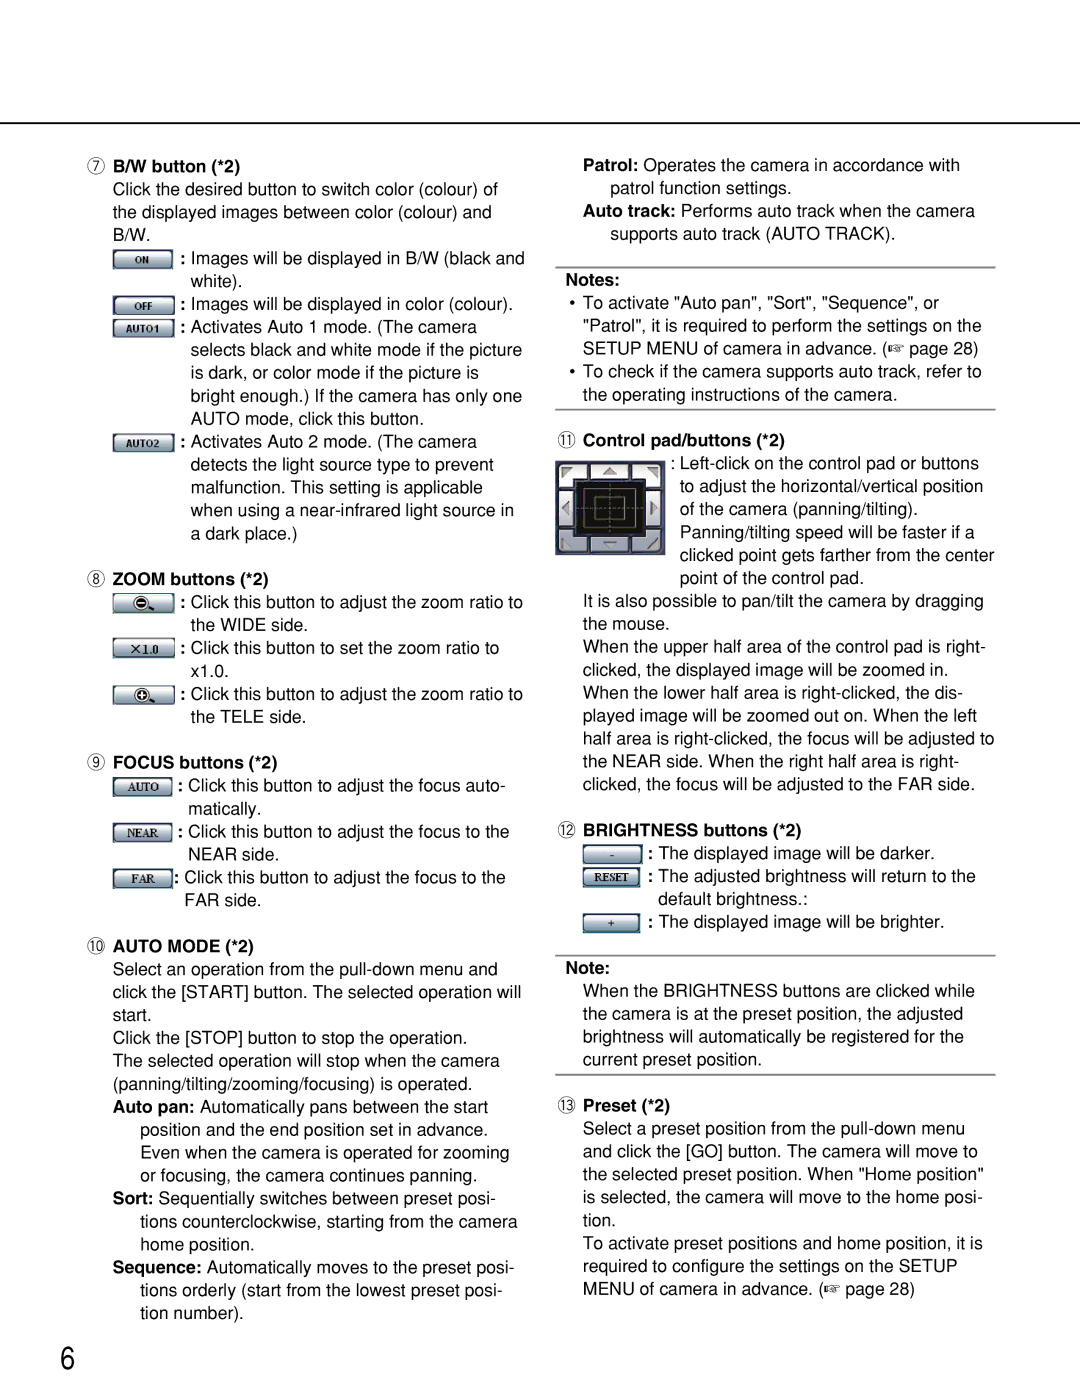
!1Control pad/buttons (*2)
:
Panning/tilting speed will be faster if a clicked point gets farther from the center point of the control pad.
It is also possible to pan/tilt the camera by dragging the mouse.
When the upper half area of the control pad is right- clicked, the displayed image will be zoomed in. When the lower half area is
!2BRIGHTNESS buttons (*2)
![]() : The displayed image will be darker.
: The displayed image will be darker.
![]() : The adjusted brightness will return to the default brightness.:
: The adjusted brightness will return to the default brightness.:
![]() : The displayed image will be brighter.
: The displayed image will be brighter.
Note:
When the BRIGHTNESS buttons are clicked while the camera is at the preset position, the adjusted brightness will automatically be registered for the current preset position.
!3Preset (*2)
Select a preset position from the
To activate preset positions and home position, it is required to configure the settings on the SETUP MENU of camera in advance. (☞ page 28)
6