FastTrak100 User Manual
Manually Creating an Array
The Define Array <3> option from the Main Menu allows users to begin the process of manually defining the drive elements and RAID levels for one or multiple disk arrays attached to FastTrak100. Users will commonly create one or two drive arrays with FastTrak100, though the card will support a maximum of four arrays1.
NOTE: For most installations, Promise recommends the <1> Auto Setup for easy disk array creation.
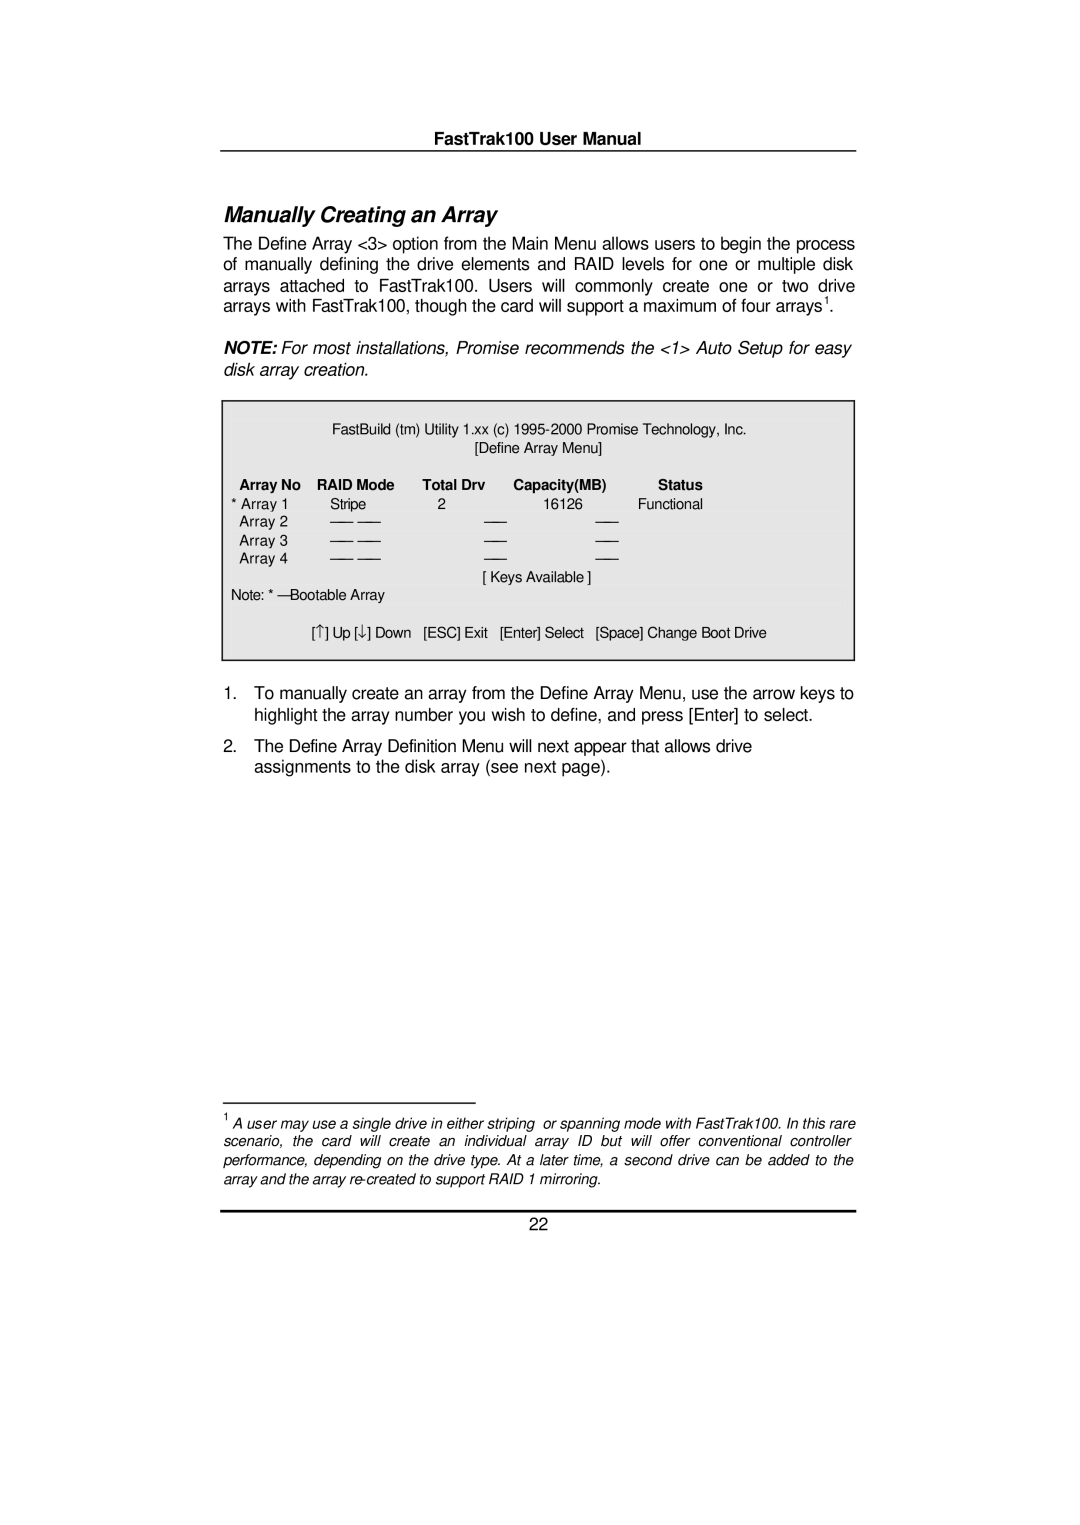
FastBuild (tm) Utility 1.xx (c)
[Define Array Menu]
Array No | RAID Mode | Total Drv | Capacity(MB) | Status | |
* Array 1 | Stripe | 2 | 16126 | Functional | |
Array 2 |
| ||||
Array 3 |
| ||||
Array 4 |
| ||||
[ Keys Available ]
Note: * — Bootable Array
[−] Up [↓] Down [ESC] Exit [Enter] Select [Space] Change Boot Drive
1.To manually create an array from the Define Array Menu, use the arrow keys to highlight the array number you wish to define, and press [Enter] to select.
2.The Define Array Definition Menu will next appear that allows drive assignments to the disk array (see next page).
1A user may use a single drive in either striping or spanning mode with FastTrak100. In this rare scenario, the card will create an individual array ID but will offer conventional controller performance, depending on the drive type. At a later time, a second drive can be added to the array and the array
22