| Installing Options | |
C Remove the adhesive tape. | F Use a coin to fasten the screws, | |
Important | and secure the finisher stand to | |
the printer | ||
❒ Do not remove the adhesive | ||
| ||
tape holding the finisher and ca- |
| |
ble until the connector is at- |
| |
tached in step J. |
|
|
|
|
|
| 2 |
|
|
|
|
| ZDEP301E |
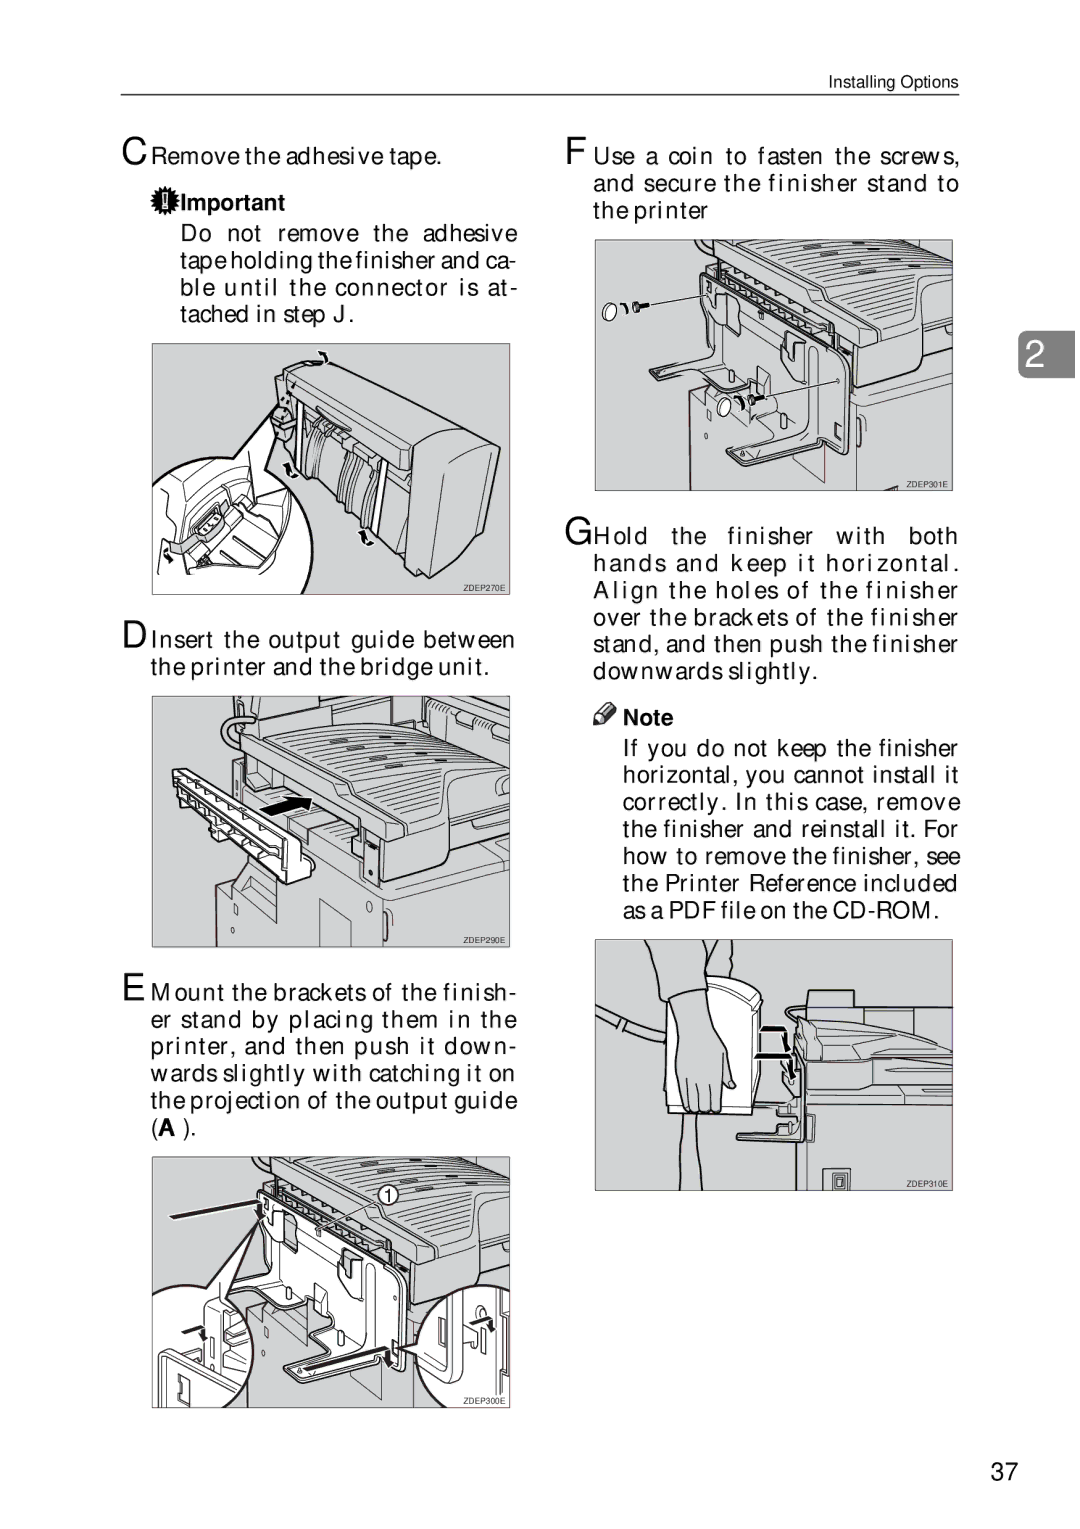
| G Hold | the | finisher | with | both |
| hands and keep it horizontal. | ||||
ZDEP270E | Align the holes of the finisher | ||||
D Insert the output guide between | over the brackets of the finisher | ||||
stand, and then push the finisher | |||||
the printer and the bridge unit. | downwards slightly. |
|
| ||
| Note |
|
|
| |
| ❒ If you do not keep the finisher | ||||
| horizontal, you cannot install it | ||||
| correctly. In this case, remove | ||||
| the finisher and reinstall it. For | ||||
| how to remove the finisher, see | ||||
| the Printer Reference included | ||||
| as a PDF file on the | ||||
ZDEP290E |
|
|
|
|
|
E Mount the brackets of the finish- |
|
|
|
|
|
er stand by placing them in the |
|
|
|
|
|
printer, and then push it down- |
|
|
|
|
|
wards slightly with catching it on |
|
|
|
|
|
the projection of the output guide |
|
|
|
|
|
(A). |
|
|
|
|
|
|
|
|
|
| ZDEP310E |
ZDEP300E
37
