Setting Up the Printer
D Use a coin to remove the two screws, and remove the cover.
![]()
![]() Note
Note
❒The removed screws are re- quired in step F.
❒The removed cover is no longer
2 required.
ZDEP140E |
E Align the hard disk interface con- nector over the printer interface port, and push gently but firmly on the hard disk until it is com- pletely connected.
ZDEP150E |
F Fasten the two screws that were removed in step D to attach the hard disk to the printer.
ZDEP160E |
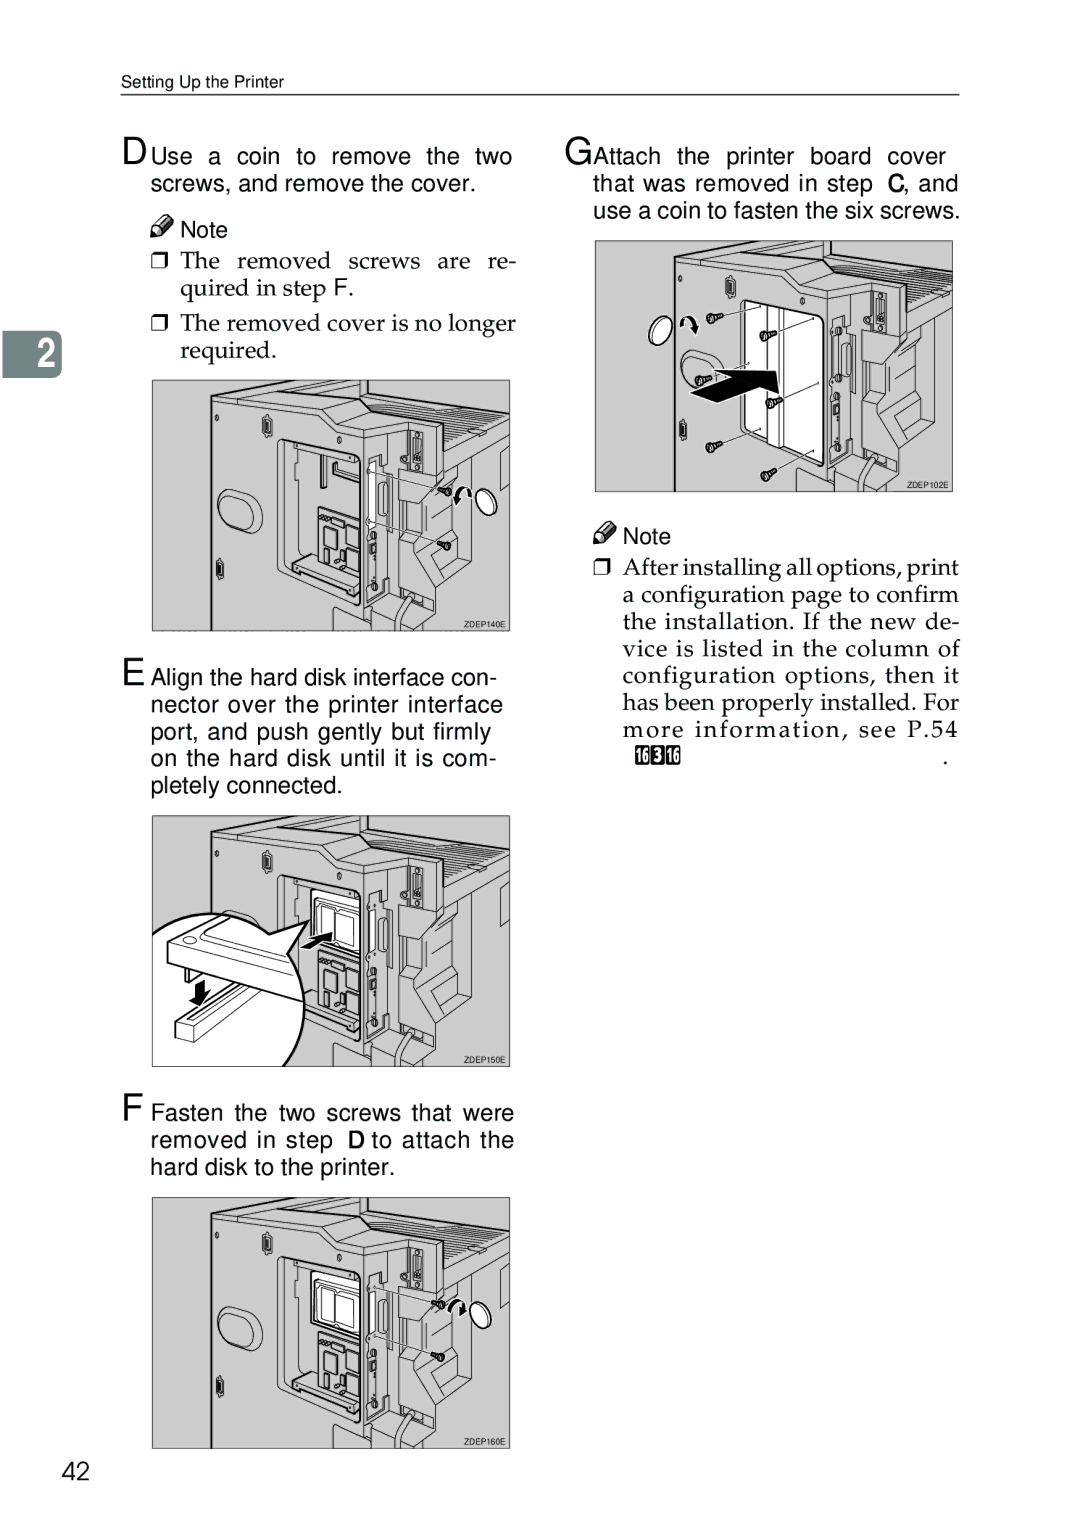
G Attach the printer board cover that was removed in step C, and use a coin to fasten the six screws.
ZDEP102E |
![]()
![]() Note
Note
❒After installing all options, print a configuration page to confirm the installation. If the new de- vice is listed in the column of configuration options, then it has been properly installed. For more information, see P.54 “Printing a Configuration Page”.
42