Setting Up the Printer
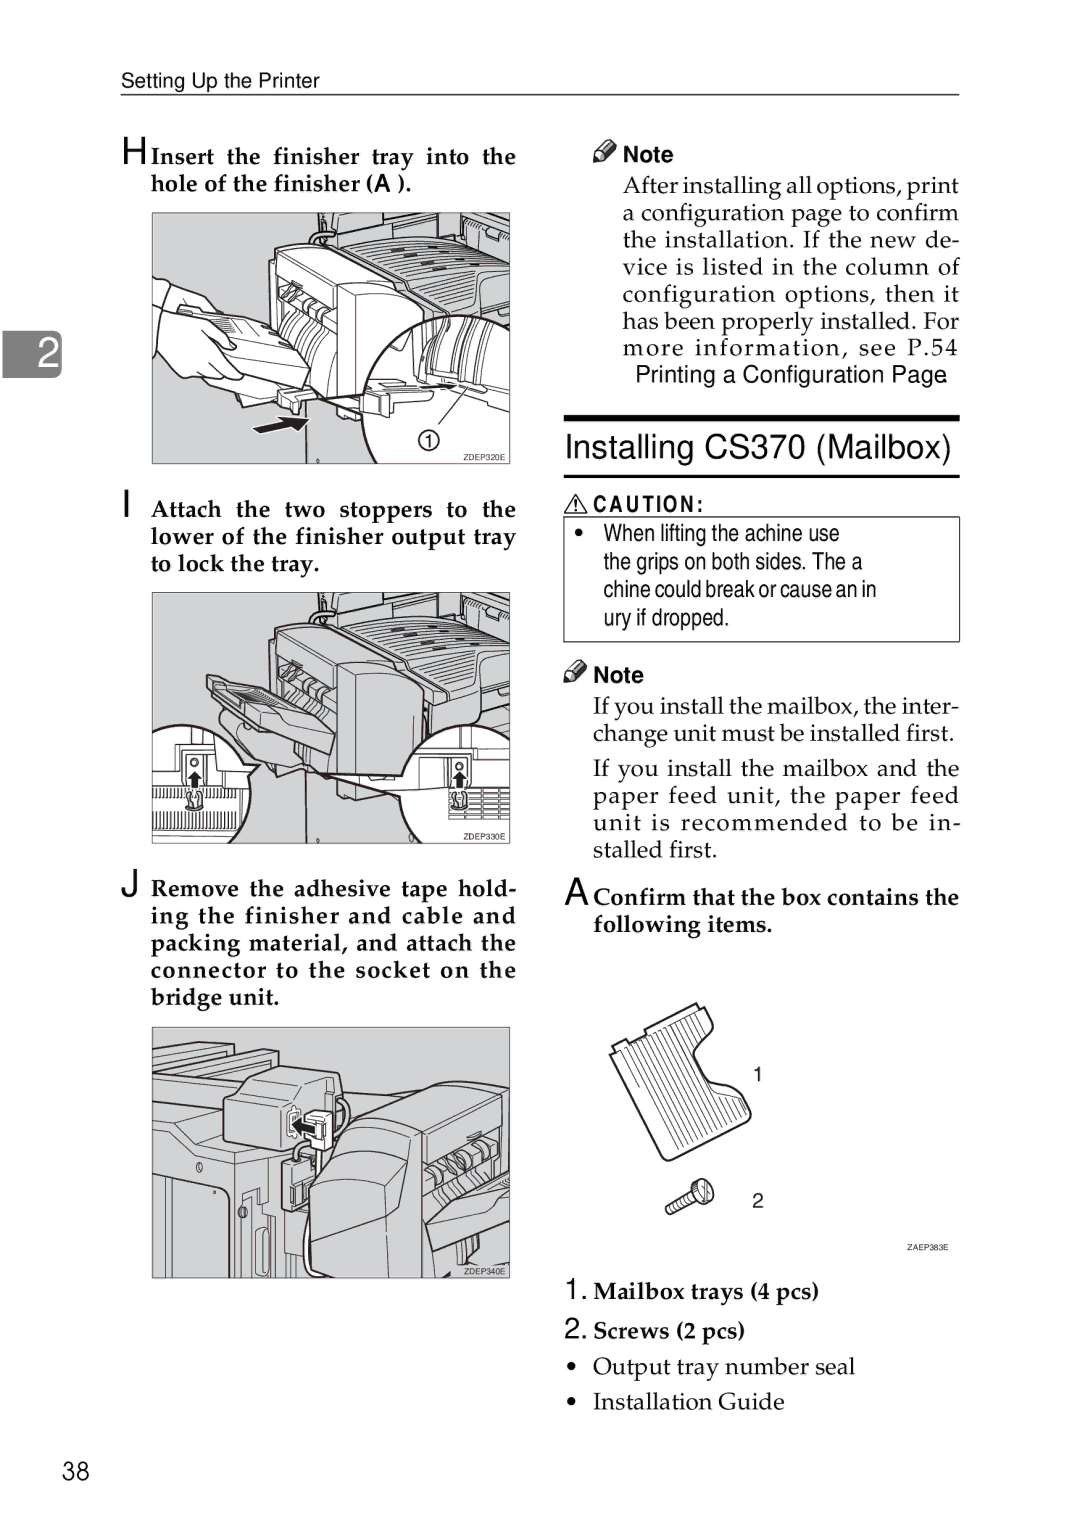
H Insert the finisher tray into the hole of the finisher (A).
2 |
ZDEP320E |
![]()
![]() Note
Note
❒After installing all options, print a configuration page to confirm the installation. If the new de- vice is listed in the column of configuration options, then it has been properly installed. For more information, see P.54 “Printing a Configuration Page”.
Installing CS370 (Mailbox)
I Attach the two stoppers to the | R CAUTION: | |
lower of the finisher output tray | • When lifting the machine, use | |
to lock the tray. | the grips on both sides. The ma- | |
| chine could break or cause an in- | |
| jury if dropped. | |
| Note | |
| ❒ If you install the mailbox, the inter- | |
| change unit must be installed first. | |
| ❒ If you install the mailbox and the | |
| paper feed unit, the paper feed | |
ZDEP330E | unit is recommended to be in- | |
stalled first. | ||
|
J Remove the adhesive tape hold- ing the finisher and cable and packing material, and attach the connector to the socket on the bridge unit.
A Confirm that the box contains the following items.
1
2
ZAEP383E
ZDEP340E
1. Mailbox trays (4 pcs)
2. Screws (2 pcs)
• Output tray number seal
• Installation Guide
38
