Projector (Side View)
Introduction
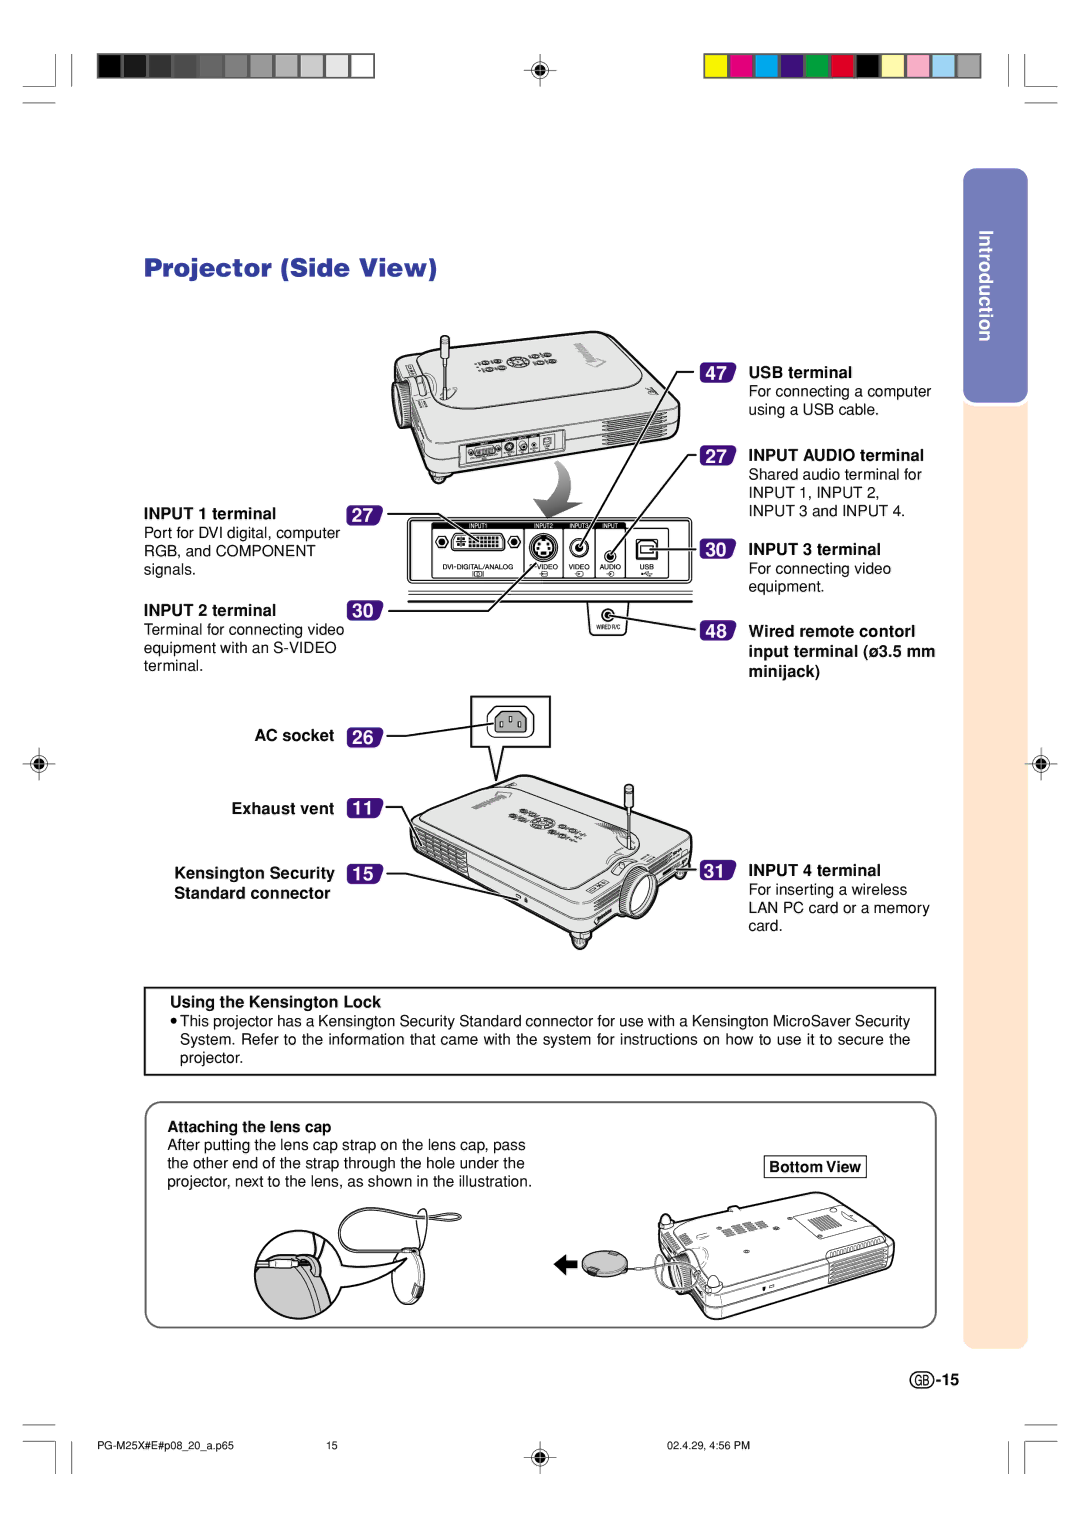
INPUT 1 terminal
Port for DVI digital, computer RGB, and COMPONENT signals.
INPUT 2 terminal
Terminal for connecting video equipment with an
27 ![]()
30
47USB terminal
For connecting a computer using a USB cable.
27INPUT AUDIO terminal Shared audio terminal for INPUT 1, INPUT 2, INPUT 3 and INPUT 4.
30 INPUT 3 terminal
For connecting video equipment.
48 Wired remote contorl input terminal (ø3.5 mm minijack)
AC socket 26 ![]()
Exhaust vent 11
Kensington Security 15
Standard connector
![]()
![]()
![]() 31 INPUT 4 terminal
31 INPUT 4 terminal
For inserting a wireless LAN PC card or a memory card.
Using the Kensington Lock
•This projector has a Kensington Security Standard connector for use with a Kensington MicroSaver Security System. Refer to the information that came with the system for instructions on how to use it to secure the projector.
Attaching the lens cap
After putting the lens cap strap on the lens cap, pass
the other end of the strap through the hole under theBottom View projector, next to the lens, as shown in the illustration.
![]() -15
-15
15 | 02.4.29, 4:56 PM |