A212_1 03.7.5 8:00 AM Page 8
GETTING STARTED
Please follow the procedure shown below.
1 | Installing the cash register |
|
Unpack the cash register and make sure all accessories are included. For details of accessories, please refer to “Specifications” section.
For installing the cash register, find a stable surface near an AC outlet where the cash register will not subject to water sources or direct sunlight, then install the register using the fixing angle bracket provided with the register. The fixing angle bracket prevents the register from moving when the drawer opens. By hooking the register on the bracket, you can secure the register to the position.
Follow the procedure shown below for the installation.
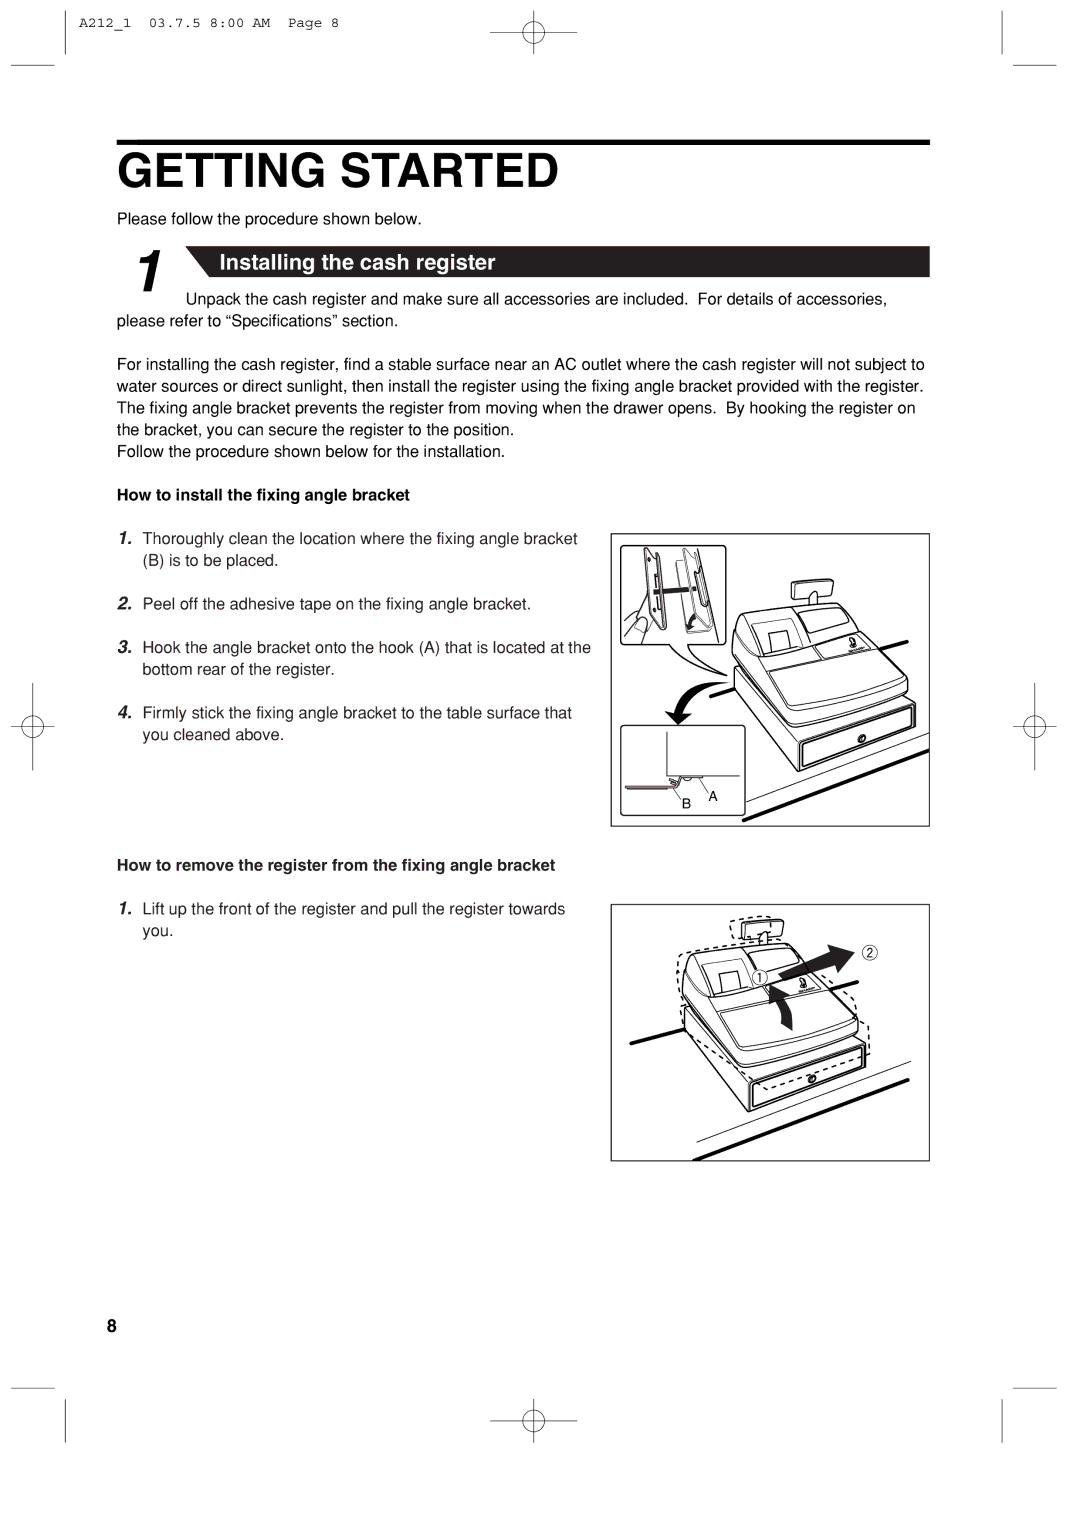
How to install the fixing angle bracket
1.Thoroughly clean the location where the fixing angle bracket
(B)is to be placed.
2.Peel off the adhesive tape on the fixing angle bracket.
3.Hook the angle bracket onto the hook (A) that is located at the bottom rear of the register.
4.Firmly stick the fixing angle bracket to the table surface that you cleaned above.
B | A |
|
How to remove the register from the fixing angle bracket
1.Lift up the front of the register and pull the register towards you.
8