A212_1 03.7.5 8:00 AM Page 10
4 | Installing a paper roll |
|
Precaution: The paper cutter is mounted on the printer cover. Take caution when removing and installing the cover.
The register can print receipts or journals. For the printer, you must install the paper roll provided with the register, even when you program the register for not printing receipts or journals.
Install the paper roll according to the procedure shown below with the AC cord connected and the mode switch set to the REG position:
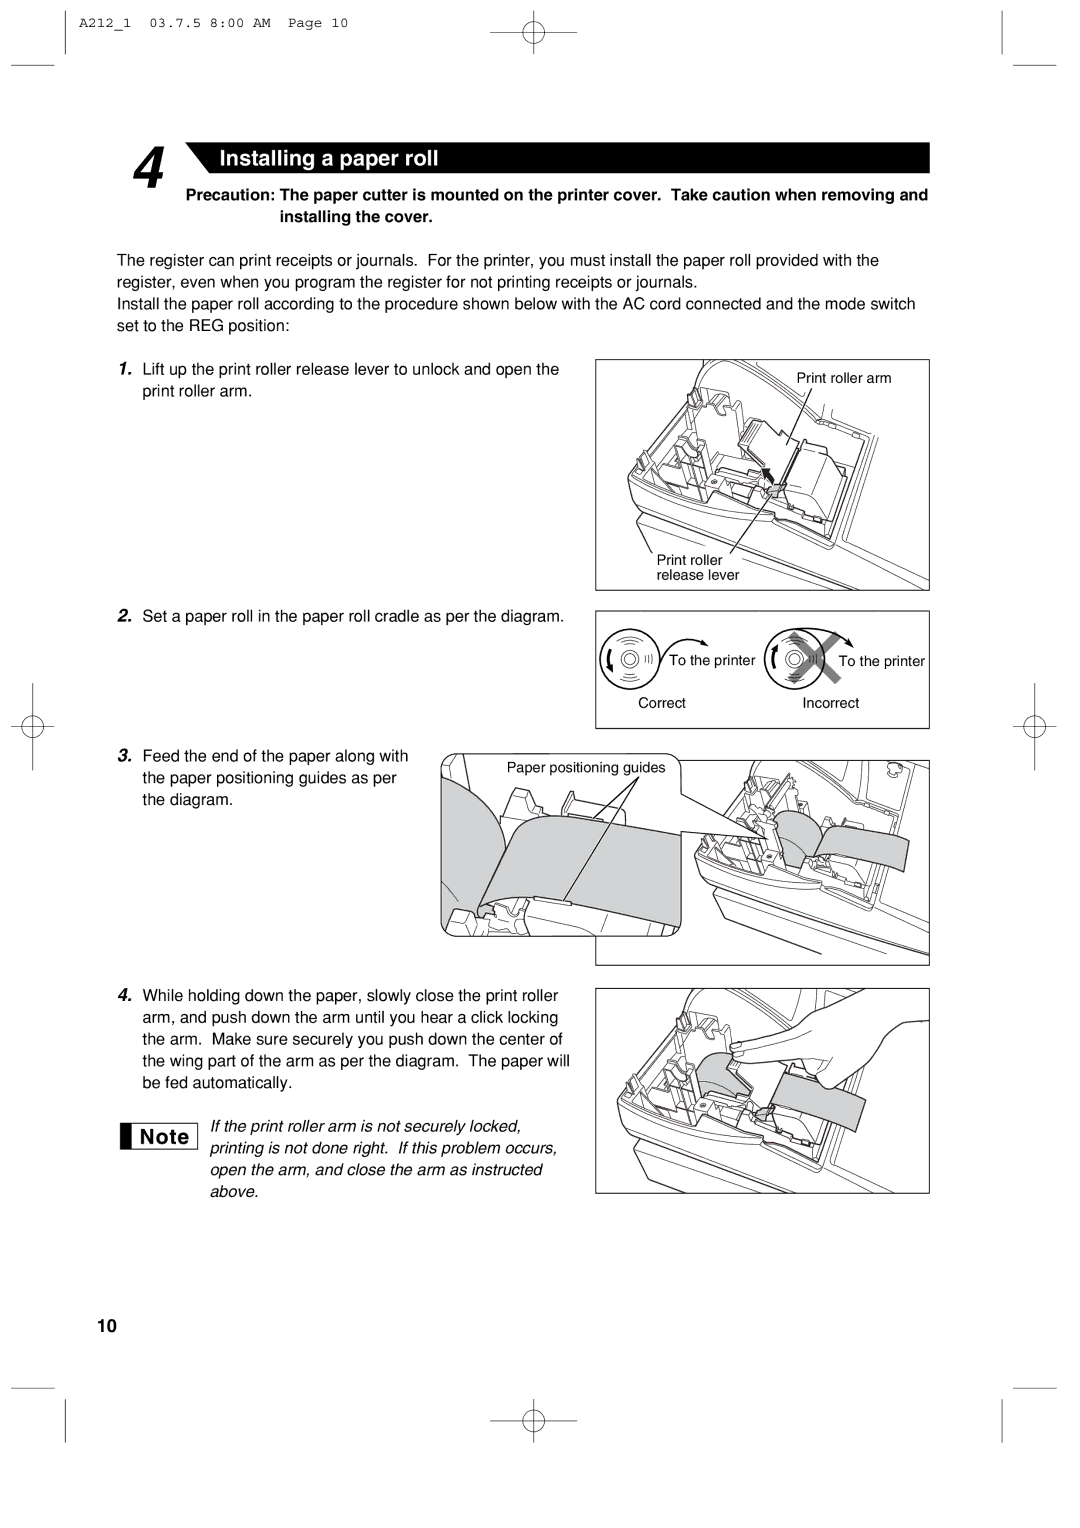
1.Lift up the print roller release lever to unlock and open the print roller arm.
Print roller arm |
Print roller |
release lever |
2.Set a paper roll in the paper roll cradle as per the diagram.
To the printer | To the printer |
Correct | Incorrect |
3. Feed the end of the paper along with |
|
Paper positioning guides |
|
the paper positioning guides as per |
|
the diagram. |
|
4.While holding down the paper, slowly close the print roller arm, and push down the arm until you hear a click locking the arm. Make sure securely you push down the center of the wing part of the arm as per the diagram. The paper will be fed automatically.
If the print roller arm is not securely locked, printing is not done right. If this problem occurs, open the arm, and close the arm as instructed above.
10