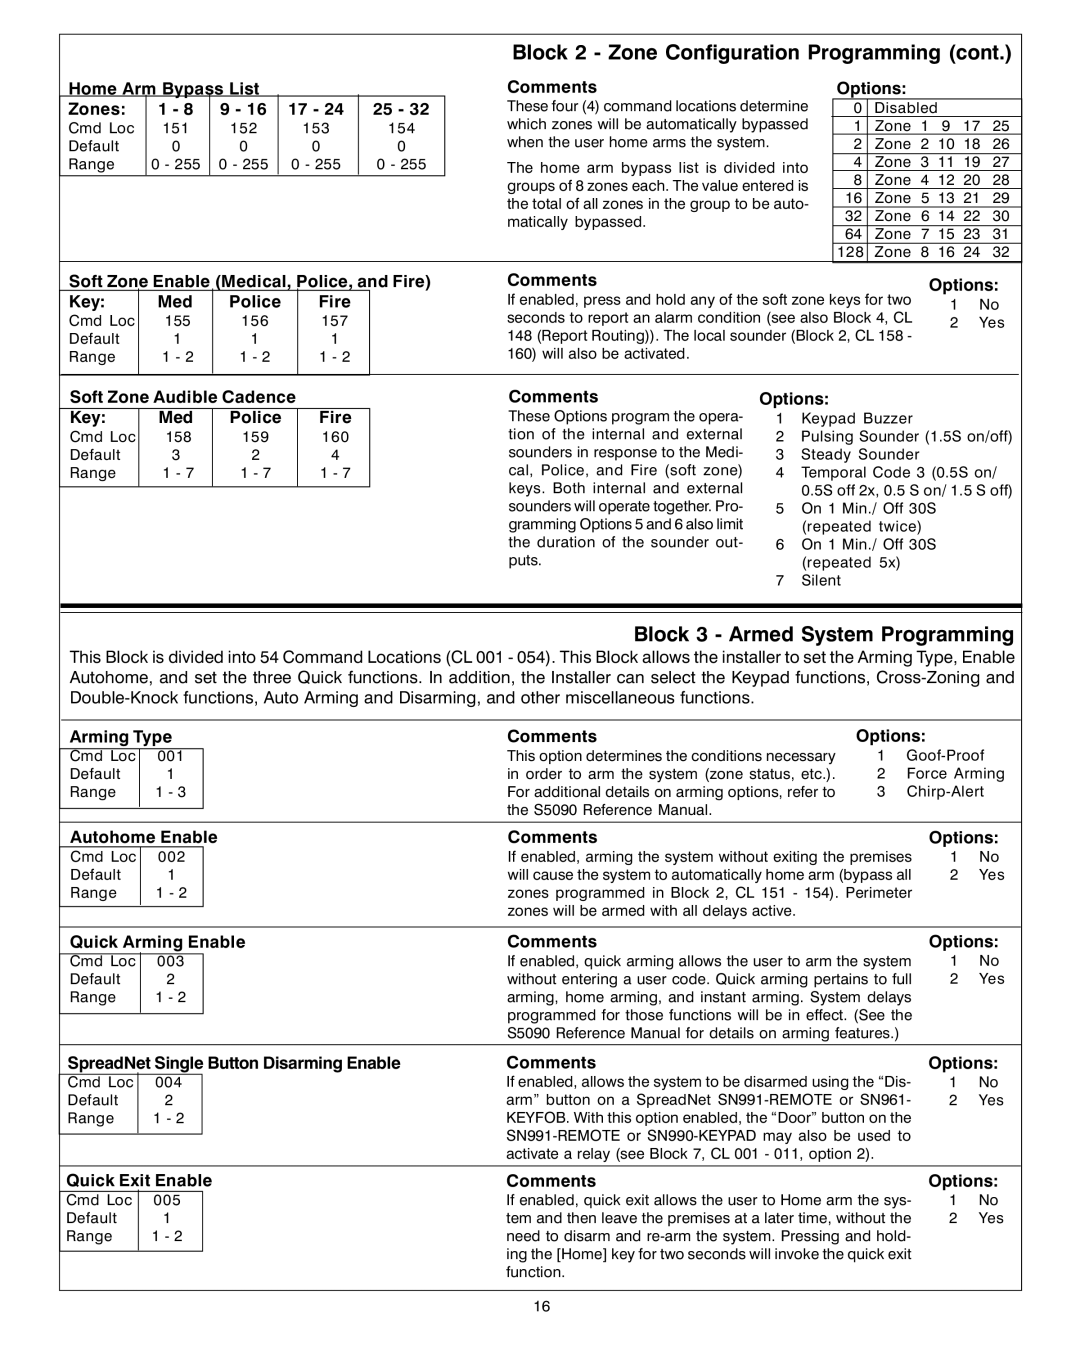
Block 2 - Zone Configuration Programming (cont.)
Home Arm Bypass List
Zones: | 1 - 8 | 9 - 16 | 17 - 24 | 25 - 32 |
Cmd Loc | 151 | 152 | 153 | 154 |
Default | 0 | 0 | 0 | 0 |
Range | 0 - 255 | 0 - 255 | 0 - 255 | 0 - 255 |
Comments
These four (4) command locations determine which zones will be automatically bypassed when the user home arms the system.
The home arm bypass list is divided into groups of 8 zones each. The value entered is the total of all zones in the group to be auto- matically bypassed.
Options:
0 | Disabled |
|
|
| |
1 | Zone 1 9 17 25 | ||||
2 | Zone | 2 | 10 | 18 | 26 |
4 | Zone | 3 | 11 | 19 | 27 |
8 | Zone | 4 | 12 | 20 | 28 |
16 | Zone | 5 | 13 | 21 | 29 |
32 | Zone | 6 | 14 | 22 | 30 |
64 | Zone | 7 | 15 | 23 | 31 |
128 | Zone | 8 | 16 | 24 | 32 |
Soft Zone Enable (Medical, Police, and Fire)
Key: | Med | Police | Fire |
Cmd Loc | 155 | 156 | 157 |
Default | 1 | 1 | 1 |
Range | 1 - 2 | 1 - 2 | 1 - 2 |
|
|
|
|
Comments
If enabled, press and hold any of the soft zone keys for two seconds to report an alarm condition (see also Block 4, CL 148 (Report Routing)). The local sounder (Block 2, CL 158 - 160) will also be activated.
Options:
1No
2 Yes
Soft Zone Audible Cadence |
| ||
Key: | Med | Police | Fire |
Cmd Loc | 158 | 159 | 160 |
Default | 3 | 2 | 4 |
Range | 1 - 7 | 1 - 7 | 1 - 7 |
|
|
|
|
Comments
These Options program the opera- tion of the internal and external sounders in response to the Medi- cal, Police, and Fire (soft zone) keys. Both internal and external sounders will operate together. Pro- gramming Options 5 and 6 also limit the duration of the sounder out- puts.
Options:
1Keypad Buzzer
2Pulsing Sounder (1.5S on/off)
3 Steady Sounder
4 Temporal Code 3 (0.5S on/
0.5S off 2x, 0.5 S on/ 1.5 S off)
5 On 1 Min./ Off 30S (repeated twice)
6 On 1 Min./ Off 30S (repeated 5x)
7 Silent
Block 3 - Armed System Programming
This Block is divided into 54 Command Locations (CL 001 - 054). This Block allows the installer to set the Arming Type, Enable Autohome, and set the three Quick functions. In addition, the Installer can select the Keypad functions,
Arming Type
Cmd Loc 001
Default 1
Range 1 - 3
Comments | Options: | |
This option determines the conditions necessary | 1 | |
in order to arm the system (zone status, etc.). | 2 | Force Arming |
For additional details on arming options, refer to | 3 | |
the S5090 Reference Manual. |
|
|
Autohome Enable | Comments | Options: | |||
Cmd Loc | 002 |
| If enabled, arming the system without exiting the premises | 1 | No |
Default | 1 |
| will cause the system to automatically home arm (bypass all | 2 | Yes |
Range | 1 - 2 |
| zones programmed in Block 2, CL 151 - 154). Perimeter |
|
|
|
|
| zones will be armed with all delays active. |
|
|
|
|
|
|
| |
Quick Arming Enable | Comments | Options: | |||
Cmd Loc | 003 |
| If enabled, quick arming allows the user to arm the system | 1 | No |
Default | 2 |
| without entering a user code. Quick arming pertains to full | 2 | Yes |
Range | 1 - 2 |
| arming, home arming, and instant arming. System delays |
|
|
|
|
| programmed for those functions will be in effect. (See the |
|
|
|
|
|
|
| |
|
|
| S5090 Reference Manual for details on arming features.) |
|
|
SpreadNet Single Button Disarming Enable | Comments | Options: | |||
Cmd Loc | 004 |
| If enabled, allows the system to be disarmed using the “Dis- | 1 | No |
Default | 2 |
| arm” button on a SpreadNet | 2 | Yes |
Range | 1 - 2 |
| KEYFOB. With this option enabled, the “Door” button on the |
|
|
|
|
|
|
| |
|
|
|
|
| |
|
|
| activate a relay (see Block 7, CL 001 - 011, option 2). |
|
|
Quick Exit Enable | Comments | Options: | |||
Cmd Loc | 005 |
| If enabled, quick exit allows the user to Home arm the sys- | 1 | No |
Default | 1 |
| tem and then leave the premises at a later time, without the | 2 | Yes |
Range | 1 - 2 |
| need to disarm and |
|
|
|
|
| ing the [Home] key for two seconds will invoke the quick exit |
|
|
|
|
|
|
| |
|
|
| function. |
|
|
16
