You can connect the camera to a computer equipped with the VISCA RS-232C connector instead of the connection to the RM-BR300 Remote Control Unit.

Note

When using the VISCA RS-232C connectors, check that the BOTTOM switch on the bottom of the camera (page 19) and the DIP switch on the bottom of the Remote Control Unit (page 23) are set to RS-232C.

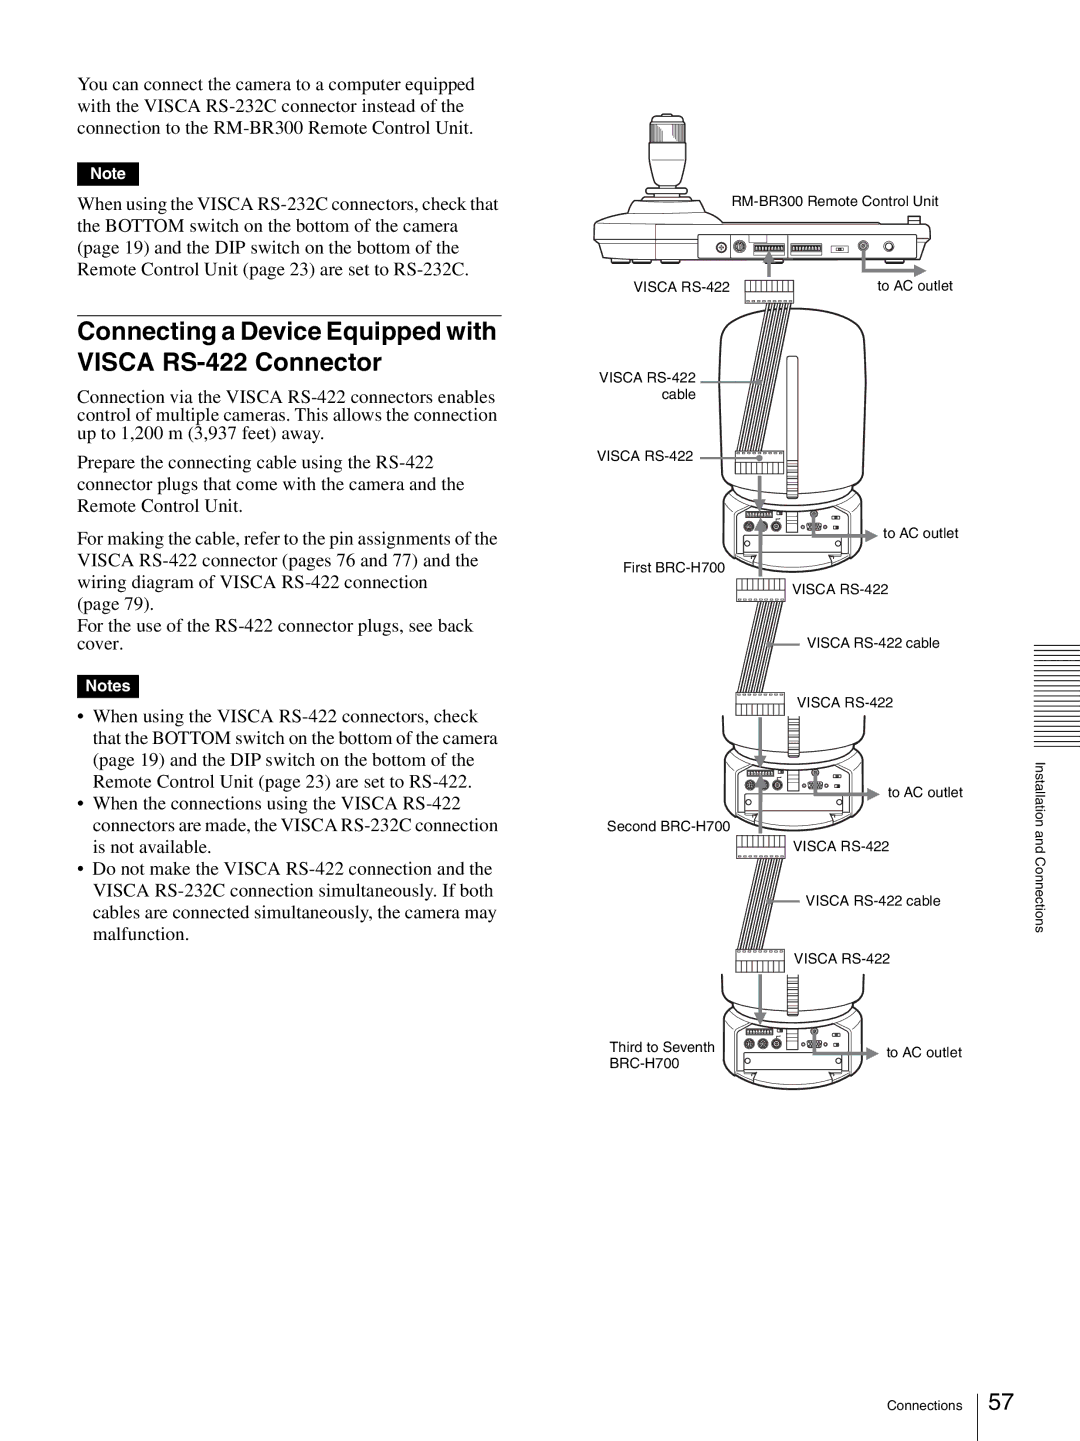
Connecting a Device Equipped with VISCA RS-422 Connector

Connection via the VISCA RS-422 connectors enables control of multiple cameras. This allows the connection up to 1,200 m (3,937 feet) away.

Prepare the connecting cable using the RS-422 connector plugs that come with the camera and the Remote Control Unit.

For making the cable, refer to the pin assignments of the VISCA RS-422 connector (pages 76 and 77) and the wiring diagram of VISCA RS-422 connection

(page 79).

For the use of the RS-422 connector plugs, see back cover.

Notes

When using the VISCA RS-422 connectors, check that the BOTTOM switch on the bottom of the camera (page 19) and the DIP switch on the bottom of the Remote Control Unit (page 23) are set to RS-422.

When the connections using the VISCA RS-422 connectors are made, the VISCA RS-232C connection is not available.

Do not make the VISCA RS-422 connection and the VISCA RS-232C connection simultaneously. If both cables are connected simultaneously, the camera may malfunction.

RM-BR300 Remote Control Unit

VISCA RS-422


to AC outlet


VISCA RS-422 cable

VISCA RS-422

to AC outlet

First BRC-H700

VISCA RS-422

VISCA RS-422 cable

VISCA RS-422

to AC outlet

Second BRC-H700 VISCA RS-422

VISCA RS-422 cable


VISCA RS-422

Third to Seventh

to AC outlet

BRC-H700


Installation and Connections

Connections

57

Page 57
Image 57
Sony HD 3CCD operating instructions Connecting a Device Equipped with Visca RS-422 Connector