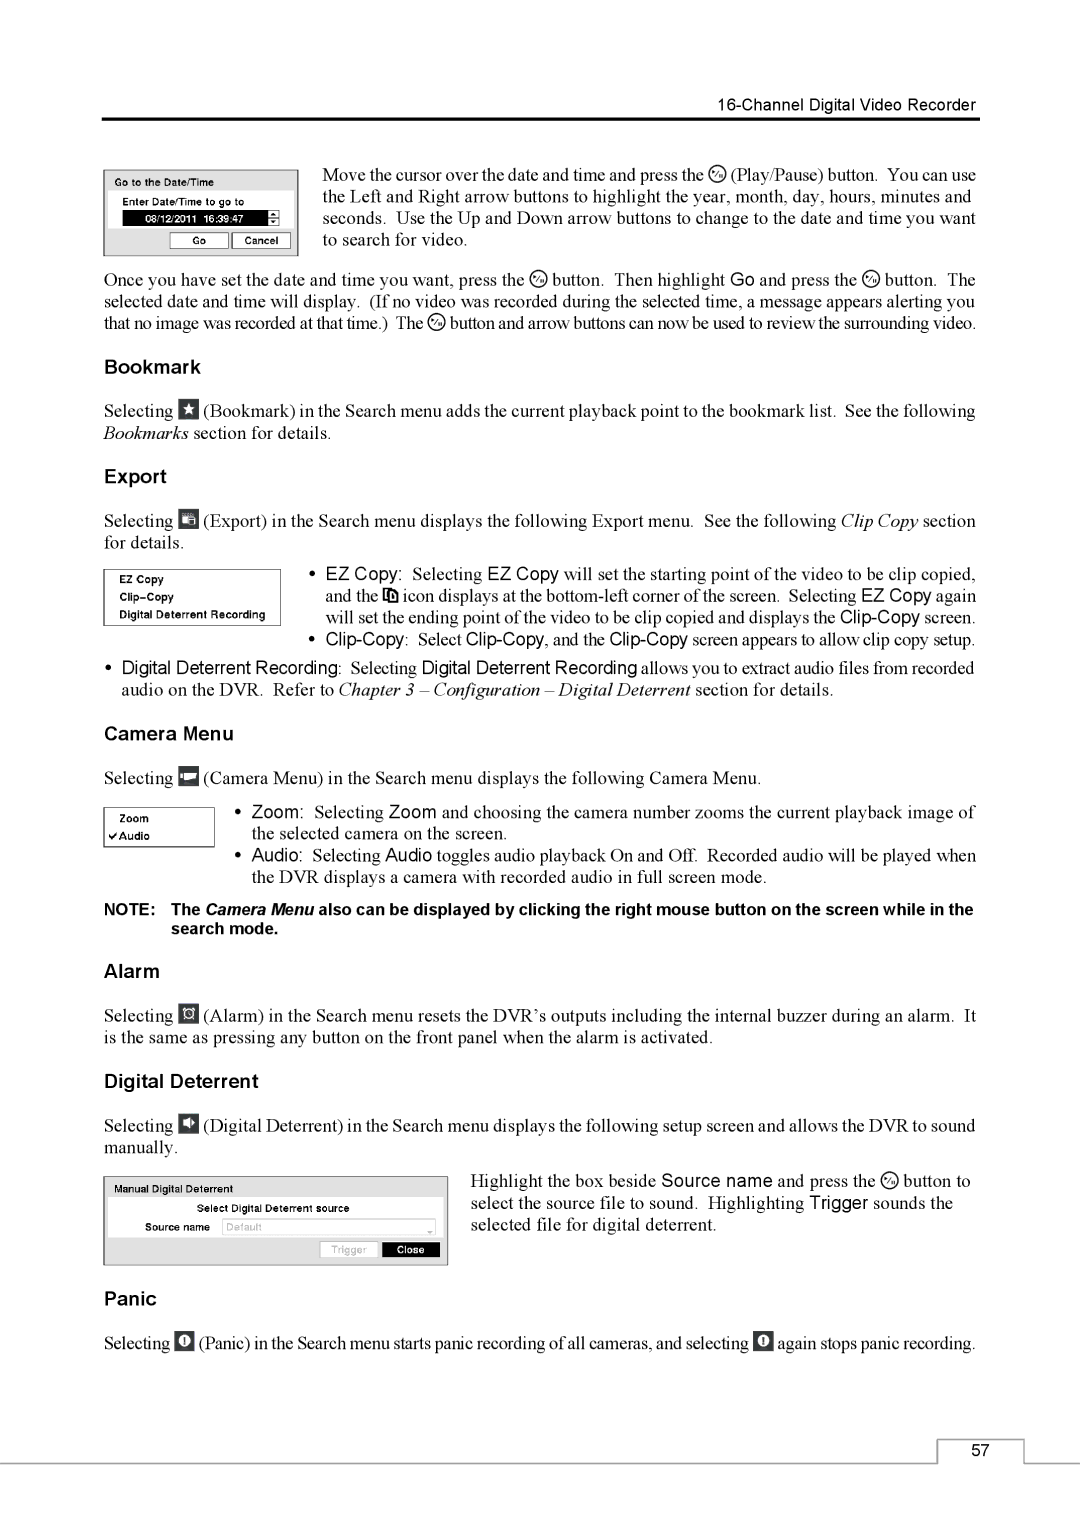
Move the cursor over the date and time and press the ![]() (Play/Pause) button. You can use the Left and Right arrow buttons to highlight the year, month, day, hours, minutes and seconds. Use the Up and Down arrow buttons to change to the date and time you want to search for video.
(Play/Pause) button. You can use the Left and Right arrow buttons to highlight the year, month, day, hours, minutes and seconds. Use the Up and Down arrow buttons to change to the date and time you want to search for video.
Once you have set the date and time you want, press the ![]() button. Then highlight Go and press the
button. Then highlight Go and press the ![]() button. The selected date and time will display. (If no video was recorded during the selected time, a message appears alerting you that no image was recorded at that time.) The
button. The selected date and time will display. (If no video was recorded during the selected time, a message appears alerting you that no image was recorded at that time.) The ![]() button and arrow buttons can now be used to review the surrounding video.
button and arrow buttons can now be used to review the surrounding video.
Bookmark
Selecting ![]() (Bookmark) in the Search menu adds the current playback point to the bookmark list. See the following Bookmarks section for details.
(Bookmark) in the Search menu adds the current playback point to the bookmark list. See the following Bookmarks section for details.
Export
Selecting ![]() (Export) in the Search menu displays the following Export menu. See the following Clip Copy section for details.
(Export) in the Search menu displays the following Export menu. See the following Clip Copy section for details.
EZ Copy: Selecting EZ Copy will set the starting point of the video to be clip copied, and the ![]() icon displays at the
icon displays at the
Digital Deterrent Recording: Selecting Digital Deterrent Recording allows you to extract audio files from recorded audio on the DVR. Refer to Chapter 3 – Configuration – Digital Deterrent section for details.
Camera Menu
Selecting ![]() (Camera Menu) in the Search menu displays the following Camera Menu.
(Camera Menu) in the Search menu displays the following Camera Menu.
Zoom: Selecting Zoom and choosing the camera number zooms the current playback image of the selected camera on the screen.
Audio: Selecting Audio toggles audio playback On and Off. Recorded audio will be played when the DVR displays a camera with recorded audio in full screen mode.
NOTE: The Camera Menu also can be displayed by clicking the right mouse button on the screen while in the search mode.
Alarm
Selecting ![]() (Alarm) in the Search menu resets the DVR’s outputs including the internal buzzer during an alarm. It is the same as pressing any button on the front panel when the alarm is activated.
(Alarm) in the Search menu resets the DVR’s outputs including the internal buzzer during an alarm. It is the same as pressing any button on the front panel when the alarm is activated.
Digital Deterrent
Selecting ![]() (Digital Deterrent) in the Search menu displays the following setup screen and allows the DVR to sound manually.
(Digital Deterrent) in the Search menu displays the following setup screen and allows the DVR to sound manually.
Highlight the box beside Source name and press the ![]() button to select the source file to sound. Highlighting Trigger sounds the selected file for digital deterrent.
button to select the source file to sound. Highlighting Trigger sounds the selected file for digital deterrent.
Panic
Selecting ![]() (Panic) in the Search menu starts panic recording of all cameras, and selecting
(Panic) in the Search menu starts panic recording of all cameras, and selecting ![]() again stops panic recording.
again stops panic recording.
57