Operation Instruction
The Mode box allows you to set how the alarm reacts during the scheduled time. When set to On, the
The Channels box allows you to set which alarm outputs will be active. You can also select the DVR’s internal buzzer.
The ![]() box allows you to delete an alarm output schedule. You will be asked to confirm whether or not you really wish to delete the schedule.
box allows you to delete an alarm output schedule. You will be asked to confirm whether or not you really wish to delete the schedule.
Digital Deterrent
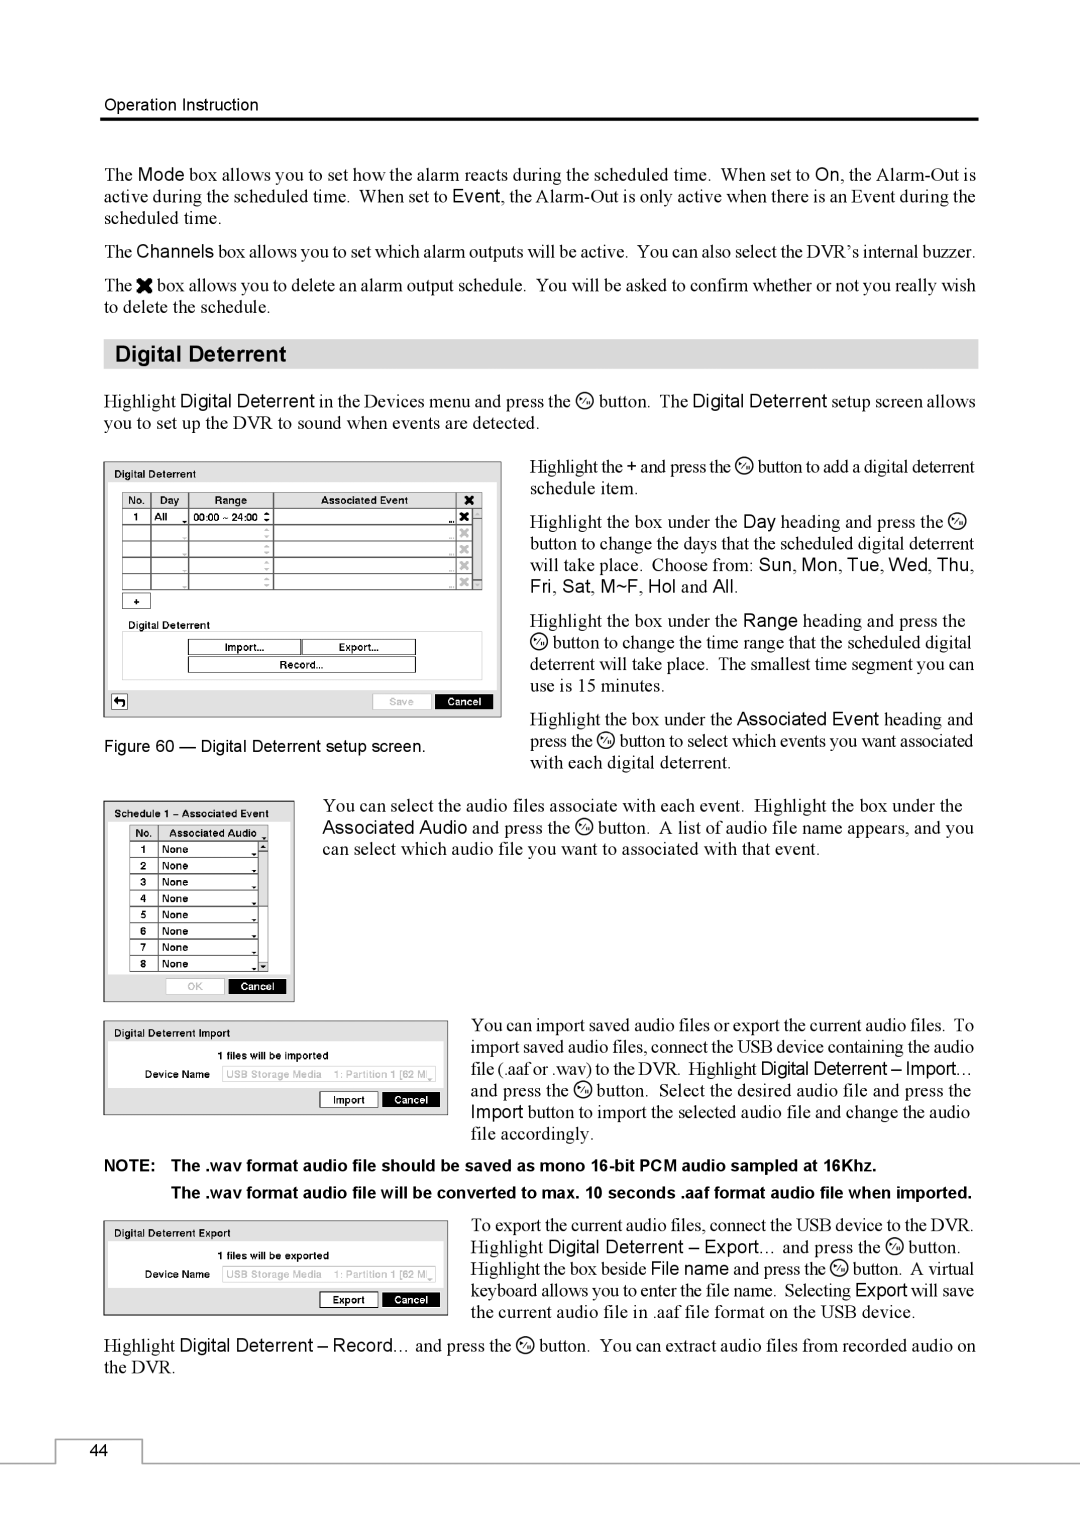
Highlight Digital Deterrent in the Devices menu and press the ![]() button. The Digital Deterrent setup screen allows you to set up the DVR to sound when events are detected.
button. The Digital Deterrent setup screen allows you to set up the DVR to sound when events are detected.
Highlight the + and press the ![]() button to add a digital deterrent schedule item.
button to add a digital deterrent schedule item.
Highlight the box under the Day heading and press the ![]() button to change the days that the scheduled digital deterrent will take place. Choose from: Sun, Mon, Tue, Wed, Thu, Fri, Sat, M~F, Hol and All.
button to change the days that the scheduled digital deterrent will take place. Choose from: Sun, Mon, Tue, Wed, Thu, Fri, Sat, M~F, Hol and All.
Highlight the box under the Range heading and press the ![]() button to change the time range that the scheduled digital deterrent will take place. The smallest time segment you can use is 15 minutes.
button to change the time range that the scheduled digital deterrent will take place. The smallest time segment you can use is 15 minutes.
Highlight the box under the Associated Event heading and
Figure 60 — Digital Deterrent setup screen.press the  button to select which events you want associated with each digital deterrent.
You can select the audio files associate with each event. Highlight the box under the Associated Audio and press the  button. A list of audio file name appears, and you can select which audio file you want to associated with that event.
You can import saved audio files or export the current audio files. To import saved audio files, connect the USB device containing the audio file (.aaf or .wav) to the DVR. Highlight Digital Deterrent – Import… and press the  button. Select the desired audio file and press the Import button to import the selected audio file and change the audio file accordingly.
NOTE: The .wav format audio file should be saved as mono
The .wav format audio file will be converted to max. 10 seconds .aaf format audio file when imported.
To export the current audio files, connect the USB device to the DVR. Highlight Digital Deterrent – Export… and press the ![]() button. Highlight the box beside File name and press the
button. Highlight the box beside File name and press the ![]() button. A virtual keyboard allows you to enter the file name. Selecting Export will save the current audio file in .aaf file format on the USB device.
button. A virtual keyboard allows you to enter the file name. Selecting Export will save the current audio file in .aaf file format on the USB device.
Highlight Digital Deterrent – Record… and press the ![]() button. You can extract audio files from recorded audio on the DVR.
button. You can extract audio files from recorded audio on the DVR.
44