Operation Instruction
Selecting ![]() or
or ![]() located at the bottom zooms the record table. Selecting
located at the bottom zooms the record table. Selecting ![]() displays eight hours
displays eight hours ![]() displays 24 hours
displays 24 hours
NOTE: If the DVR has images recorded in more than one recording mode in the same time range, the recording status bar displays recording information in the following priority order: Panic
Selecting ![]() located at the bottom displays the Calendar Search screen. See the following Calendar Search section for details.
located at the bottom displays the Calendar Search screen. See the following Calendar Search section for details.
Selecting ![]() located at the bottom displays the Search menu.
located at the bottom displays the Search menu.
Go To: Displays the first or last recorded image, or searches by date and time (see the previous Searching Video – Go To section of this chapter for more details).
Digital Deterrent Record: Extracts audio files from recorded audio on the DVR see Chapter 3
– Configuration – Digital Deterrent section for more details).
Zoom: Zooms the current playback image.
Slow Play: Plays video at low speed (x1/2, x1/3, x1/4, x1/6 and x1/8).
NOTE: Playing video at low speed will be supported for video recorded 10 images or more per second.
The individual playback controls at the bottom perform the following functions as described below:
Go to the previous image | Play/Pause | Go to the next image |
Fast backward play | Fast forward play |
|
Selecting ![]() located at the bottom displays the Bookmarks screen. See the following Bookmarks section for details. Selecting
located at the bottom displays the Bookmarks screen. See the following Bookmarks section for details. Selecting ![]() in the
in the
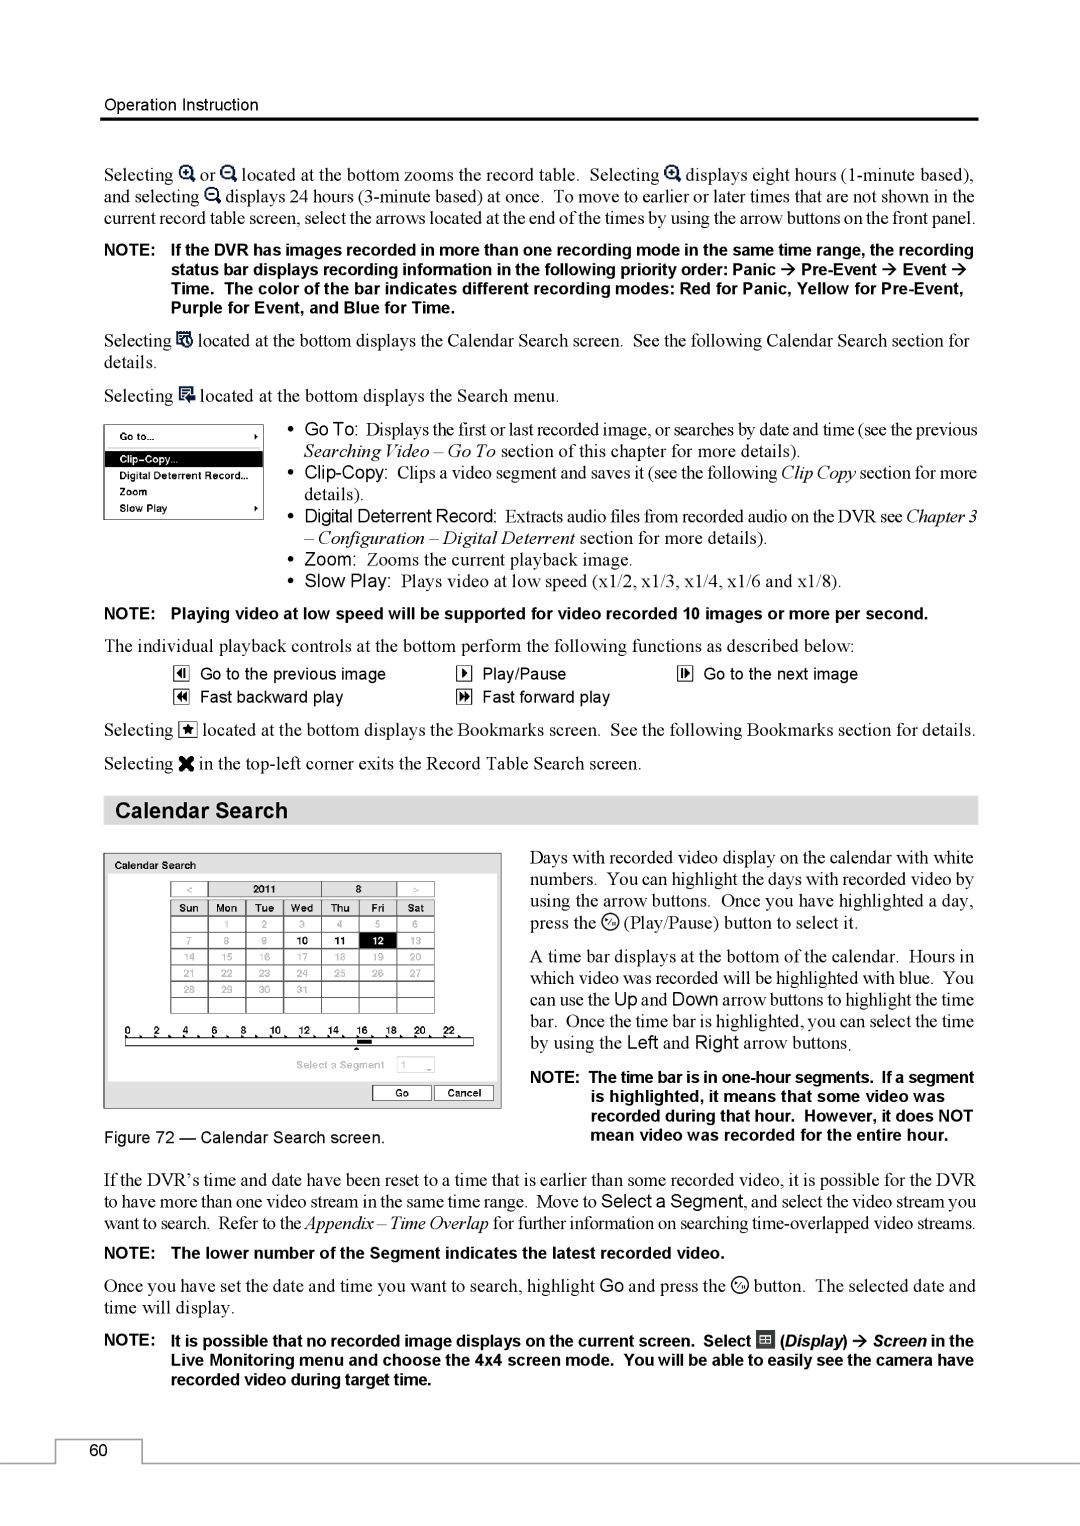
Calendar Search
Figure 72 — Calendar Search screen.
Days with recorded video display on the calendar with white numbers. You can highlight the days with recorded video by using the arrow buttons. Once you have highlighted a day, press the ![]() (Play/Pause) button to select it.
(Play/Pause) button to select it.
A time bar displays at the bottom of the calendar. Hours in which video was recorded will be highlighted with blue. You can use the Up and Down arrow buttons to highlight the time bar. Once the time bar is highlighted, you can select the time by using the Left and Right arrow buttons.
NOTE: The time bar is in
If the DVR’s time and date have been reset to a time that is earlier than some recorded video, it is possible for the DVR to have more than one video stream in the same time range. Move to Select a Segment, and select the video stream you want to search. Refer to the Appendix – Time Overlap for further information on searching
NOTE: The lower number of the Segment indicates the latest recorded video.
Once you have set the date and time you want to search, highlight Go and press the ![]() button. The selected date and time will display.
button. The selected date and time will display.
NOTE: It is possible that no recorded image displays on the current screen. Select ![]() (Display) Screen in the Live Monitoring menu and choose the 4x4 screen mode. You will be able to easily see the camera have recorded video during target time.
(Display) Screen in the Live Monitoring menu and choose the 4x4 screen mode. You will be able to easily see the camera have recorded video during target time.
60