Highlighting the Panic Recording – Quality and pressing the ![]() button allows you to set the recorded image quality for Panic recording. You can select from: Very High, High, Standard and Basic.
button allows you to set the recorded image quality for Panic recording. You can select from: Very High, High, Standard and Basic.
Highlighting the Panic Recording – Resolution and pressing the ![]() button allows you to set the recorded image resolution for Panic recording. You can select from: Very High (D1), High (Half D1) and Standard (CIF).
button allows you to set the recorded image resolution for Panic recording. You can select from: Very High (D1), High (Half D1) and Standard (CIF).
Schedule
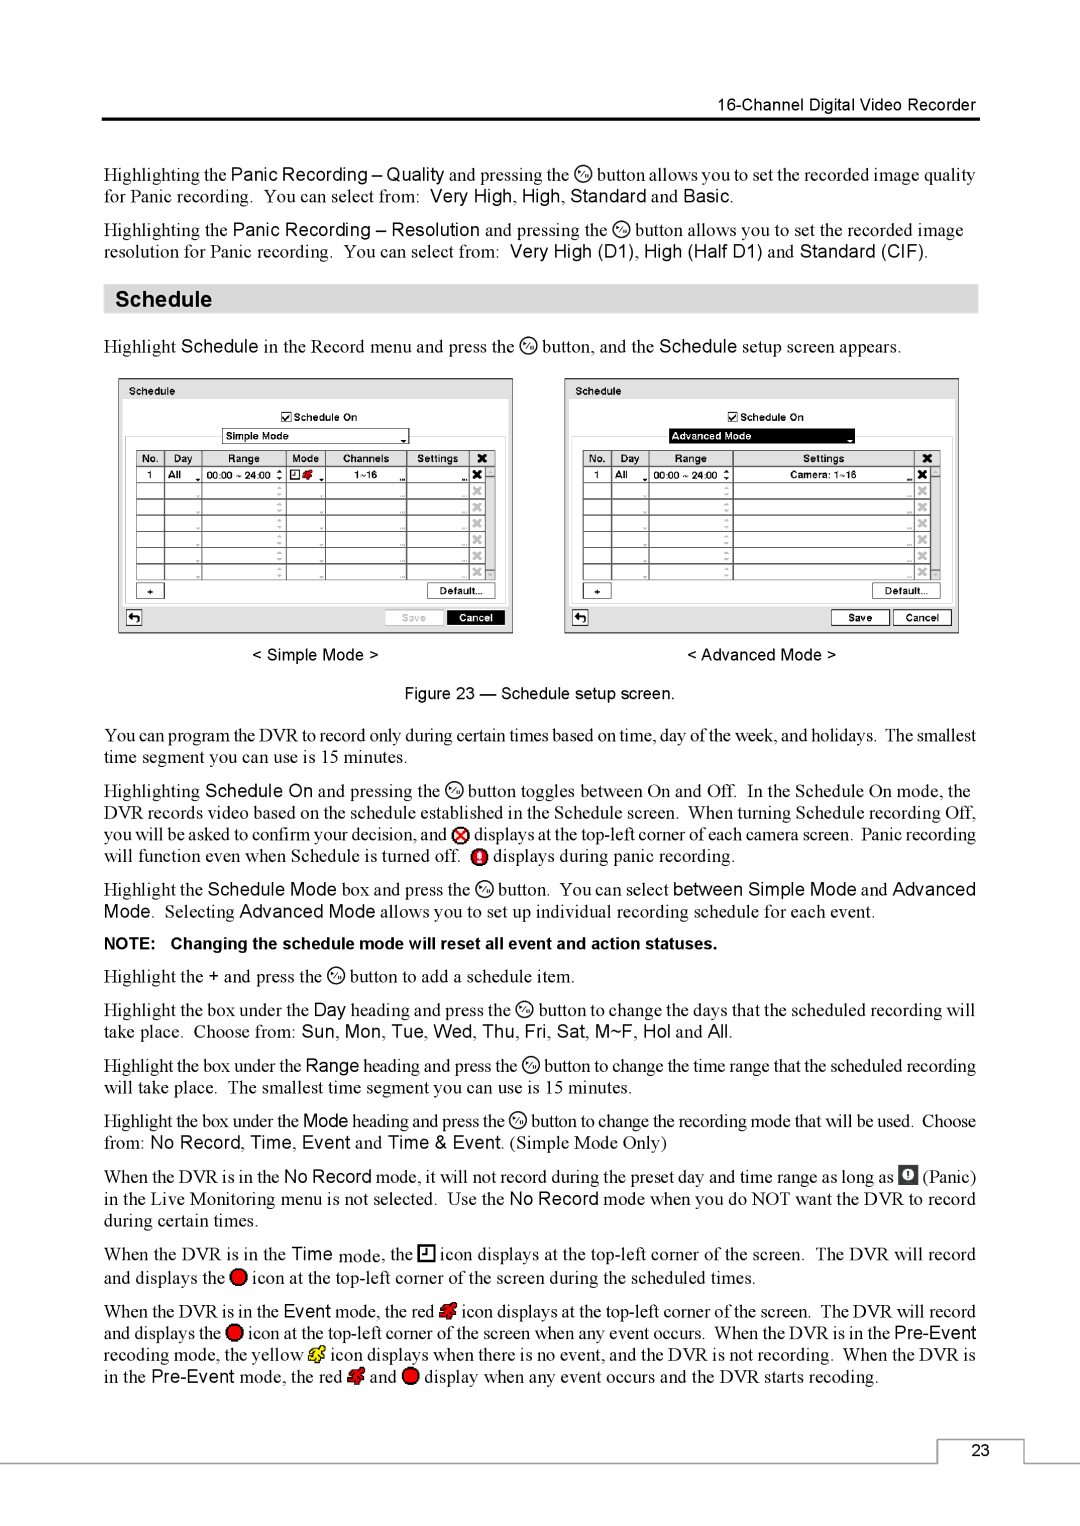
Highlight Schedule in the Record menu and press the ![]() button, and the Schedule setup screen appears.
button, and the Schedule setup screen appears.
< Simple Mode > | < Advanced Mode > |
Figure 23 — Schedule setup screen.
You can program the DVR to record only during certain times based on time, day of the week, and holidays. The smallest time segment you can use is 15 minutes.
Highlighting Schedule On and pressing the ![]() button toggles between On and Off. In the Schedule On mode, the DVR records video based on the schedule established in the Schedule screen. When turning Schedule recording Off, you will be asked to confirm your decision, and
button toggles between On and Off. In the Schedule On mode, the DVR records video based on the schedule established in the Schedule screen. When turning Schedule recording Off, you will be asked to confirm your decision, and ![]() displays at the
displays at the ![]() displays during panic recording.
displays during panic recording.
Highlight the Schedule Mode box and press the ![]() button. You can select between Simple Mode and Advanced Mode. Selecting Advanced Mode allows you to set up individual recording schedule for each event.
button. You can select between Simple Mode and Advanced Mode. Selecting Advanced Mode allows you to set up individual recording schedule for each event.
NOTE: Changing the schedule mode will reset all event and action statuses.
Highlight the + and press the ![]() button to add a schedule item.
button to add a schedule item.
Highlight the box under the Day heading and press the ![]() button to change the days that the scheduled recording will take place. Choose from: Sun, Mon, Tue, Wed, Thu, Fri, Sat, M~F, Hol and All.
button to change the days that the scheduled recording will take place. Choose from: Sun, Mon, Tue, Wed, Thu, Fri, Sat, M~F, Hol and All.
Highlight the box under the Range heading and press the ![]() button to change the time range that the scheduled recording will take place. The smallest time segment you can use is 15 minutes.
button to change the time range that the scheduled recording will take place. The smallest time segment you can use is 15 minutes.
Highlight the box under the Mode heading and press the ![]() button to change the recording mode that will be used. Choose from: No Record, Time, Event and Time & Event. (Simple Mode Only)
button to change the recording mode that will be used. Choose from: No Record, Time, Event and Time & Event. (Simple Mode Only)
When the DVR is in the No Record mode, it will not record during the preset day and time range as long as ![]() (Panic) in the Live Monitoring menu is not selected. Use the No Record mode when you do NOT want the DVR to record during certain times.
(Panic) in the Live Monitoring menu is not selected. Use the No Record mode when you do NOT want the DVR to record during certain times.
When the DVR is in the Time mode, the ![]() icon displays at the
icon displays at the ![]() icon at the
icon at the
When the DVR is in the Event mode, the red ![]() icon displays at the
icon displays at the ![]() icon at the
icon at the ![]() icon displays when there is no event, and the DVR is not recording. When the DVR is in the
icon displays when there is no event, and the DVR is not recording. When the DVR is in the ![]() and
and ![]() display when any event occurs and the DVR starts recoding.
display when any event occurs and the DVR starts recoding.
23