Setting up the output tray
When you print documents, this tray will keep your work in order.
Steps:
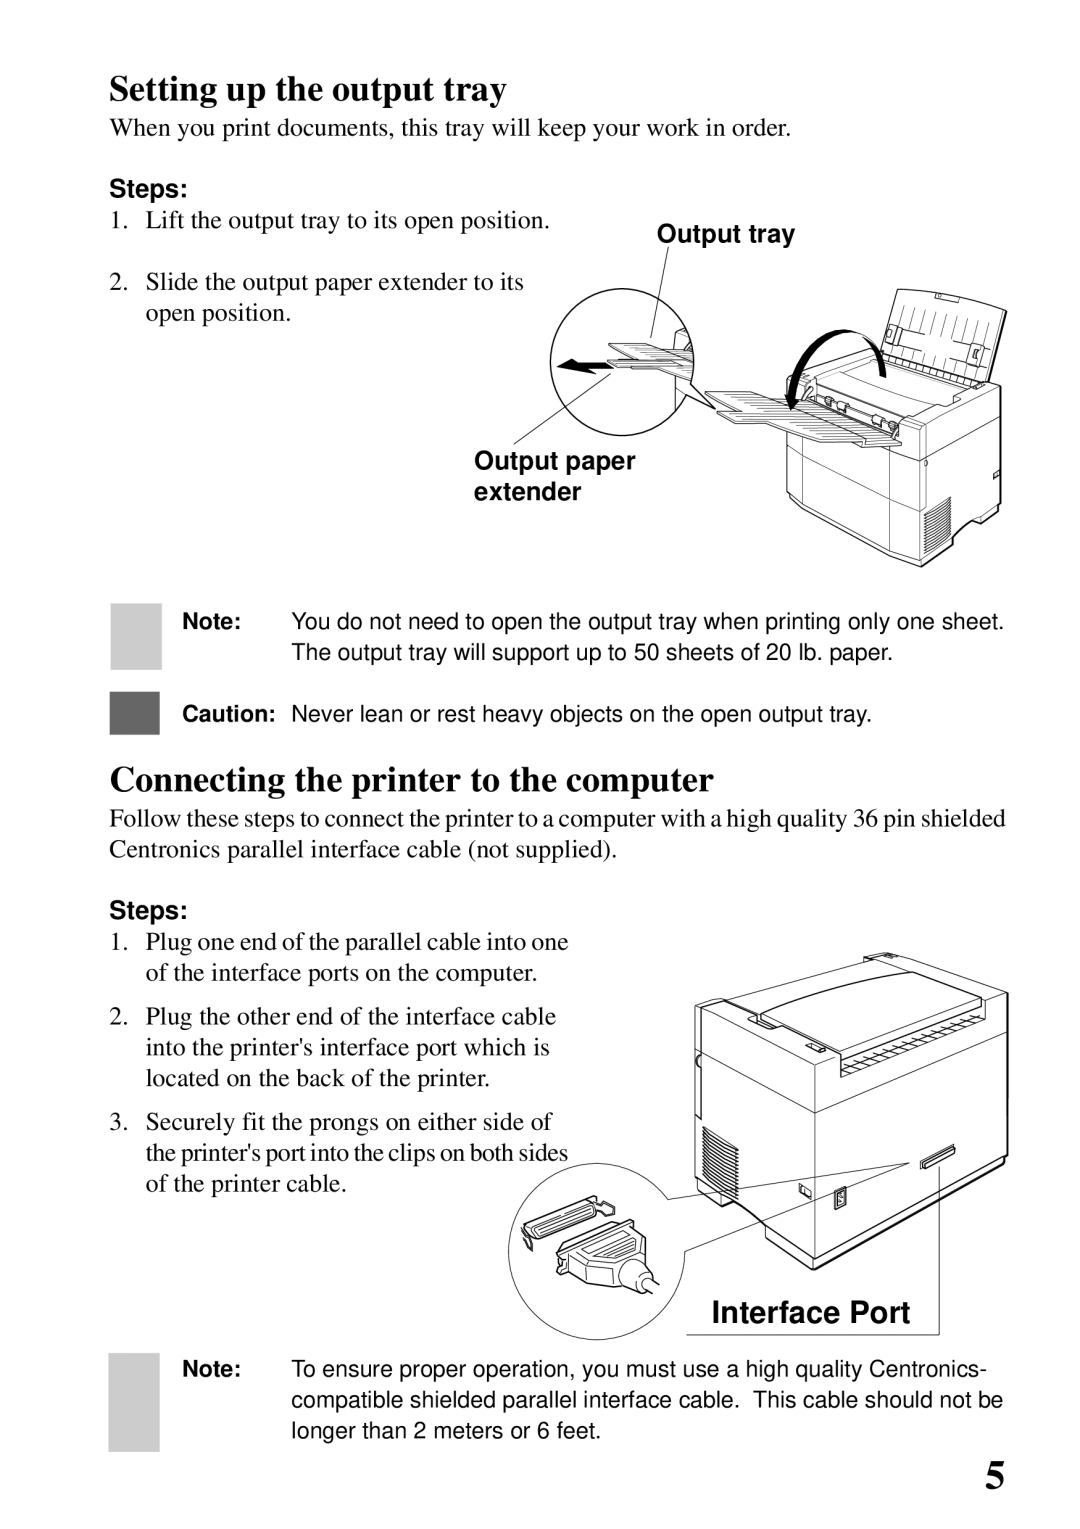
1. Lift the output tray to its open position.
2. Slide the output paper extender to its open position.
Output tray
Output paper extender
Note: You do not need to open the output tray when printing only one sheet.
The output tray will support up to 50 sheets of 20 lb. paper.
Caution: Never lean or rest heavy objects on the open output tray.
Connecting the printer to the computer
Follow these steps to connect the printer to a computer with a high quality 36 pin shielded Centronics parallel interface cable (not supplied).
Steps:
1.Plug one end of the parallel cable into one of the interface ports on the computer.
2.Plug the other end of the interface cable into the printer's interface port which is located on the back of the printer.
3.Securely fit the prongs on either side of the printer's port into the clips on both sides of the printer cable.
Interface Port |
Note: To ensure proper operation, you must use a high quality Centronics- compatible shielded parallel interface cable. This cable should not be longer than 2 meters or 6 feet.
5