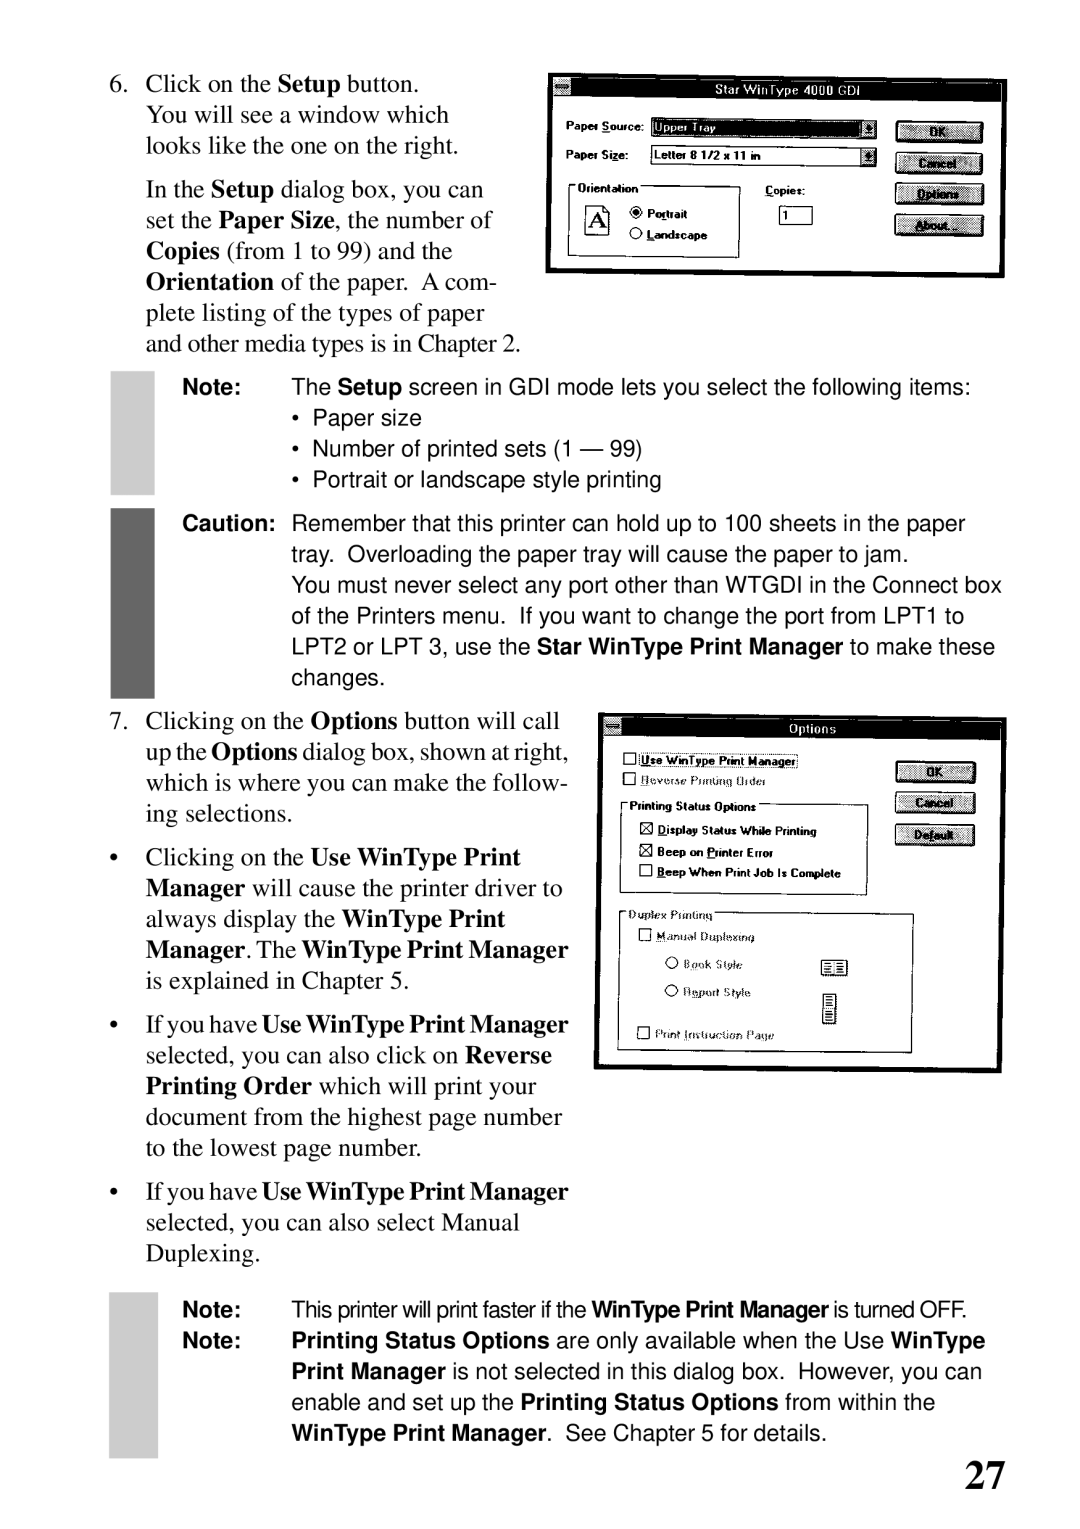
6.Click on the Setup button. You will see a window which looks like the one on the right.
In the Setup dialog box, you can set the Paper Size, the number of Copies (from 1 to 99) and the Orientation of the paper. A com- plete listing of the types of paper and other media types is in Chapter 2.
Note: The Setup screen in GDI mode lets you select the following items:
•Paper size
•Number of printed sets (1 — 99)
•Portrait or landscape style printing
Caution: Remember that this printer can hold up to 100 sheets in the paper tray. Overloading the paper tray will cause the paper to jam.
You must never select any port other than WTGDI in the Connect box of the Printers menu. If you want to change the port from LPT1 to LPT2 or LPT 3, use the Star WinType Print Manager to make these changes.
7.Clicking on the Options button will call up the Options dialog box, shown at right, which is where you can make the follow- ing selections.
•Clicking on the Use WinType Print Manager will cause the printer driver to always display the WinType Print Manager. The WinType Print Manager is explained in Chapter 5.
•If you have Use WinType Print Manager selected, you can also click on Reverse Printing Order which will print your document from the highest page number to the lowest page number.
•If you have Use WinType Print Manager selected, you can also select Manual Duplexing.
Note: This printer will print faster if the WinType Print Manager is turned OFF.
Note: Printing Status Options are only available when the Use WinType Print Manager is not selected in this dialog box. However, you can enable and set up the Printing Status Options from within the WinType Print Manager. See Chapter 5 for details.
27
