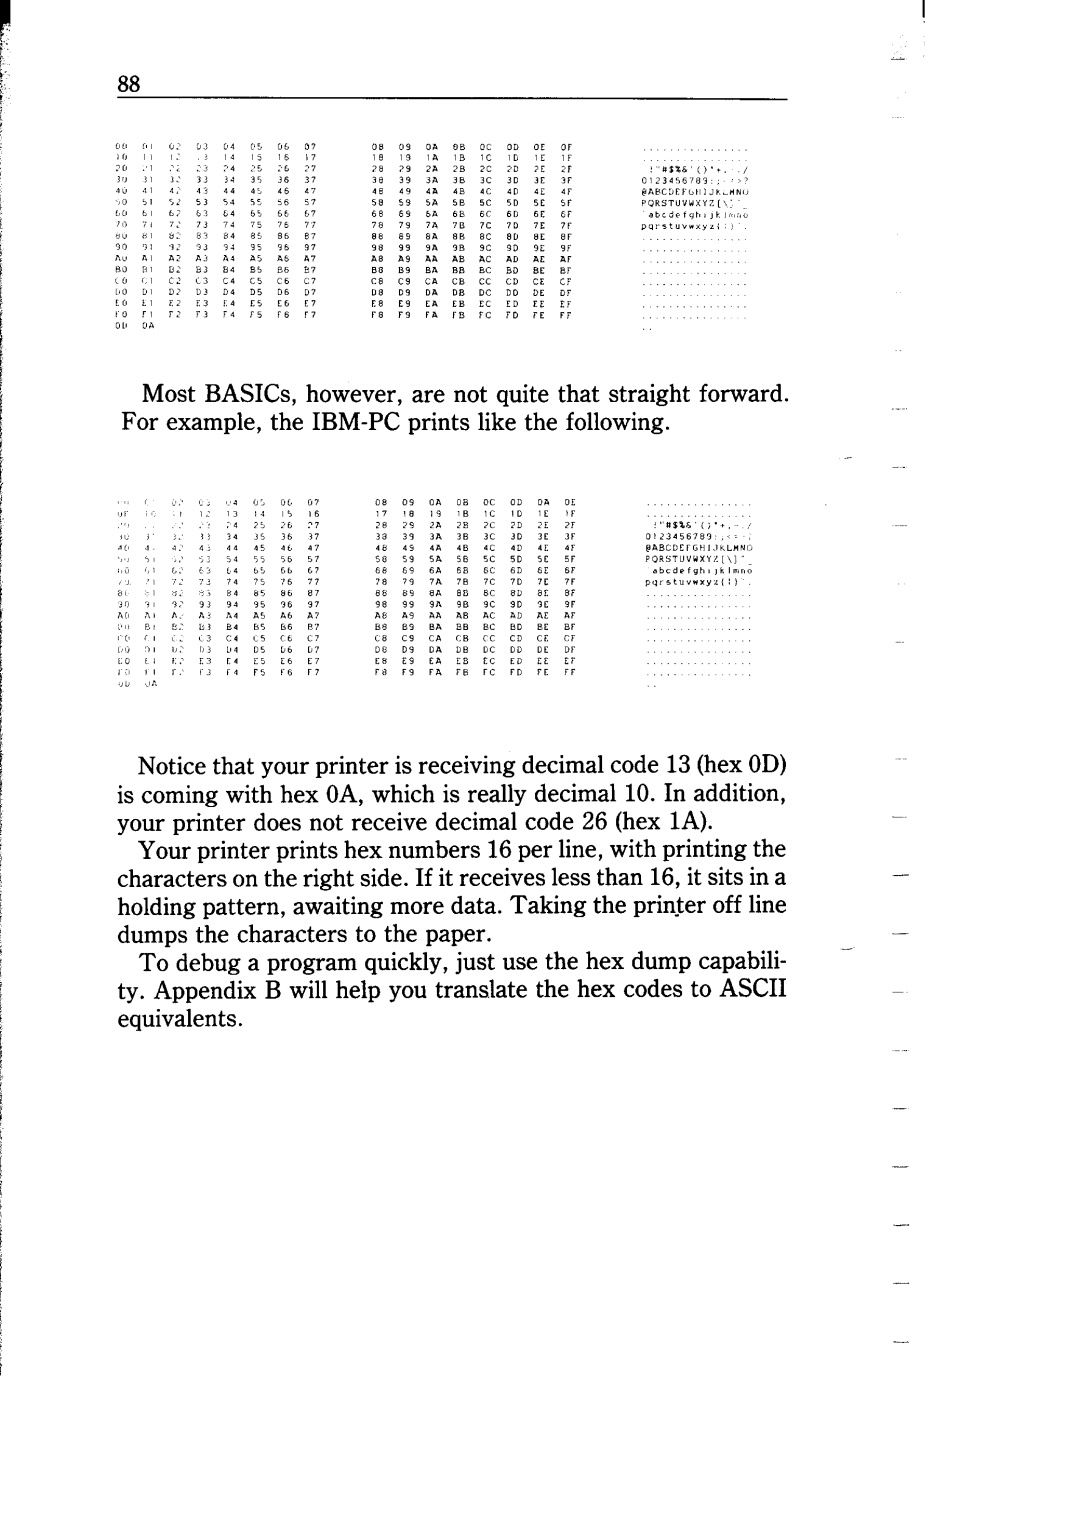
USER’S MANUAli
NOT INTENDED FOR SALE PN
3 tatement
Self Declaration
Trademark Acknowledgement
A Special Message to the New Owner
Table of Contents
Setting Up Your Printer
Using Commercial Software
Chapter Chapter Chapter
Chapter
Controlling with BASIC
Chapter Chapter
Printing Text
Special Features of the Printer
Adjusting the width of space between characters
Chapter Chapter
Creating Your Own Characters
Appendix A DIP Switch Settings
Appendix B ASCII Codes and Conversion Chart Appendix C Function Codes
Appendix D Command Summary in Numeric 191 Order
Technical Specifications
Appendix G Serial Interface Specifications
Appendix H Connecting with Computer
SETTING UP YOUR PRINTER
CHAPTER
Setting it up
Subjects we’ll cover in Chapter 1 include
Removing the printer cover
tion and movement for both removing and replacing the cover
n Installing the platen knob
n Installing the ribbon cartridge
Or, if you feel better following written instructions, read on
Page
n Installing the mute cover
W Installing the interface board
n Installing the font cartridge
GETTING TO KNOW YOUR PRINTER
Parts of the printer - what they’re for and how to use them
Paper selection and loading Adjustment Testing printer operation
CHAPTER
Figure 2-1. Front and rear views of the printer
H Controls and indicators
Figure 2-2. The control panel
Turning the knob with the power on could damage the - drive gears
n Extra functions
For details, please refer to the end of this chapter n Other controls
It has four settings
n Loading single sheets
L L L L L L
To align paper that is not in straight
Figure 2-7. Open the sprocket covers to expose the sprocket teeth
pigure 2-8. Ready to run with sprocket-feed paper
Sprocket cover
paper guide
While trrnirrgon the power
EXTRA FUNCTIONS WITH THE COUTRUL PANEL
n Self-tests
Paper Feed key-Self-test 1 long On Line key-Self-test 2 short
1. Plug in the printer don’t turn it on yet
2. Insert a sheet of paper, as you did for the self-tests
n Panel modes
1. Plug in the printer don’t turn it on yet
During normal operation
CONNECTING THE PRINTER
Figure 2- 14. Connect the cable like thm
I. Make sure that both your computer and printer are turn- ed off
MEMO
USING COMMERCIAL SOFTWARE
CHAPTER
Using your printer with SuperCalc
Using your printer with word processors
n First, some terminology
USING YOUR PRINTER WITH SUPERCALC
are now available. It has the capability of using several of the ad
Page
MEMO
CONTROLLING WITH BASIC
CHAPTfiR
CHR$ function Command syntax Problem codes
Subjects we’ll cover in Chapter 4 include
LPRINT things other than character strings
Let’s try what we learned. Type the following
ESC “W”
ending with
MEMO
PRINTING TEXT
CHAPTER
Subjects we’ll cover in Chapter 5 include
Letter quality LQ characters Underlining and overlining
20 LPRINT CHR$27 xl
Font selection commands
This line shows Font 2 characters
Function
Control code
Underline and overline commands
100 LPRINT ” printing.”
printing
1Function
10 Demo of boldface
30 LPRINT “This line is BOLDFACE printing 40 LPRINT CHR$27F
50 LPRINT This line is normal printing
This line is BOLDFACE printing This line is normal printing
Superscript ON
Try this program to see how these two pitches work
mode
Permanentexpanded modestayson until
Condensed
CHR$15orESCCHR$15
CHR$18
Here’s what you should get from this program
MIXING PRINT MODES
Proportional
print
1 Pica is the default pitch and is active when Elite is turned off
Summary notes
MEMO
CHAPTER
Setting margins- left, right, and bottom
FORMATTING TEXT
The amount of space between lines Moving to the next page
print head to the left margin, ready to start a new line
Line 40 defines and changes the line spacing. The command ESC“A”CHR$n defines the line spacing as n/60 of an inch the ESC“2” command changes the line spacing to the amount defined by the previous ESC“A”. The loop that is started in line 20 increases the value of n the variable I in the program each time it is executed. So the line spacing increases as the pro- gram continues. Line 30 shortcuts the loop when I = 13, since BASIC won’t let us send CHR$l3 without adding an unwanted CHR$lO to it. Finally, the ESC“A”CHR$lO and ESC“2” commands in line 80 reset the line spacing to 6 lines per inch IO/60 or l/6 inch
The results are the same as previous one
n Moving down the page without a carriage return
40 ’ One-time reverse line feed 50 LPRINT CHR$27“j”CHR$lOO
OI IOI
ESC“N”CHR$n
50 FOR I=1 TO 60 LPRINT THIS IS LINE1 70 NEXT
90 LPRINT CHR$lZ Form feed 100 END
20 ’ Leave 6 blank lines at the bottom of page 30 LPRINT CHR$27NCHR$6
80 LPRINT CHR$270 Clear bottom margin
THIS IS LINE THIS IS LINE THIS IS LINE I THIS IS LINE THIS IS LINE
Try setting the margins with this program
HORIZONTAL AND VERTICAL TABS
When you run the program now it produces this
Absolute horizontal tab Relative horizontal tab
Try thisprogram tosee how this works
n Vertical tabs
Vertical tabs have the same kinds of uses that horizontal tabs
10 ’ Demo of vertical tabs 40 LPRINT CHR$11 “FIRST TAB.”
80 LPRINT CHR$llFIFTH TAB
W Vertical tab channels
CHRSO
120 LPRINT “2ND TAB OF CHANNEL’ 130 LPRINT CHR$12 140 NEXT
MEMO
SPECIAL FEATURES OF THE PRINTER
Printer’s bell Master reset Uni-directional printing
CHAPTER
Subjects we’ll cover in Chapter 7 include
You can try this by typing
n Backspace, delete, and cancel text
Here is what this program will print
Now add this line
This command can be used to produce micro-justification
10 ’ Uni-directional printing 20 LPRINT CHR$27“A”CHR$6
power on condition
10 LPRINTCHR$270 20 LPRINTCHR$276 30 FOR J=3 TO
134 a
159 f
164 A
169 c
15 LPRINTCHR$27 95 LPRINTCHR$27=
Double-highenlargedprint ESC“h”CHR$l
DOUBLE
THIS IS QUAI SIZED PRINTING
ESCCHR$25 CHR$4 or “4”
ESCCHR$25 CHR$l or “1”
ESCCHR$25“R” or “R”
10 FOR I=0 TO
30 NEXT 40 LPRINT 50 END
Page
CREATING YOUR OWN CHARACTERS
CHAPTER
Subjects we’ll cover in Chapter 8 include
Designing your own characters Printing your own characters
O0 O0 O0 O0 O0 O0 O0 O0
OO OO
THE PRINT MATRIX
design and download into the printer. When download
n Rule 1 Dots cannot overlap
WRONG
1.igure8-s
Uotscannotoverlapthoseinimmediatelyadjacent
123458789
dots, the printhead would have to slow down and back up to
n Assigningavalueofcharacterspace
Figure 8-8. Characterdesignsforthetwographsymbols
n Download character definition command
ESC “&” CHR$O nl n2 m0 ml m2 dl d2 d3 ... dx
CHR$27CHR$38CHR$OCHR$6OCHR$6O CHR$lCHR$9CHR$2CHR$lCHR$24OCHR$O
10 LPRINT CHR$27“%l”CHR$O 20 LPRINTCHR$60CHR$61
30 LPRINTCHR$27“$O”CHR$O 40 END
10 LPRINTCHR$27“%1”CHR$O 20 FOR I=32TO 30 LPRINTCHR$I 40 NEXT
50 LPRINT 60 FOR I=160 TO 70 LPRINT CHR$I 80 NEXT 90 LPRINT
Ithat
102 370 LPRINT 380 LPRINTCHR$9 390 FOR I=0 TO 488 STEP
400 LPRINTCHR$61 410 NEXT 420 LPRINT 430 LPRINTJAPANCHRSg
440 FOR I=0 TO 347 STEP 450 LPRINTCHR$60 460 NEXT 470 LPRINT
480 LPRINTCHR$9 490 FOR I=0 TO 493 STEP 500 LPRINTCHR$61 510 NEXT
90 DATA 1, 9, 2, 31,253,64, 32, 1,128,80
mO+ml +m2
Draft characters
Letter Qualitv characters
n Draft download characters
than draft characters the same is true of LQ download characters
MEMO