Prestige 642R Series ADSL Router
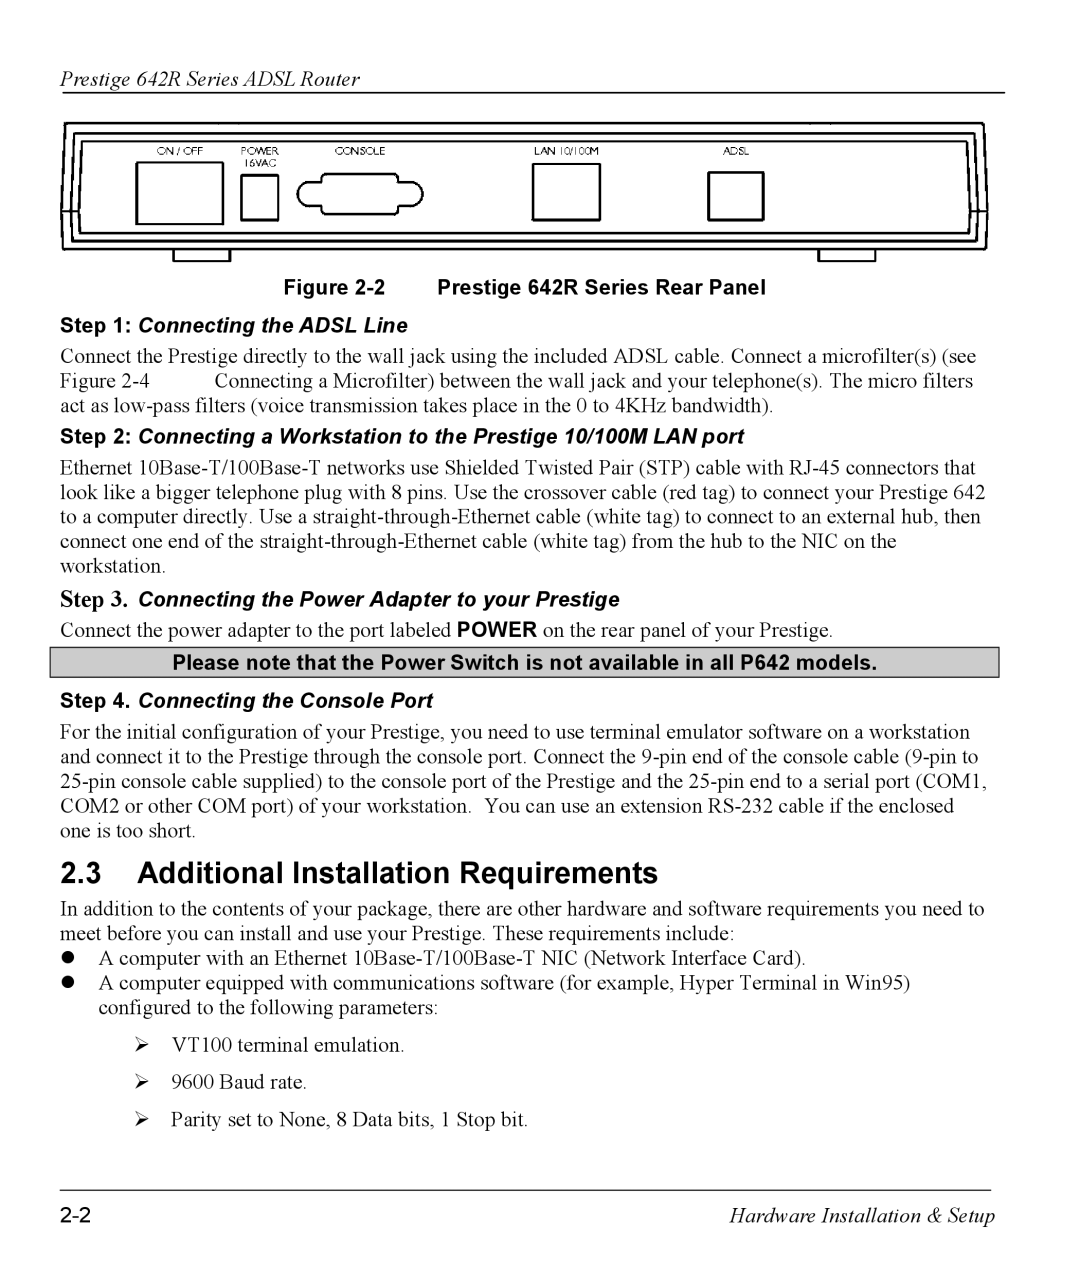
Figure 2-2 Prestige 642R Series Rear Panel
Step 1: Connecting the ADSL Line
Connect the Prestige directly to the wall jack using the included ADSL cable. Connect a microfilter(s) (see
Figure 2-4 Connecting a Microfilter) between the wall jack and your telephone(s). The micro filters act as low-pass filters (voice transmission takes place in the 0 to 4KHz bandwidth).
Step 2: Connecting a Workstation to the Prestige 10/100M LAN port
Ethernet
Connecting the Power Adapter to your Prestige
Connect the power adapter to the port labeled POWER on the rear panel of your Prestige.
Please note that the Power Switch is not available in all P642 models.
Step 4. Connecting the Console Port
For the initial configuration of your Prestige, you need to use terminal emulator software on a workstation and connect it to the Prestige through the console port. Connect the
2.3Additional Installation Requirements
In addition to the contents of your package, there are other hardware and software requirements you need to meet before you can install and use your Prestige. These requirements include:
zA computer with an Ethernet
zA computer equipped with communications software (for example, Hyper Terminal in Win95) configured to the following parameters:
¾VT100 terminal emulation.
¾9600 Baud rate.
¾Parity set to None, 8 Data bits, 1 Stop bit.
Hardware Installation & Setup |