36CHAPTER 4: RUNNING THE SETUP WIZARD
To assign a fixed IP address:
1Enter your Internet IP address in the WAN IP field.
2Enter the subnet mask in the Subnet Mask field.
3Enter the default gateway IP address in the Default Gateway field.
4Enter the DNS address in the DNS field.
5Enter your VPI and VCI information in the VPI/VCI text boxes.
6Select the encapsulation type (LLC or VC MUX) in the Encapsulation
7Check all of your settings, and then click Next.
The LAN Settings screen will then be displayed (refer to Figure 24).
Setup Wizard - LAN The LAN Settings screen allows you to set the default IP address and Settings DHCP client IP range for the Router.
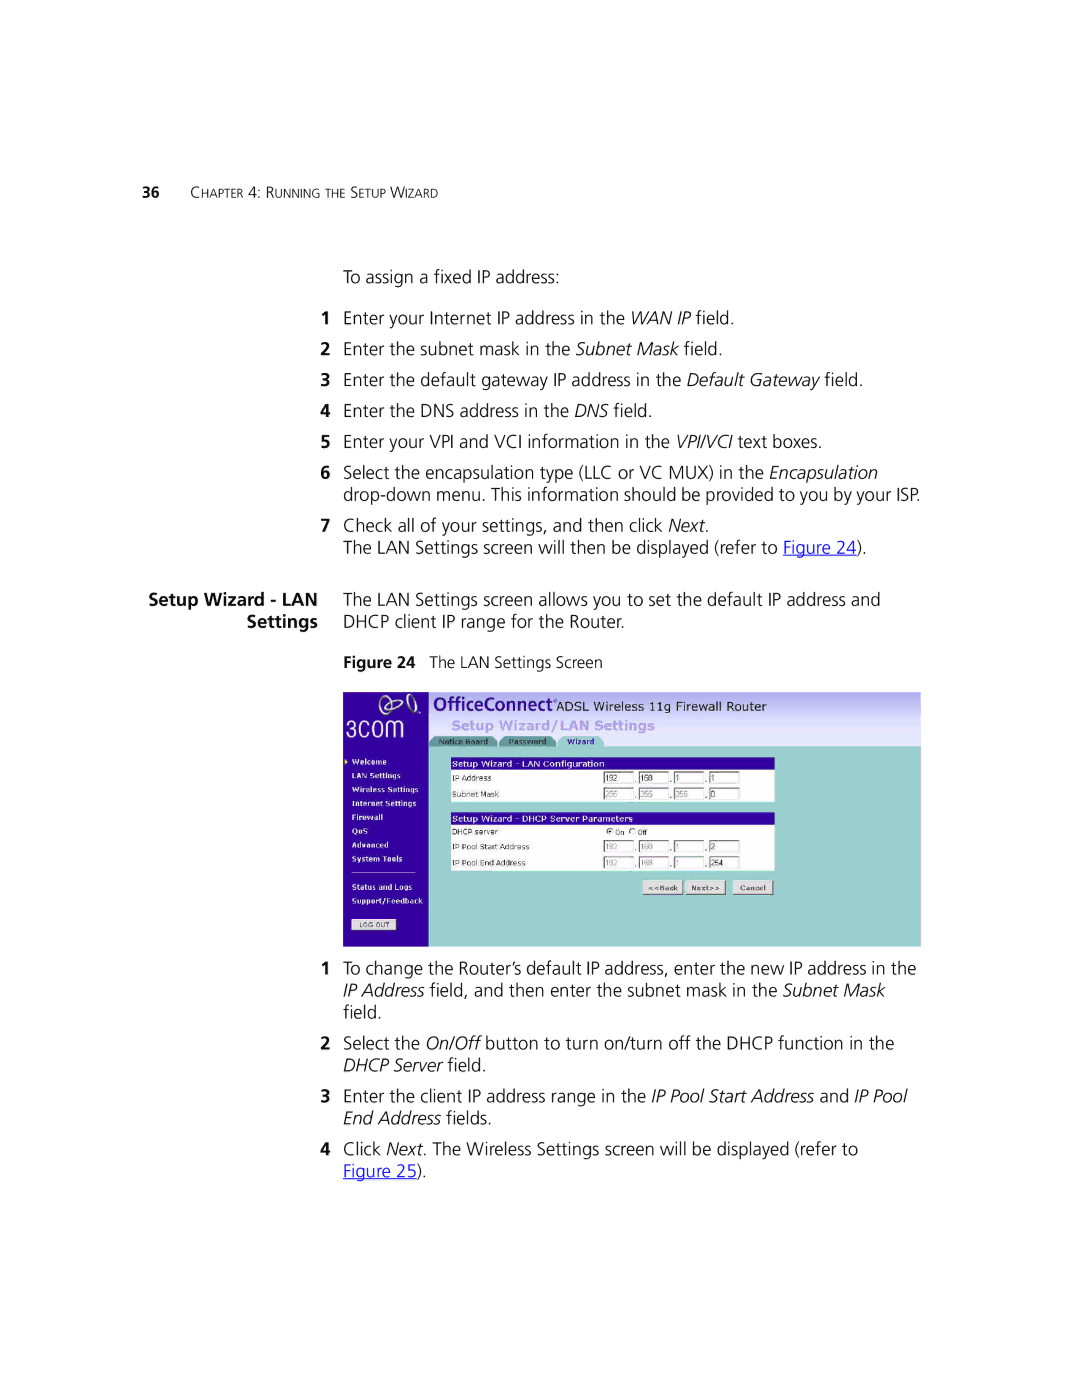
Figure 24 The LAN Settings Screen
1To change the Router’s default IP address, enter the new IP address in the IP Address field, and then enter the subnet mask in the Subnet Mask field.
2Select the On/Off button to turn on/turn off the DHCP function in the DHCP Server field.
3Enter the client IP address range in the IP Pool Start Address and IP Pool End Address fields.
4Click Next. The Wireless Settings screen will be displayed (refer to Figure 25).