3
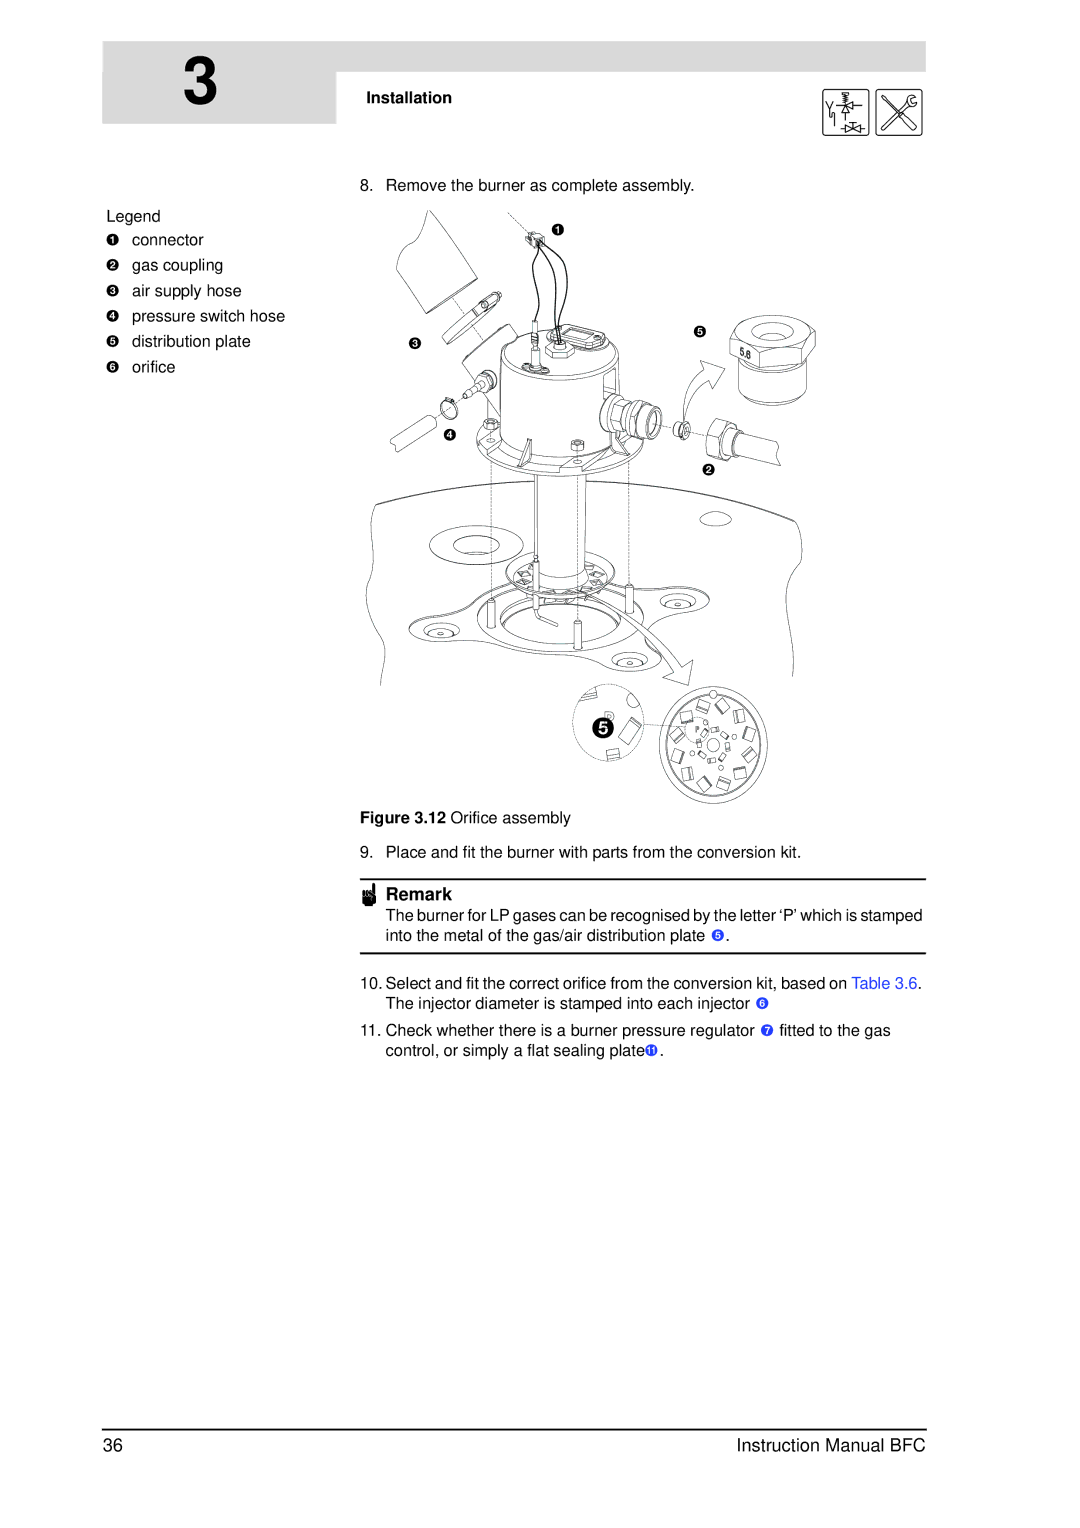
Legend
aconnector
bgas coupling
cair supply hose
dpressure switch hose
edistribution plate
forifice
Installation | is |
|
8.Remove the burner as complete assembly.
a
e
c
d
b
5
Figure 3.12 Orifice assembly
9. Place and fit the burner with parts from the conversion kit.
nRemark
The burner for LP gases can be recognised by the letter ‘P’ which is stamped into the metal of the gas/air distribution plate 5.
10.Select and fit the correct orifice from the conversion kit, based on Table 3.6. The injector diameter is stamped into each injector 6
11.Check whether there is a burner pressure regulator 7 fitted to the gas control, or simply a flat sealing plate!.
36 | Instruction Manual BFC |