IP Office/Voicemail Pro Configuration: Automatic Recording Options
6.5 Creating a Call Flow
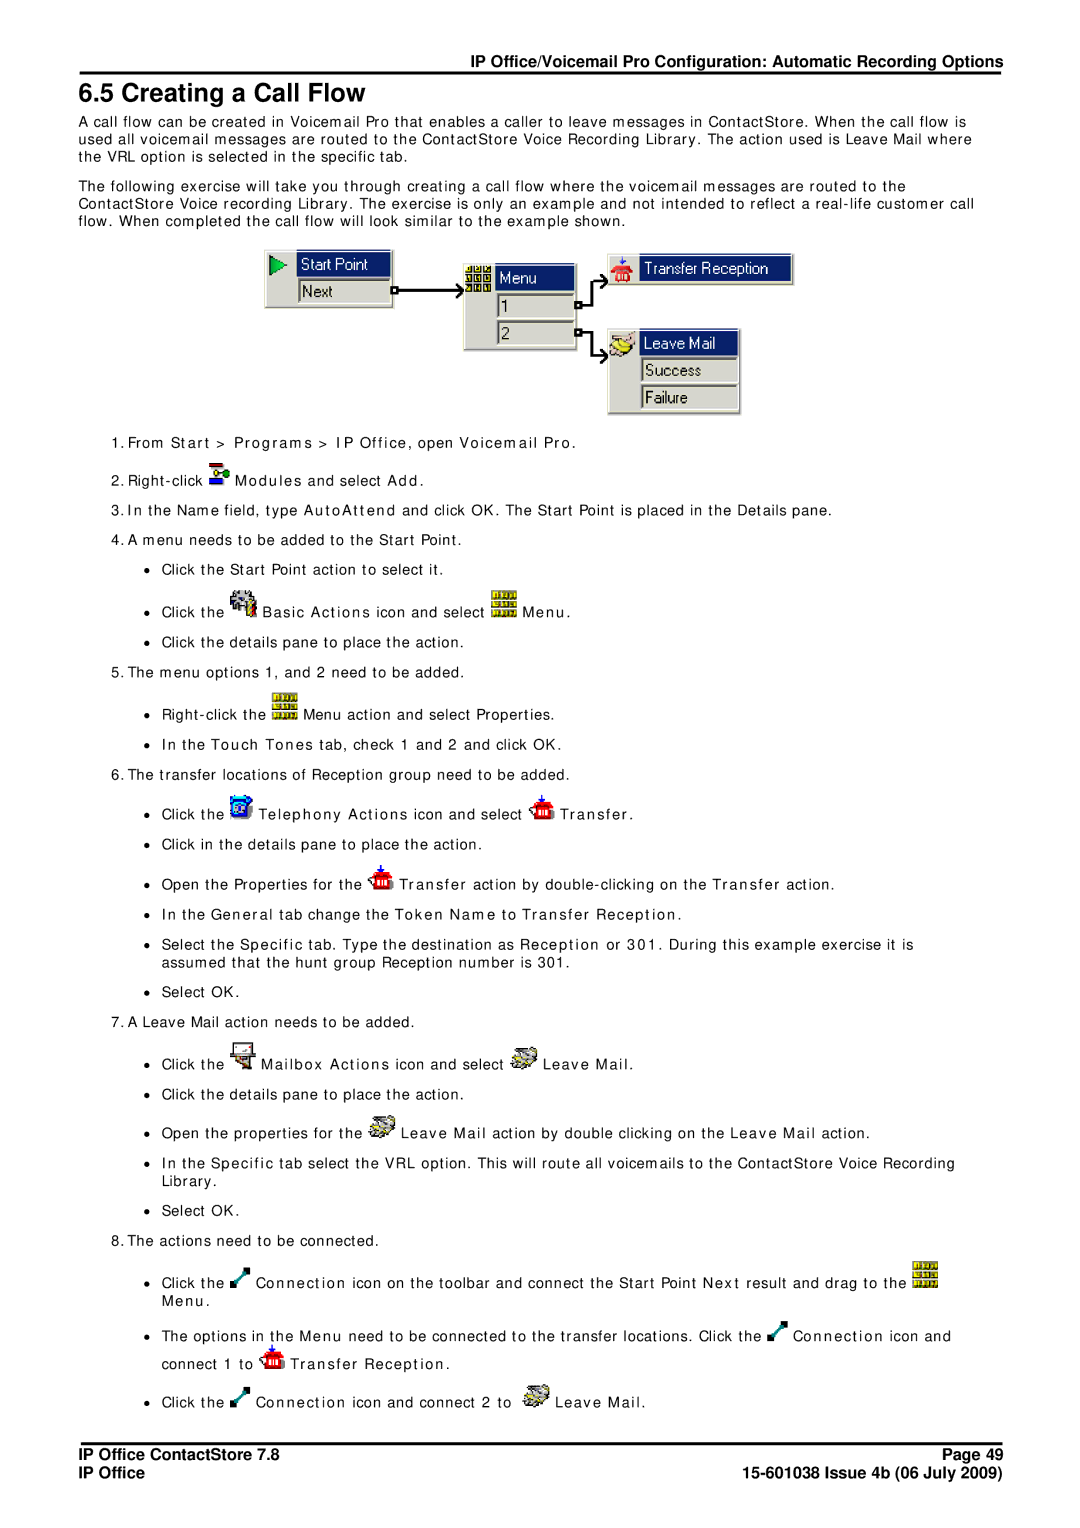
A call flow can be created in Voicemail Pro that enables a caller to leave messages in ContactStore. When the call flow is used all voicemail messages are routed to the ContactStore Voice Recording Library. The action used is Leave Mail where the VRL option is selected in the specific tab.
The following exercise will take you through creating a call flow where the voicemail messages are routed to the ContactStore Voice recording Library. The exercise is only an example and not intended to reflect a
1.From Start > Programs > IP Office, open Voicemail Pro.
2.![]() Modules and select Add.
Modules and select Add.
3.In the Name field, type AutoAttend and click OK. The Start Point is placed in the Details pane.
4.A menu needs to be added to the Start Point.
∙Click the Start Point action to select it.
∙Click the ![]() Basic Actions icon and select
Basic Actions icon and select ![]() Menu.
Menu.
∙Click the details pane to place the action.
5.The menu options 1, and 2 need to be added.
∙![]() Menu action and select Properties.
Menu action and select Properties.
∙In the Touch Tones tab, check 1 and 2 and click OK.
6.The transfer locations of Reception group need to be added.
∙Click the  Telephony Actions icon and select
  Transfer.
∙Click in the details pane to place the action.
∙Open the Properties for the ![]() Transfer action by
Transfer action by
∙In the General tab change the Token Name to Transfer Reception.
∙Select the Specific tab. Type the destination as Reception or 301. During this example exercise it is assumed that the hunt group Reception number is 301.
∙Select OK.
7.A Leave Mail action needs to be added.
∙Click the  Mailbox Actions icon and select
  Leave Mail.
∙Click the details pane to place the action.
∙Open the properties for the ![]() Leave Mail action by double clicking on the Leave Mail action.
Leave Mail action by double clicking on the Leave Mail action.
∙In the Specific tab select the VRL option. This will route all voicemails to the ContactStore Voice Recording Library.
∙Select OK.
8.The actions need to be connected.
∙Click the ![]() Connection icon on the toolbar and connect the Start Point Next result and drag to the
Connection icon on the toolbar and connect the Start Point Next result and drag to the ![]() Menu.
Menu.
∙The options in the Menu need to be connected to the transfer locations. Click the ![]() Connection icon and
Connection icon and
connect 1 to  Transfer Reception.
∙Click the ![]() Connection icon and connect 2 to
Connection icon and connect 2 to ![]() Leave Mail.
Leave Mail.
IP Office ContactStore 7.8 | Page 49 |
IP Office |