
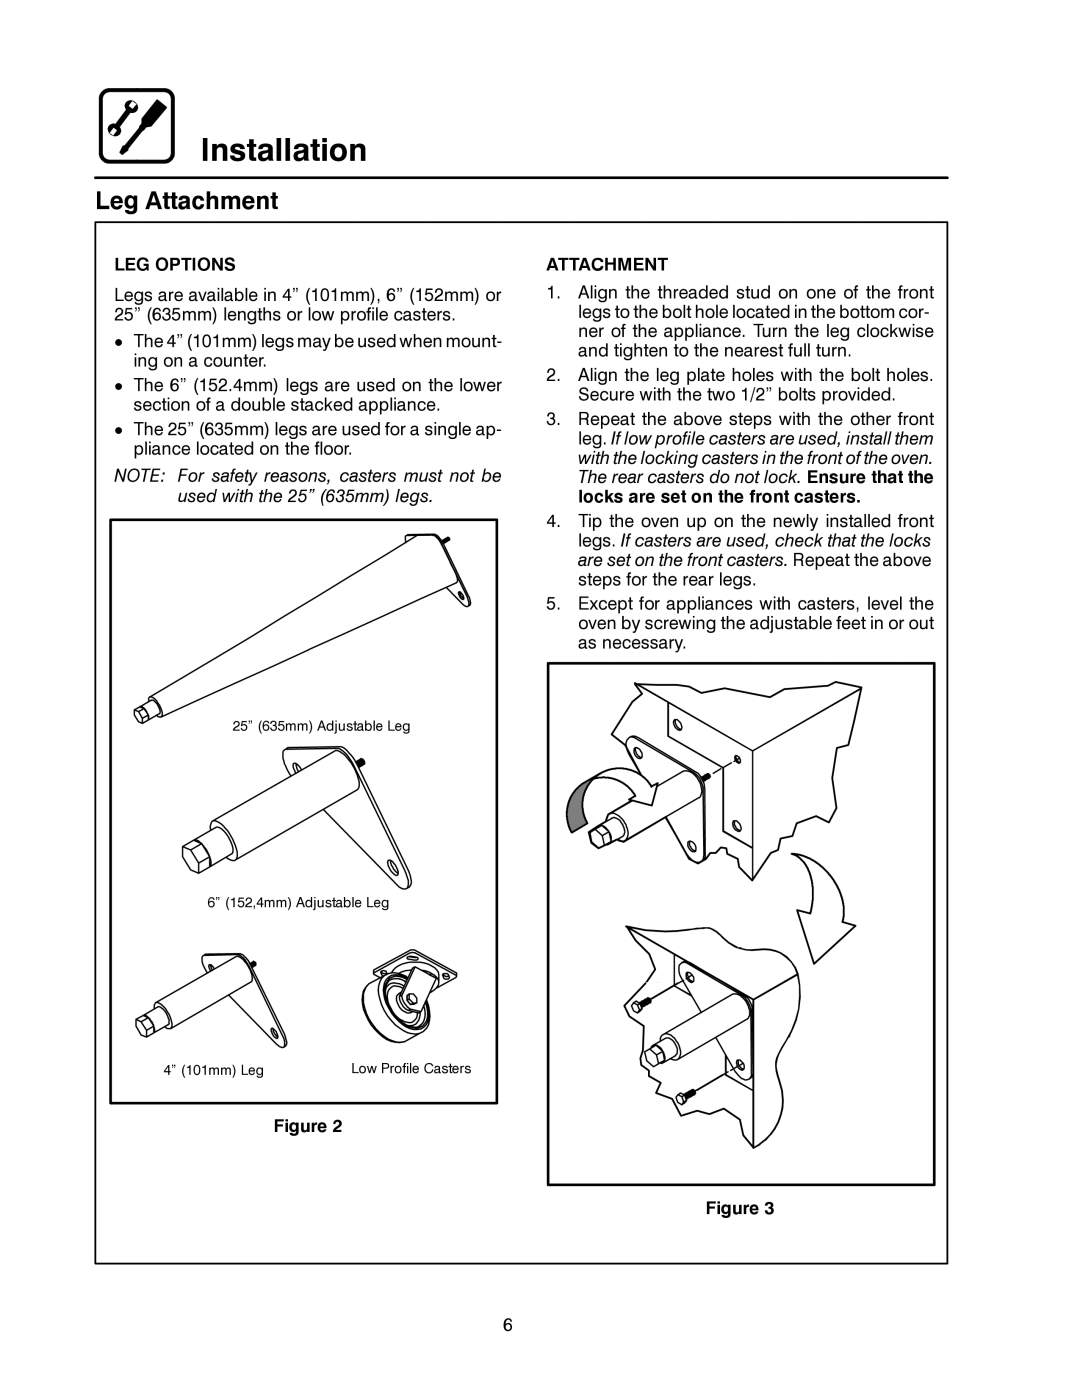
CNV14E, CNV14G specifications
The Blodgett CNV14G and CNV14E are advanced commercial convection ovens designed for high-volume food service operations. Renowned for their reliability, efficiency, and versatility, these ovens are a mainstay in restaurants, catering businesses, and institutional kitchens. They are engineered to meet the demanding needs of professional chefs while ensuring consistent cooking results every time.One of the standout features of the CNV14G and CNV14E is their exceptional capacity. With the ability to hold up to 14 full-size pans, these ovens can easily accommodate large batches of food. This is ideal for establishments that need to prepare numerous meals simultaneously, enabling efficient workflow in busy kitchens. The spacious interior is designed to provide even air circulation, ensuring uniform cooking results, which is crucial for maintaining the quality and consistency of dishes.
Both models are equipped with state-of-the-art digital controls that allow chefs to set precise temperatures and cooking times. The control panel is user-friendly, enabling quick adjustments to be made during operation. This technological feature not only enhances user experience but also helps in achieving optimal cooking results for various types of food.
The Blodgett CNV14G and CNV14E are designed with energy efficiency in mind. They utilize advanced insulation and heating technologies, which helps reduce energy consumption while maintaining high performance levels. This energy efficiency is not only cost-effective but also positively contributes to environmentally friendly kitchen practices.
Another key characteristic is the heavy-duty construction of these ovens, built to withstand the rigors of daily use in a commercial setting. The stainless steel exterior ensures durability and easy cleaning, while the oven’s robust interior is designed to resist wear and tear from frequent use.
A notable feature of both models is their ability to produce steam when required, allowing for versatile cooking methods such as baking, roasting, and steaming. This flexibility makes the CNV14G and CNV14E suitable for a wide range of menu items, from crispy roasted vegetables to soft, fluffy breads.
In summary, the Blodgett CNV14G and CNV14E convection ovens are exemplary choices for any commercial kitchen looking for reliability, efficiency, and versatility. Their impressive features, advanced technology, and robust design continue to set industry standards for professional cooking equipment.