Chapter 3 Installing the Cisco ASR 903 Router
Installing the Fan Tray
Caution To avoid erroneous failure messages, allow at least 2 minutes for the system to reinitialize after the fan tray has been removed or replaced.
Follow these steps to remove and replace the fan tray on the Cisco ASR 903 Router:
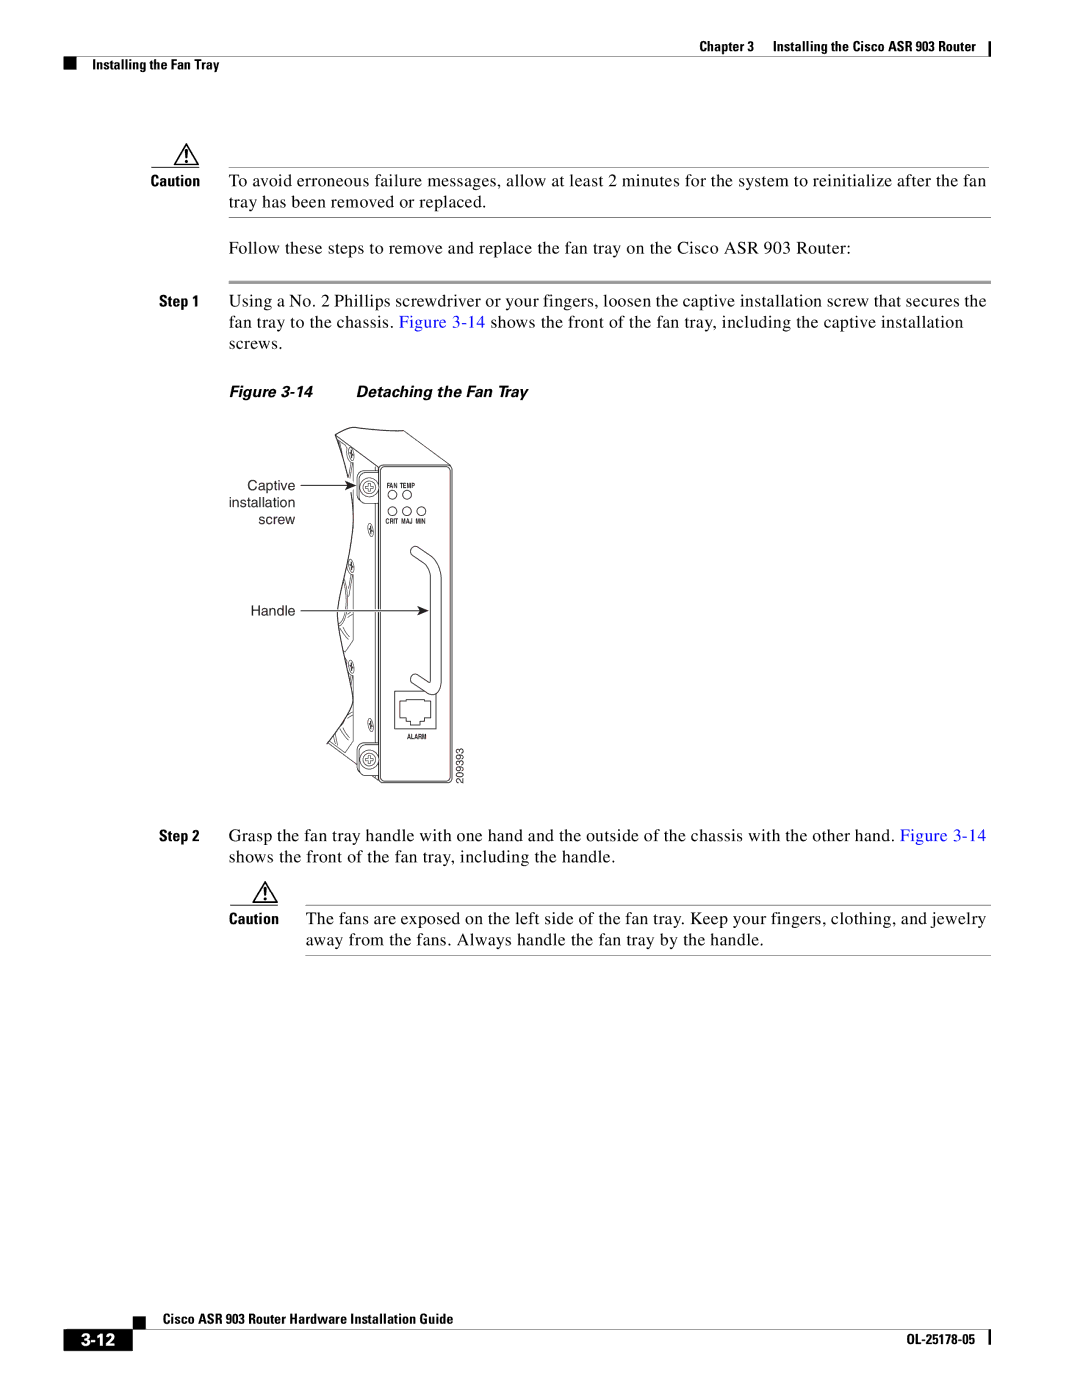
Step 1 Using a No. 2 Phillips screwdriver or your fingers, loosen the captive installation screw that secures the fan tray to the chassis. Figure
Figure 3-14 Detaching the Fan Tray
Captive ![]()
![]() installation
installation ![]()
![]()
![]()
screw
FAN TEMP
CRIT MAJ MIN
Handle
ALARM
209393
Step 2 Grasp the fan tray handle with one hand and the outside of the chassis with the other hand. Figure
Caution The fans are exposed on the left side of the fan tray. Keep your fingers, clothing, and jewelry away from the fans. Always handle the fan tray by the handle.
| Cisco ASR 903 Router Hardware Installation Guide |
|