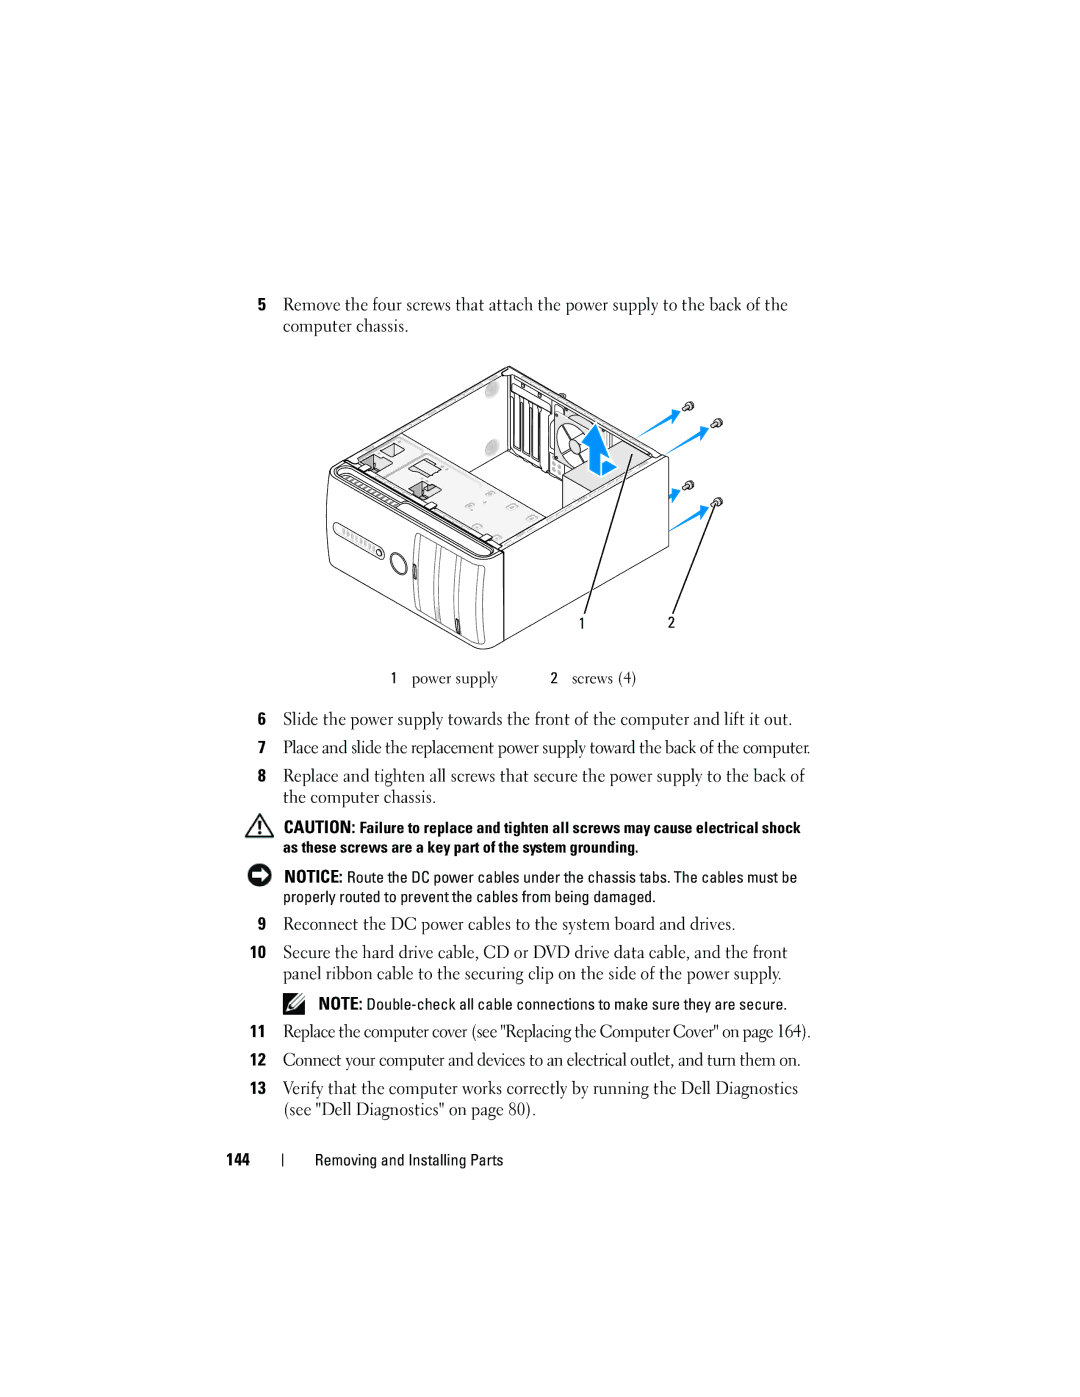
5Remove the four screws that attach the power supply to the back of the computer chassis.
12
1 power supply | 2 screws (4) |
6Slide the power supply towards the front of the computer and lift it out.
7Place and slide the replacement power supply toward the back of the computer.
8Replace and tighten all screws that secure the power supply to the back of the computer chassis.
CAUTION: Failure to replace and tighten all screws may cause electrical shock as these screws are a key part of the system grounding.
NOTICE: Route the DC power cables under the chassis tabs. The cables must be properly routed to prevent the cables from being damaged.
9Reconnect the DC power cables to the system board and drives.
10Secure the hard drive cable, CD or DVD drive data cable, and the front panel ribbon cable to the securing clip on the side of the power supply.
NOTE:
11Replace the computer cover (see "Replacing the Computer Cover" on page 164).
12Connect your computer and devices to an electrical outlet, and turn them on.
13Verify that the computer works correctly by running the Dell Diagnostics (see "Dell Diagnostics" on page 80).
144