![]() 1
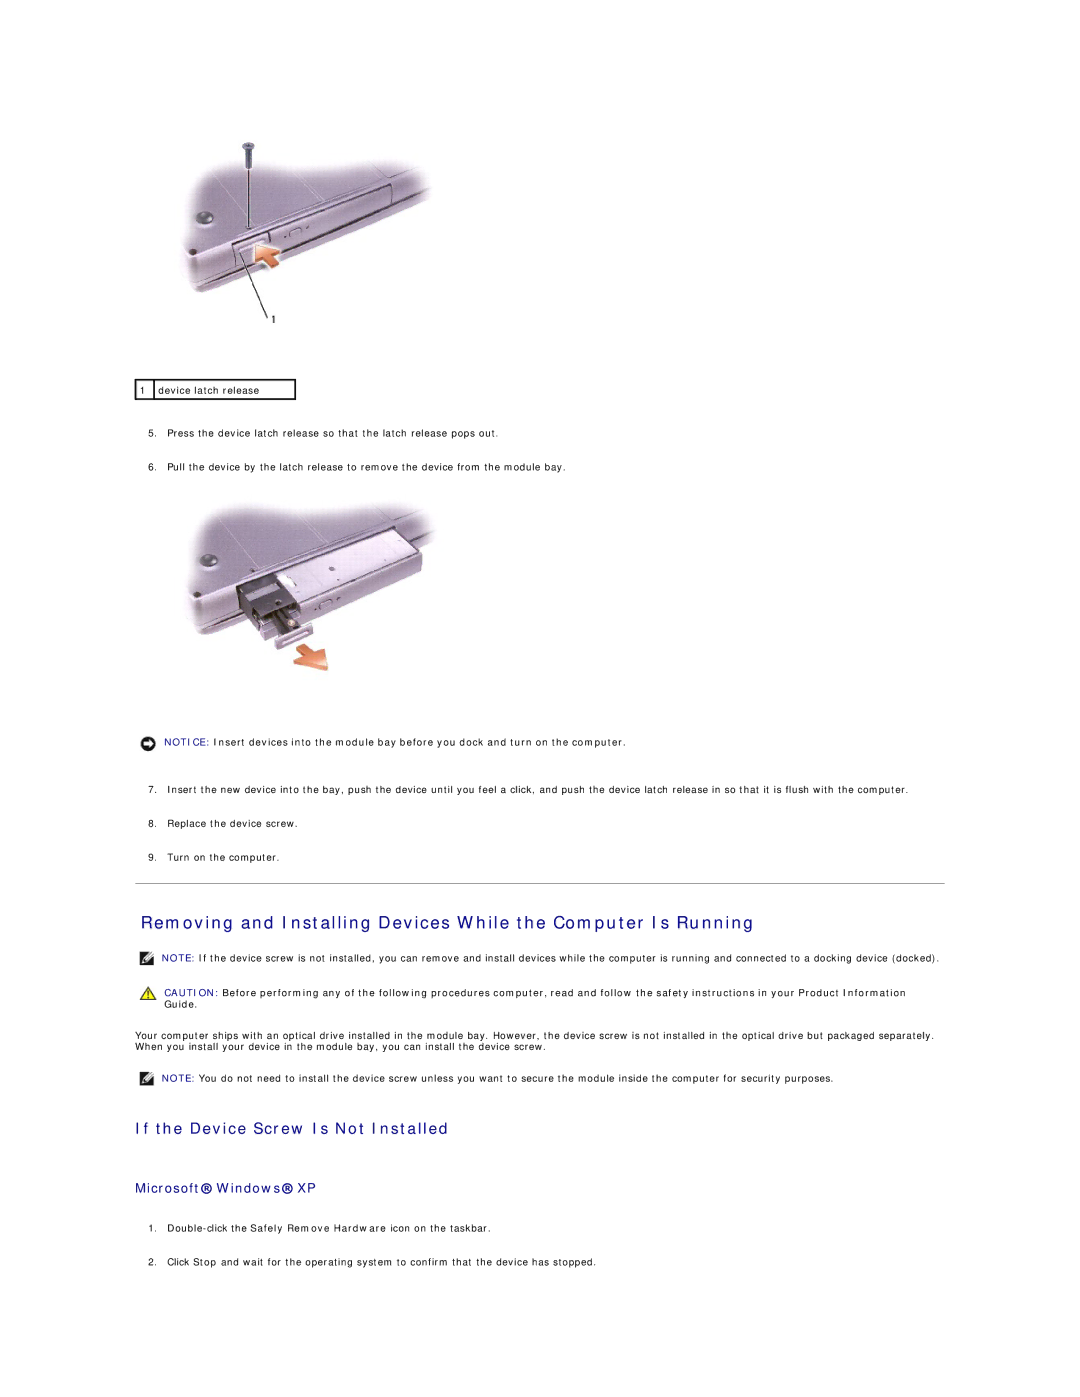
1 ![]() device latch release
device latch release
5.Press the device latch release so that the latch release pops out.
6.Pull the device by the latch release to remove the device from the module bay.
NOTICE: Insert devices into the module bay before you dock and turn on the computer.
7.Insert the new device into the bay, push the device until you feel a click, and push the device latch release in so that it is flush with the computer.
8.Replace the device screw.
9.Turn on the computer.
Removing and Installing Devices While the Computer Is Running
NOTE: If the device screw is not installed, you can remove and install devices while the computer is running and connected to a docking device (docked).
CAUTION: Before performing any of the following procedures computer, read and follow the safety instructions in your Product Information Guide.
Your computer ships with an optical drive installed in the module bay. However, the device screw is not installed in the optical drive but packaged separately. When you install your device in the module bay, you can install the device screw.
NOTE: You do not need to install the device screw unless you want to secure the module inside the computer for security purposes.
If the Device Screw Is Not Installed
Microsoft® Windows® XP
1.
2.Click Stop and wait for the operating system to confirm that the device has stopped.
