Troubleshooting Tools
Diagnostic Lights
CAUTION: Before you begin any of the procedures in this section, follow the safety instructions in the Product Information Guide.
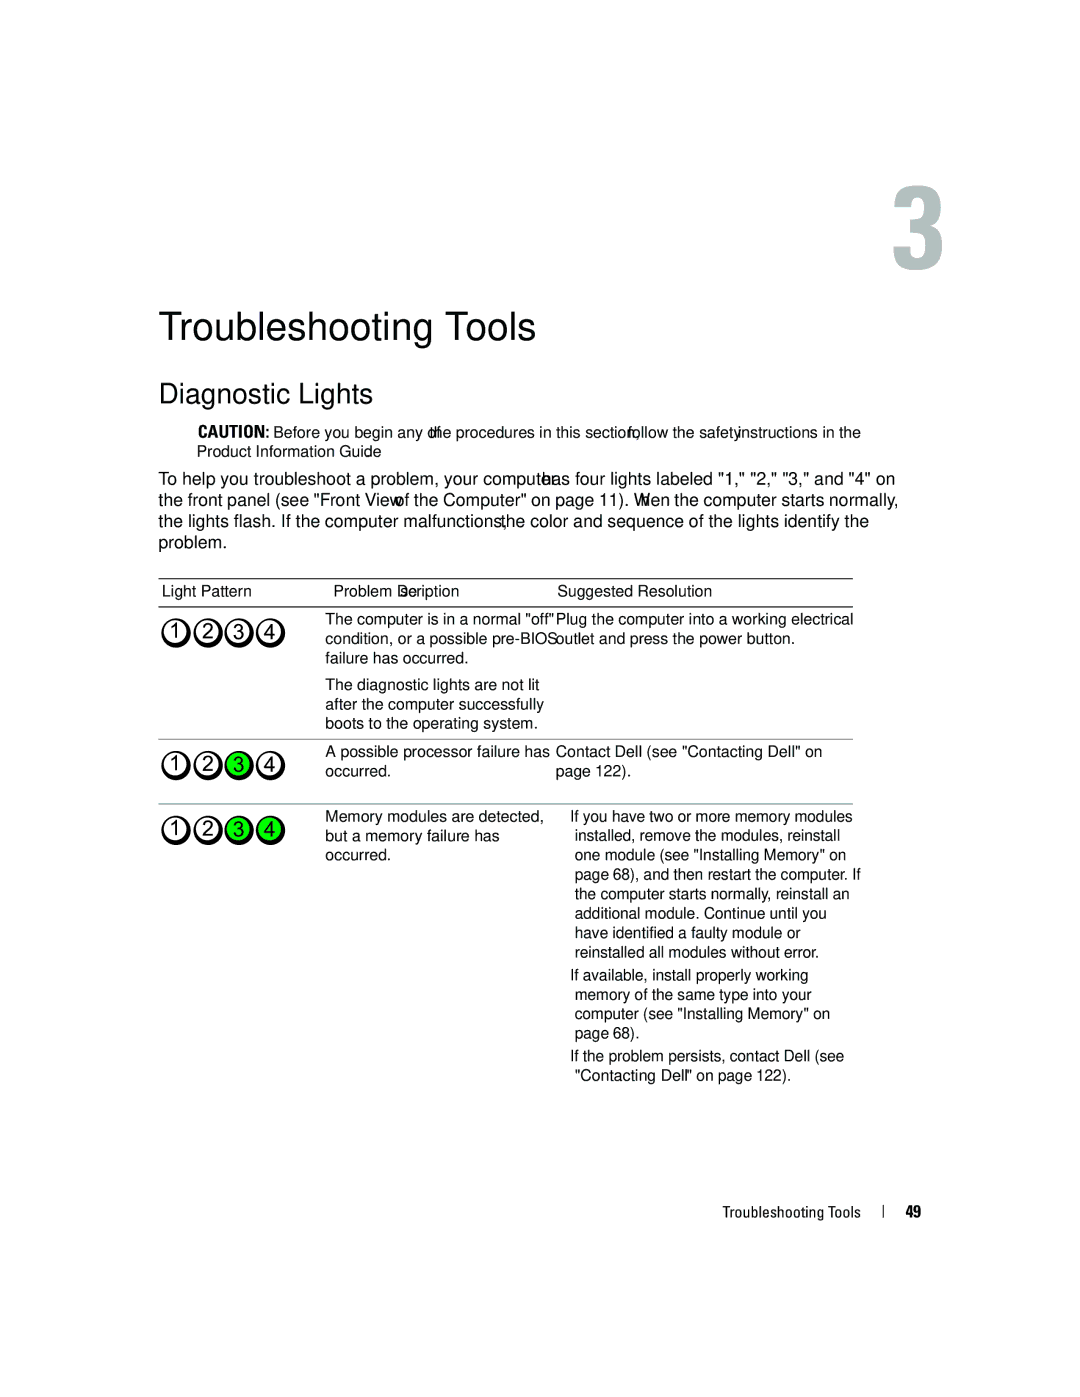
To help you troubleshoot a problem, your computer has four lights labeled "1," "2," "3," and "4" on the front panel (see "Front View of the Computer" on page 11). When the computer starts normally, the lights flash. If the computer malfunctions, the color and sequence of the lights identify the problem.
Light Pattern | Problem Description | Suggested Resolution |
|
|
|
| The computer is in a normal "off" | Plug the computer into a working electrical |
| condition, or a possible | outlet and press the power button. |
| failure has occurred. |
|
| The diagnostic lights are not lit |
|
| after the computer successfully |
|
| boots to the operating system. |
|
|
|
|
| A possible processor failure has | Contact Dell (see "Contacting Dell" on |
| occurred. | page 122). |
Memory modules are detected, but a memory failure has occurred.
•If you have two or more memory modules installed, remove the modules, reinstall one module (see "Installing Memory" on page 68), and then restart the computer. If the computer starts normally, reinstall an additional module. Continue until you have identified a faulty module or reinstalled all modules without error.
•If available, install properly working memory of the same type into your computer (see "Installing Memory" on page 68).
•If the problem persists, contact Dell (see
"Contacting Dell" on page 122).
Troubleshooting Tools
49