w w w . d e l l . c o m / s u p p l i e s s u p p o r t . d e l l . c o m
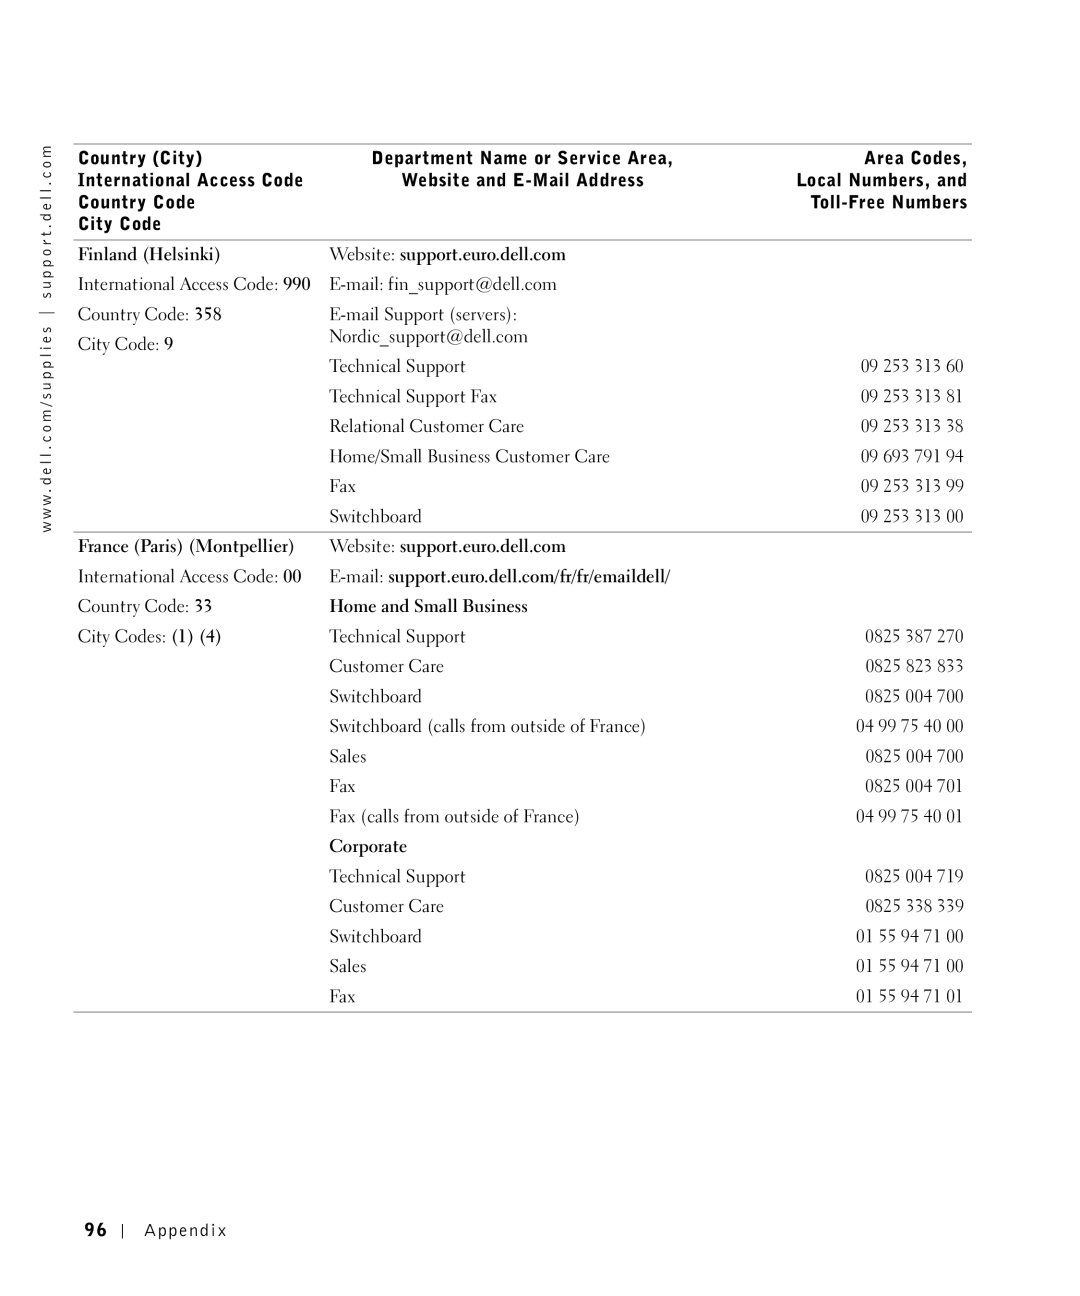
Country (City) | Department Name or Service Area, | |
International Access Code | Website and | |
Country Code |
| |
City Code |
| |
Finland (Helsinki) | Website: support.euro.dell.com | |
International Access Code: 990 | ||
Country Code: 358 | ||
City Code: 9 | Nordic_support@dell.com | |
Technical Support | ||
| ||
| Technical Support Fax | |
| Relational Customer Care | |
| Home/Small Business Customer Care | |
| Fax | |
| Switchboard | |
France (Paris) (Montpellier) | Website: support.euro.dell.com | |
International Access Code: 00 | ||
Country Code: 33 | Home and Small Business | |
City Codes: (1) (4) | Technical Support | |
| Customer Care | |
| Switchboard | |
| Switchboard (calls from outside of France) | |
| Sales | |
| Fax | |
| Fax (calls from outside of France) | |
| Corporate | |
| Technical Support | |
| Customer Care | |
| Switchboard | |
| Sales | |
| Fax |
Area Codes,
Local Numbers, and
Toll-Free Numbers
09 253 313 60
09 253 313 81
09 253 313 38
09 693 791 94
09 253 313 99
09 253 313 00
0825 387 270
0825 823 833
0825 004 700
04 99 75 40 00
0825 004 700
0825 004 701
04 99 75 40 01
0825 004 719
0825 338 339
01 55 94 71 00
01 55 94 71 00
01 55 94 71 01
96
Appendix