EPSON | Rev. A |
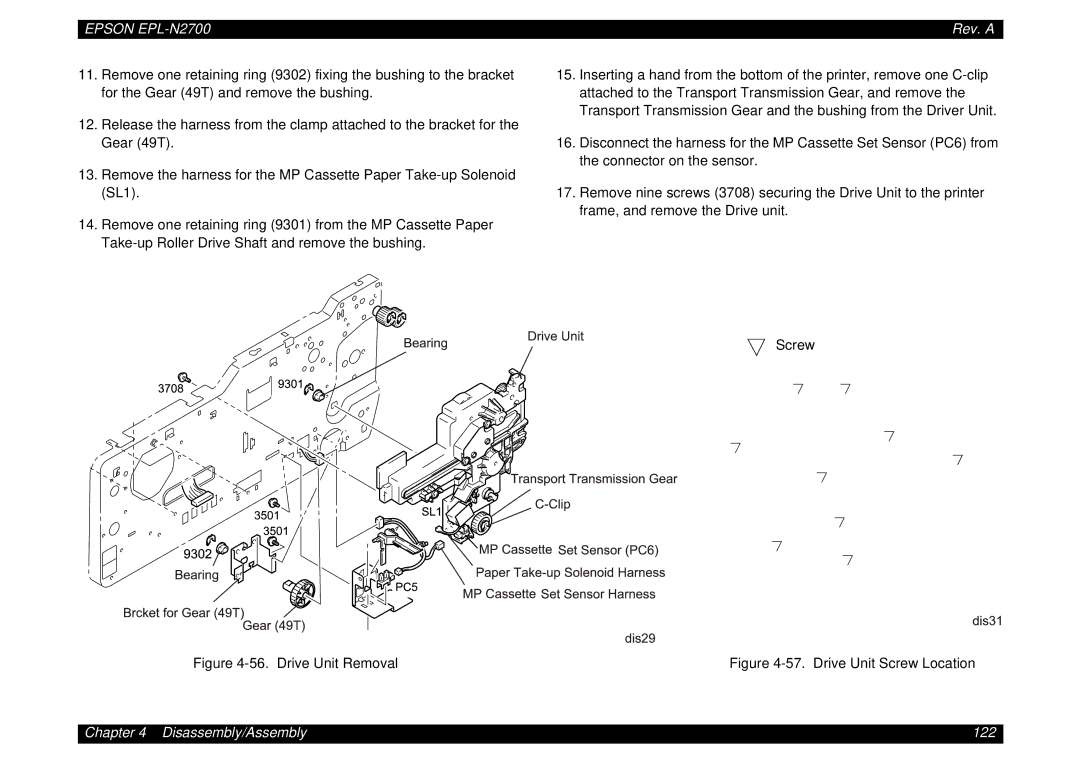
11.Remove one retaining ring (9302) fixing the bushing to the bracket for the Gear (49T) and remove the bushing.
12.Release the harness from the clamp attached to the bracket for the Gear (49T).
13.Remove the harness for the MP Cassette Paper
14.Remove one retaining ring (9301) from the MP Cassette Paper
15.Inserting a hand from the bottom of the printer, remove one
16.Disconnect the harness for the MP Cassette Set Sensor (PC6) from the connector on the sensor.
17.Remove nine screws (3708) securing the Drive Unit to the printer frame, and remove the Drive unit.
Screw
Figure | Figure |
Chapter 4 Disassembly/Assembly | 122 |
