EPSON | Rev. A |
4.2.22 Drive Unit Removal
1.Separate the printer. (See Section 4.2.6.)
2.Remove the Rear Cover. (See Section 4.2.6.)
3.Remove the Top Cover. (See Section 4.2.11.)
4.Remove the Front Cover. (See Section 4.2.17.)
5.Remove the Transport Motor. (See Section 4.2.7.)
6.Remove the I/C Drive Motor. (See Section 4.2.8.)
7.Remove the Fuser Unit. (See Section 4.2.21.1.)
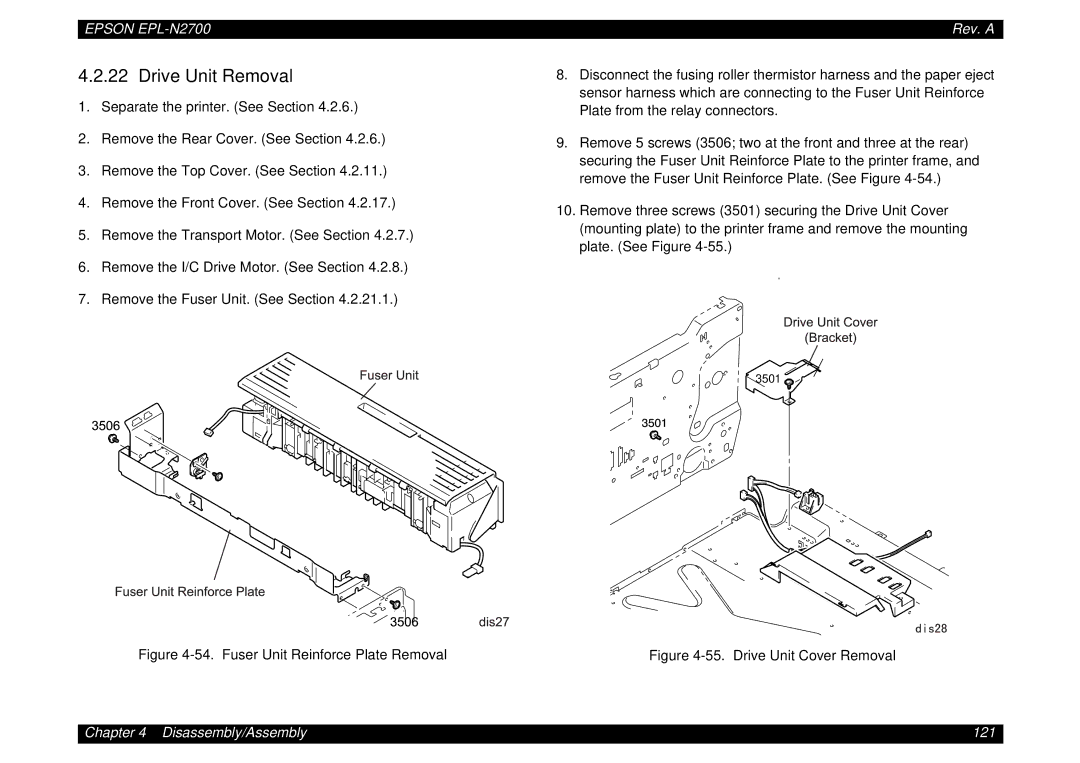
8.Disconnect the fusing roller thermistor harness and the paper eject sensor harness which are connecting to the Fuser Unit Reinforce Plate from the relay connectors.
9.Remove 5 screws (3506; two at the front and three at the rear) securing the Fuser Unit Reinforce Plate to the printer frame, and remove the Fuser Unit Reinforce Plate. (See Figure
10.Remove three screws (3501) securing the Drive Unit Cover (mounting plate) to the printer frame and remove the mounting plate. (See Figure
al
3501![]()
Figure | Figure |
Chapter 4 Disassembly/Assembly | 121 |
