EPSON | Rev. A |
4.2.20 Power Supply Unit Removal
1.Remove the Rear Cover. (See Section 4.2.6.)
2.Remove the Top Cover. (See Section 4.2.11.)
3.Remove the Front Cover. (See Section 4.2.17.)
4.Remove four screws (3541) securing the Left Cover (rail) to the printer frame and remove the left cover.
5.Remove four screws (3501) securing the Left Reinforce Plate to the printer frame and PH Plate and remove the Left Reinforce Plate.
6.Disconnect the harnesses from the Power Supply Board Unit.
Figure 4-34. Harnesses to be Removed
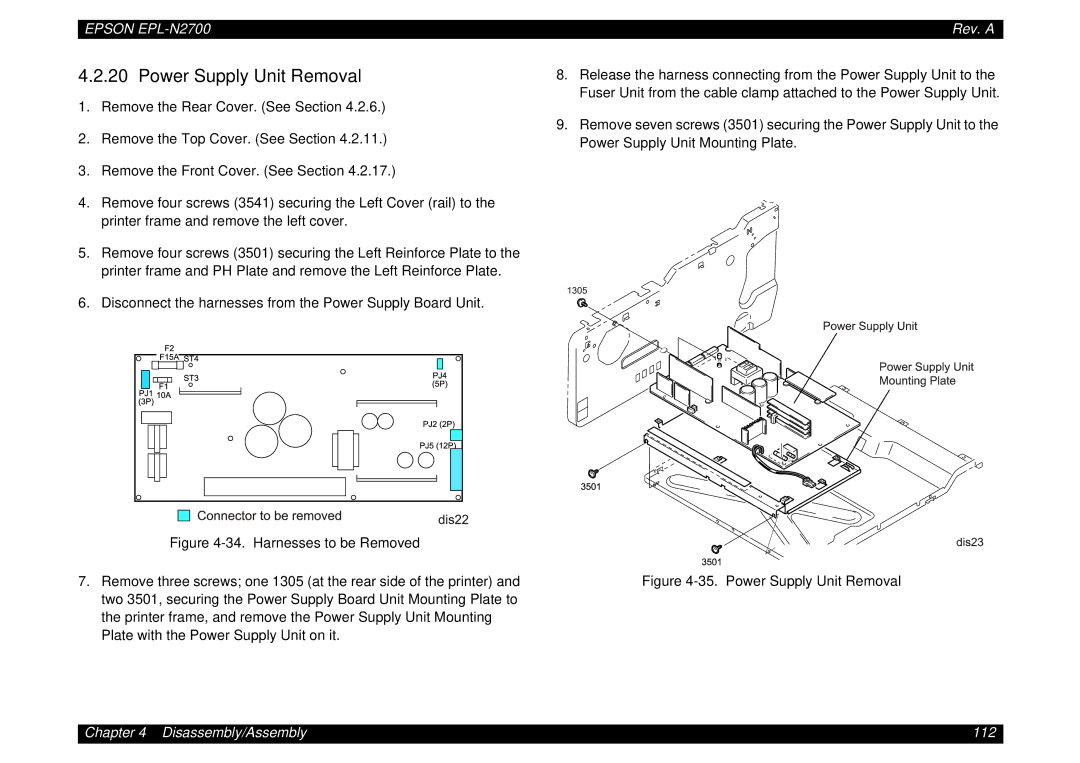
7.Remove three screws; one 1305 (at the rear side of the printer) and two 3501, securing the Power Supply Board Unit Mounting Plate to the printer frame, and remove the Power Supply Unit Mounting Plate with the Power Supply Unit on it.
8.Release the harness connecting from the Power Supply Unit to the Fuser Unit from the cable clamp attached to the Power Supply Unit.
9.Remove seven screws (3501) securing the Power Supply Unit to the Power Supply Unit Mounting Plate.
Figure 4-35. Power Supply Unit Removal
Chapter 4 Disassembly/Assembly | 112 |