Note:
For detailed information about the utility and web browser for LAN setting, see “ Wireless LAN Setup Detailed Information” (page
2.6.1 Preparing a host PC for setting up a printer
At first, prepare a PC (trial host PC) to set up a printer. The requirements for the trial host PC are the following:
❏ OS: | Windows 2000 professional, Windows XP professional |
❏Communication port: 802.11b or serial port equipped
When you use the utility (TM Net Win Config Ver. 2.00 or later), you should install it in the host PC before setting up the
Note:
When you set up the printer by using wireless LAN, the LAN setting of host PC is changed to correspond to the LAN setting of
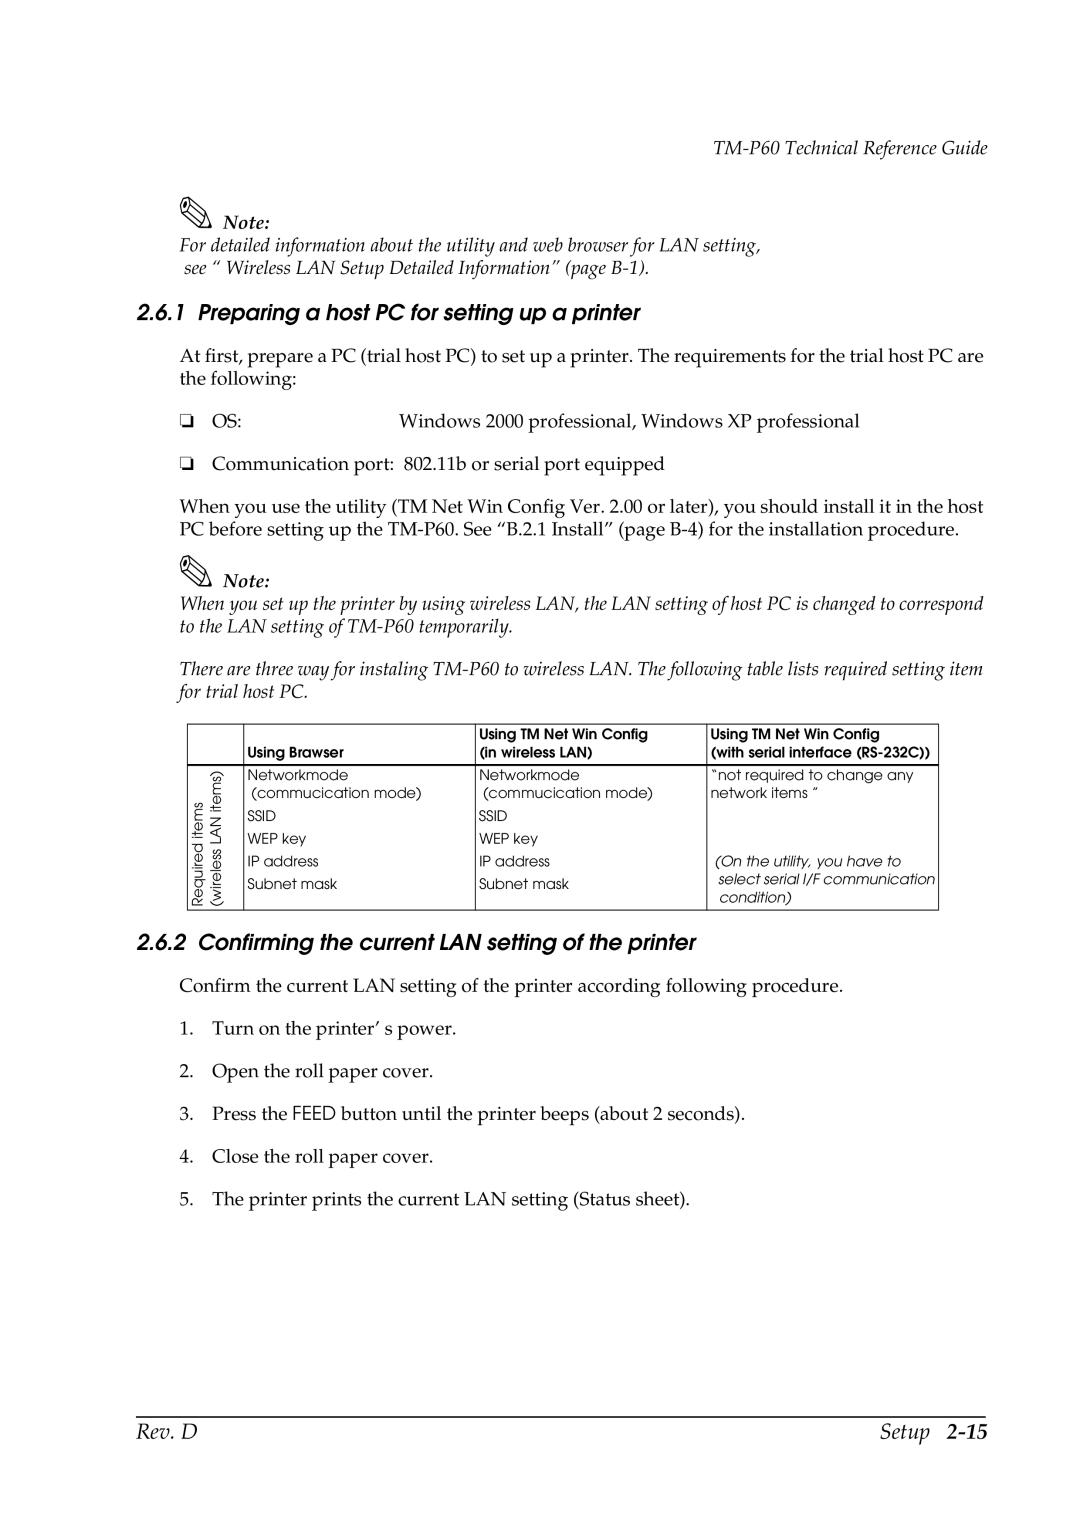
There are three way for instaling
|
|
| Using TM Net Win Config | Using TM Net Win Config | |
|
| Using Brawser | (in wireless LAN) | (with serial interface | |
|
|
|
|
| |
| (wireless LAN items) | Networkmode | Networkmode | “not required to change any | |
Required items | (commucication mode) | (commucication mode) | network items ” | ||
SSID | SSID |
| |||
WEP key | WEP key |
| |||
IP address | IP address | (On the utility, you have to | |||
Subnet mask | Subnet mask | select serial I/F communication | |||
condition) | |||||
|
| ||||
|
|
|
|
|
2.6.2 Confirming the current LAN setting of the printer
Confirm the current LAN setting of the printer according following procedure.
1.Turn on the printer’ s power.
2.Open the roll paper cover.
3.Press the FEED button until the printer beeps (about 2 seconds).
4.Close the roll paper cover.
5.The printer prints the current LAN setting (Status sheet).
Rev. D | Setup |