Installation, cont’d
Mounting the IPI 101 or IPI 104 into an AAP Wall Plate or Device Faceplate
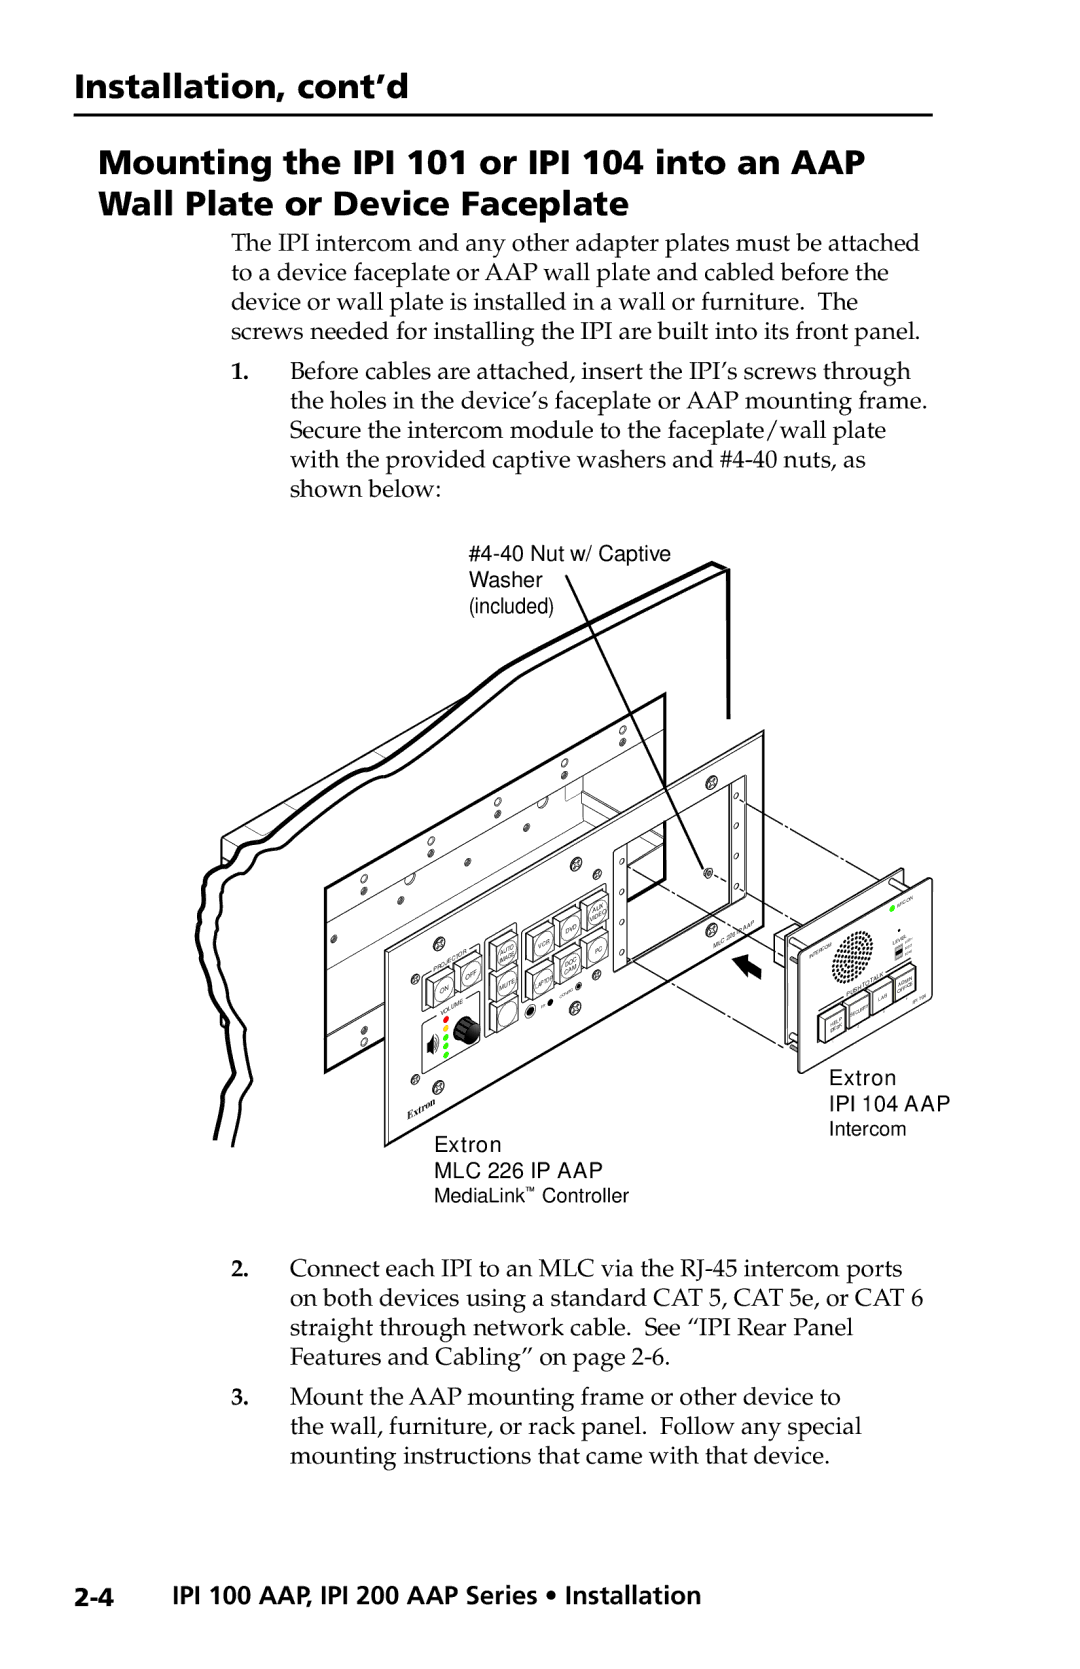
The IPI intercom and any other adapter plates must be attached to a device faceplate or AAP wall plate and cabled before the device or wall plate is installed in a wall or furniture. The screws needed for installing the IPI are built into its front panel.
1.Before cables are attached, insert the IPI’s screws through the holes in the device’s faceplate or AAP mounting frame. Secure the intercom module to the faceplate/wall plate with the provided captive washers and
(included)
|
|
|
|
| AUX |
|
|
|
|
| VIDEO |
|
|
|
| DVD | |
|
| AUTO | VCR |
| PC |
|
|
|
| ||
PROJEC |
| IMAGE | 4 | DOC | |
|
|
| CA | M | |
| OFF | E | OP |
|
|
ON |
| MUT | LAPT | CONFIG | |
|
|
| |||
VOLUME |
|
| IR |
|
|
|
|
|
|
| |
| on |
Ex | tr |
|
Extron
MLC 226 IP AAP
MediaLink Controller
IP | AAP |
226
MLC
|
|
| ON |
|
| |
|
|
| MIC |
|
|
|
|
|
| LEVELHIG | H |
|
|
M |
|
| MED |
|
|
|
INTERCO |
|
| LOW |
|
|
|
|
|
| ADMINCE |
|
| |
|
|
| OFFI |
|
| 4 |
|
| LAB | 4 |
| 10 | |
|
| IPI |
| |||
|
| TY |
|
|
| |
| SECURI |
|
|
|
| |
|
| 3 |
|
|
|
|
HELP | 2 |
|
|
|
|
|
DESK |
|
|
|
|
|
|
1 |
|
|
|
|
|
|
Extron
IPI 104 AAP
Intercom
2.Connect each IPI to an MLC via the
3.Mount the AAP mounting frame or other device to the wall, furniture, or rack panel. Follow any special mounting instructions that came with that device.