3. Add intercoms to the intercom list and click Update Intercom List.
4. Configure each intercom and click Apply. See the “Configuration” section in this chapter for details.
5. Exit the configuration utility. The main screen is now accessible.
6. Click on the Tools
7. Select the desired settings for the system, then click OK to accept the settings and return to the main screen. See “Setting preferences” on page
8. Click on the File menu and select Save Project or Save Project As, then create a filename for and save the system settings.
9. Manage the intercom system using the main/management screen. See “Parts of the Main Screen” on page
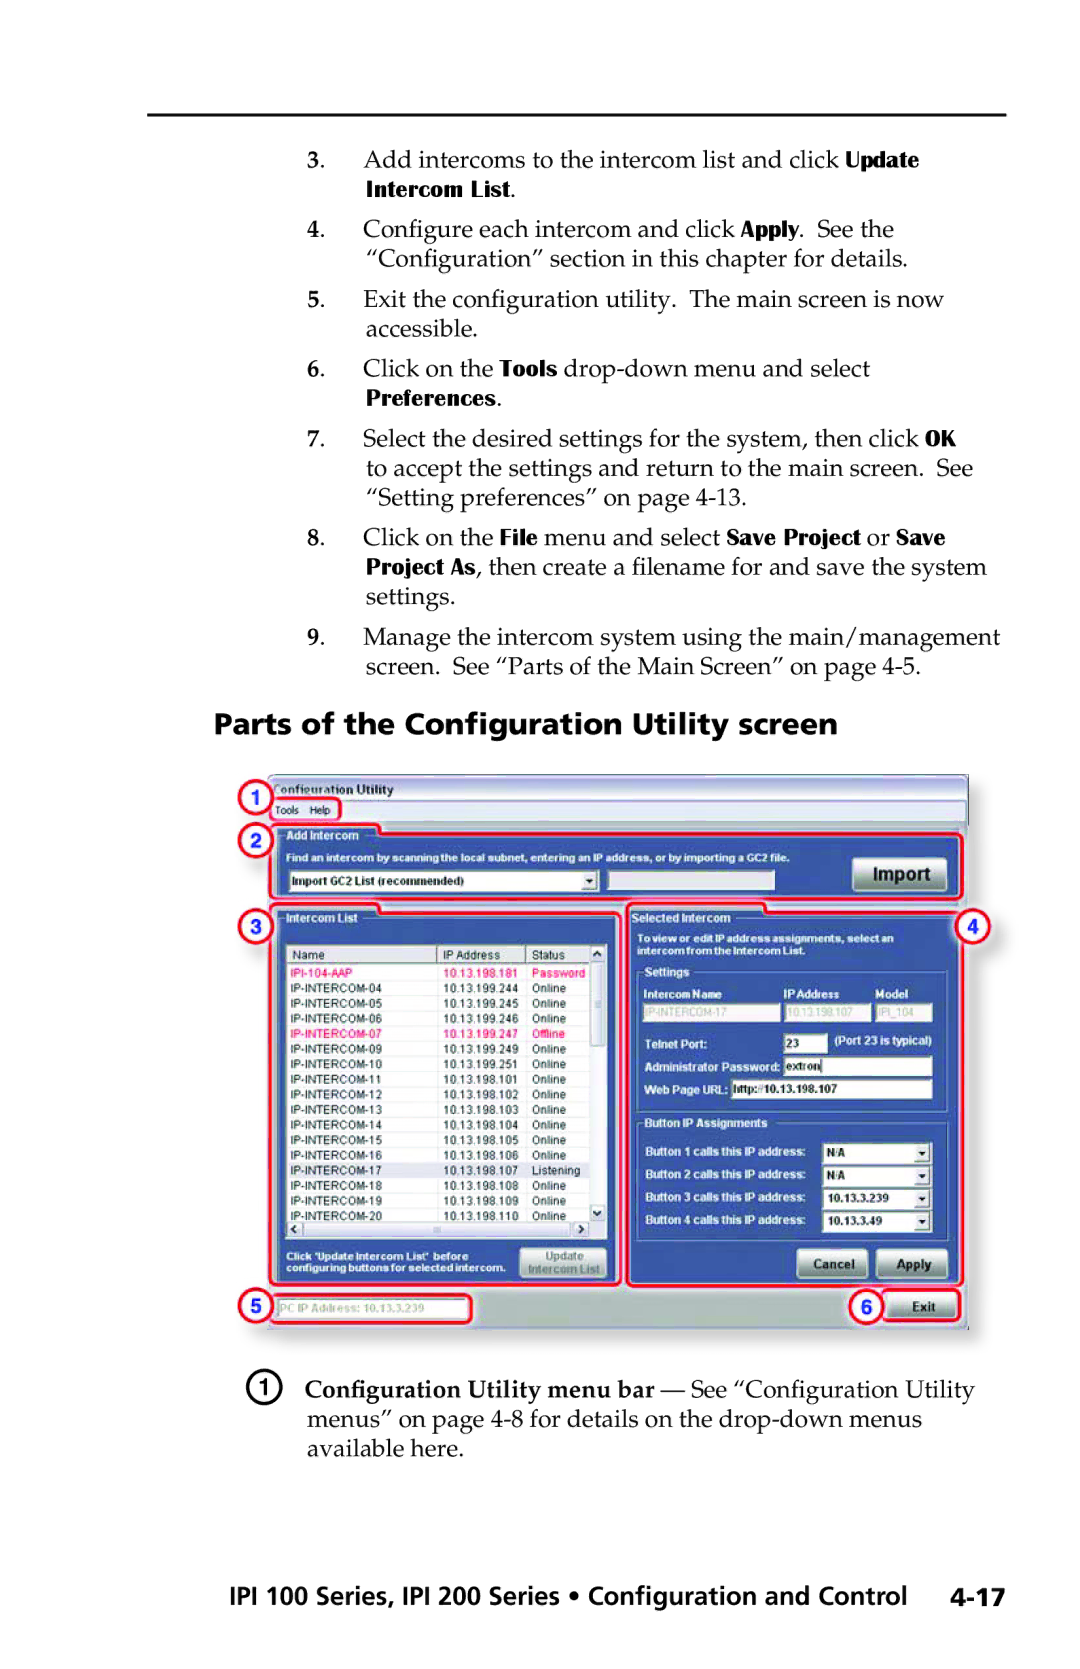
Parts of the Configuration Utility screen
A Configuration Utility menu bar — See “Configuration Utility menus” on page
