5.1 Operation of Optical Disk Drive
3.If the BUSY LED indicator lamp does not go on after a cartridge is inserted, press the eject/BUSY LED button once to eject the cartridge and insert it again.
4.Do not forcibly insert a cartridge if you have any difficulty inserting it. If you do, the drive may be damaged. In such a case, be sure to remove the cartridge once and check the insertion orientation and the face and back of the cartridge before inserting it again.
(2)While the drive is powered off:
1)Make sure that there is no other optical disk cartridge in the drive.
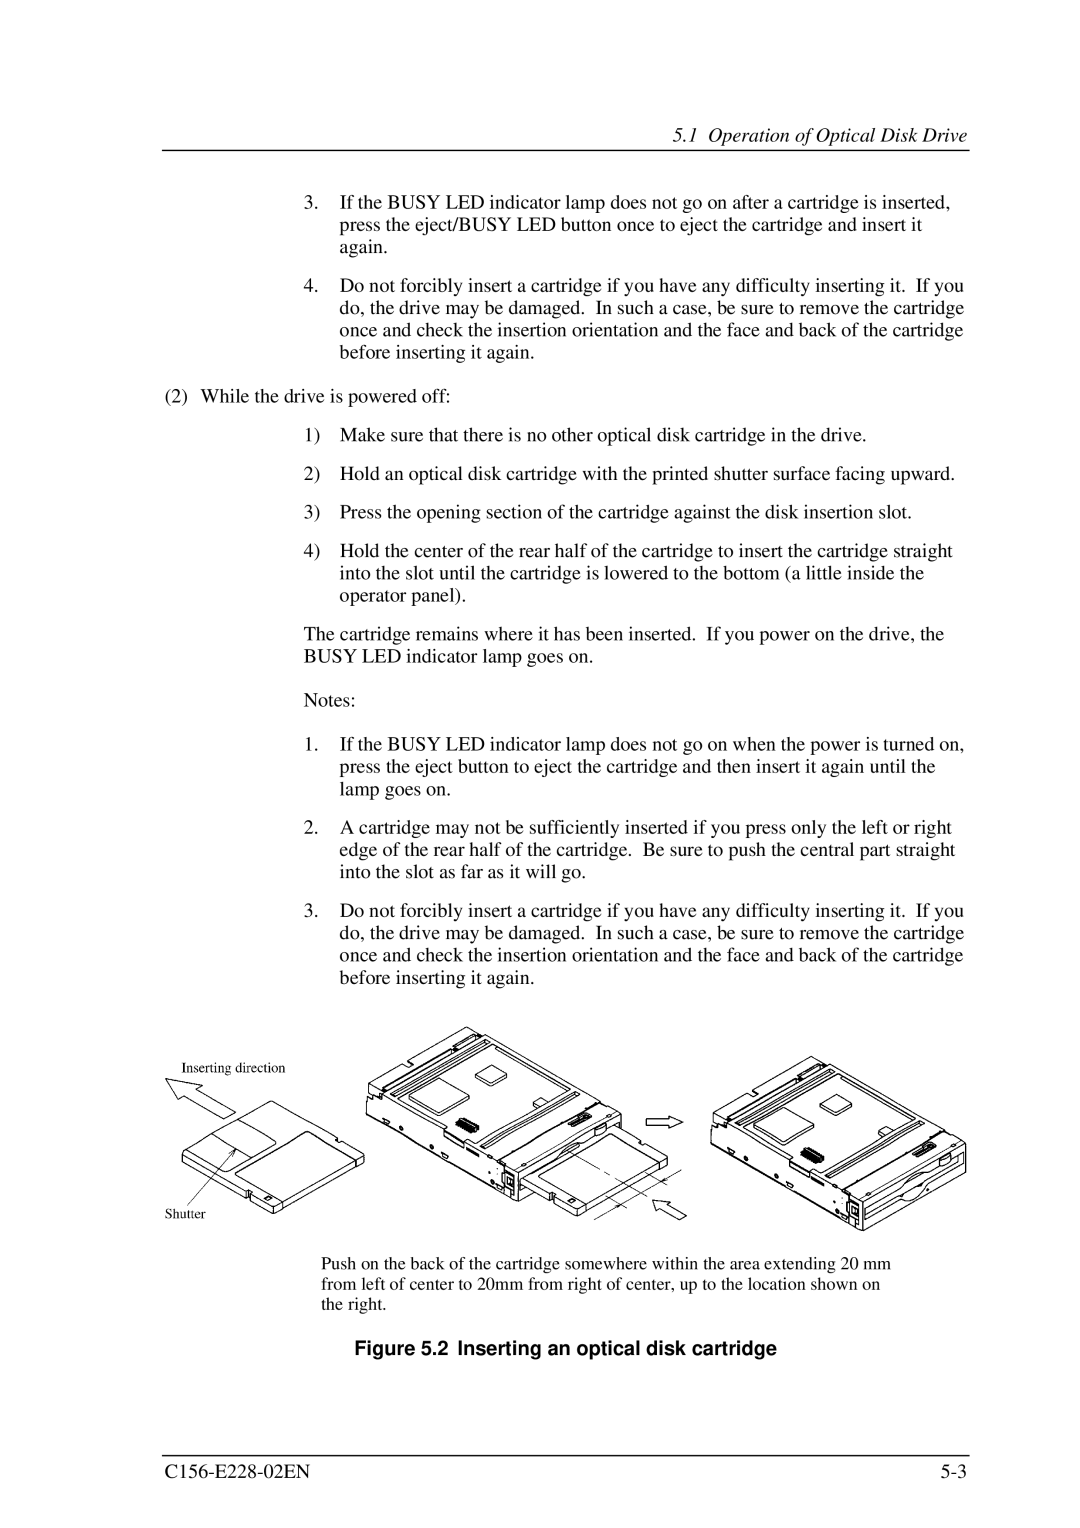
2)Hold an optical disk cartridge with the printed shutter surface facing upward.
3)Press the opening section of the cartridge against the disk insertion slot.
4)Hold the center of the rear half of the cartridge to insert the cartridge straight into the slot until the cartridge is lowered to the bottom (a little inside the operator panel).
The cartridge remains where it has been inserted. If you power on the drive, the BUSY LED indicator lamp goes on.
Notes:
1.If the BUSY LED indicator lamp does not go on when the power is turned on, press the eject button to eject the cartridge and then insert it again until the lamp goes on.
2.A cartridge may not be sufficiently inserted if you press only the left or right edge of the rear half of the cartridge. Be sure to push the central part straight into the slot as far as it will go.
3.Do not forcibly insert a cartridge if you have any difficulty inserting it. If you do, the drive may be damaged. In such a case, be sure to remove the cartridge once and check the insertion orientation and the face and back of the cartridge before inserting it again.
Push on the back of the cartridge somewhere within the area extending 20 mm from left of center to 20mm from right of center, up to the location shown on the right.