SECTION THREE
••••••••••••••••••••••••••••••••••••••••••••••••••• ••••••••••••••••••••••••••••••••••••••••••••••••••• ••••••••••••••••••••••••
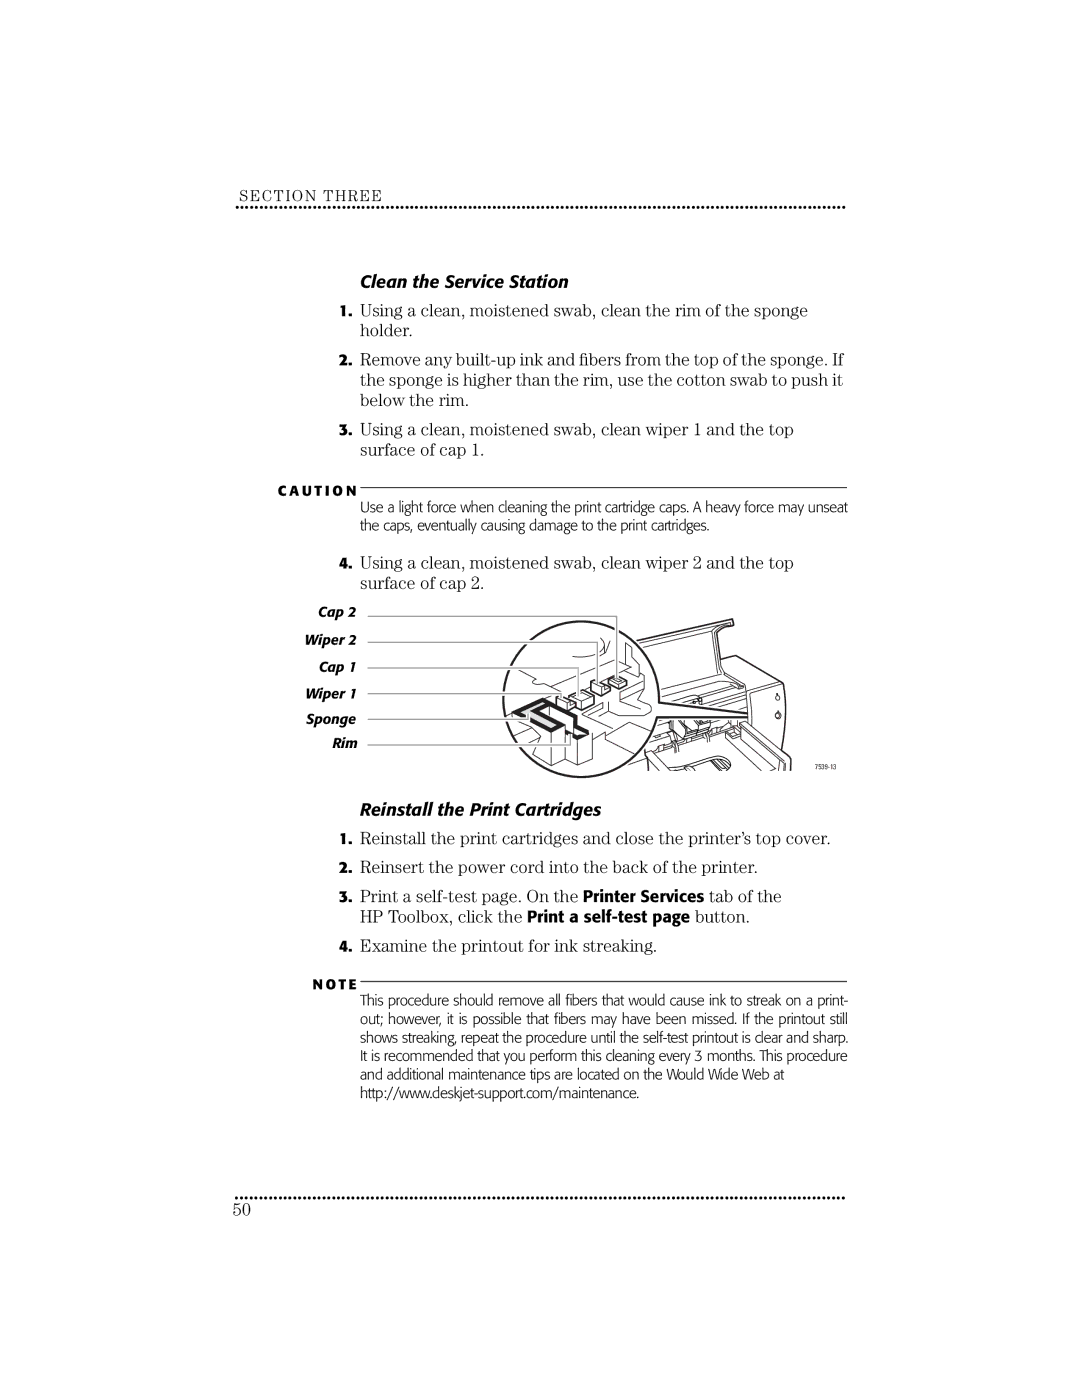
Clean the Service Station
1.Using a clean, moistened swab, clean the rim of the sponge holder.
2.Remove any
3.Using a clean, moistened swab, clean wiper 1 and the top surface of cap 1.
C A U T I O N
Use a light force when cleaning the print cartridge caps. A heavy force may unseat the caps, eventually causing damage to the print cartridges.
4.Using a clean, moistened swab, clean wiper 2 and the top surface of cap 2.
Cap 2
Wiper 2
Cap 1
Wiper 1
Sponge
Rim
Reinstall the Print Cartridges
1.Reinstall the print cartridges and close the printer’s top cover.
2.Reinsert the power cord into the back of the printer.
3.Print a
4.Examine the printout for ink streaking.
N O T E
This procedure should remove all fibers that would cause ink to streak on a print- out; however, it is possible that fibers may have been missed. If the printout still shows streaking, repeat the procedure until the
••••••••••••••••••••••••••••••••••••••••••••••••••• ••••••••••••••••••••••••••••••••••••••••••••••••••• ••••••••••••••••••••••••
50